How do I create a campaign?
Using Birdeye campaigns, businesses have the ability to solicit new reviews and generate feedback from customers. A campaign allows businesses to select the recipients manually. The campaign ends once requests have been sent to the selected recipients.
CREATING AND LAUNCHING A CAMPAIGN
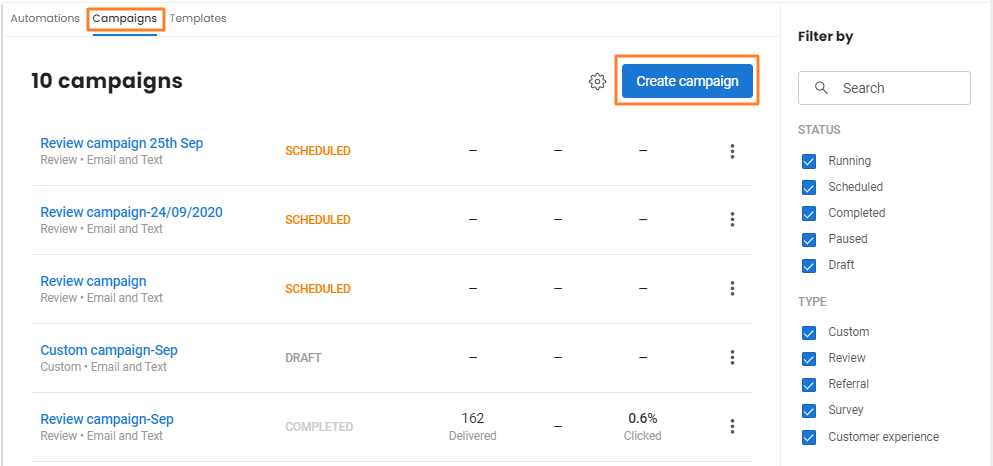
To create a new campaign, log in to your Birdeye account and click on the 'Campaigns' tab on the left navigation rail. On the new page, go to the 'Campaigns' tab and click on the 'Create campaign' button on the top right to create a new campaign.

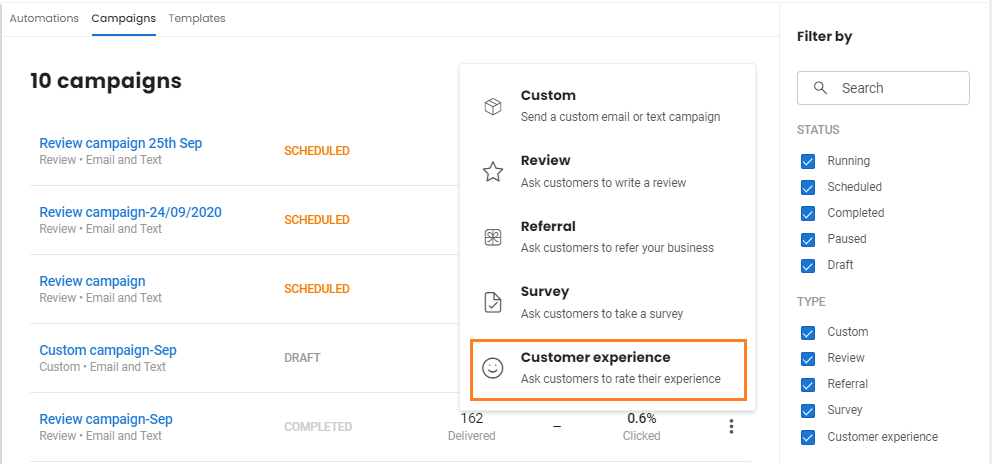
From the option menu, select the campaign type: 'Custom', 'Review', 'Referral', 'Survey', or 'Customer experience' campaign.

On the next screen, give a name to your campaign by using the 'Pencil' icon next to the name of your campaign and also select the ways to send your campaign. Here are the options available in the drop-down menu:
| Email and Text | The campaign will be sent via both 'Email' and 'Text'. |
| Email only | The campaign will be sent via 'Email' only. |
| Text only | The campaign will be sent via 'Text' only. |
| Text first | The campaign will be sent via Text' and it will be sent via 'Email' in the absence of a phone number. |
| Email first | The campaign will be sent via 'Email' and it will be sent via 'Text' in the absence of an Email ID. |

CHOOSING YOUR RECIPIENTS
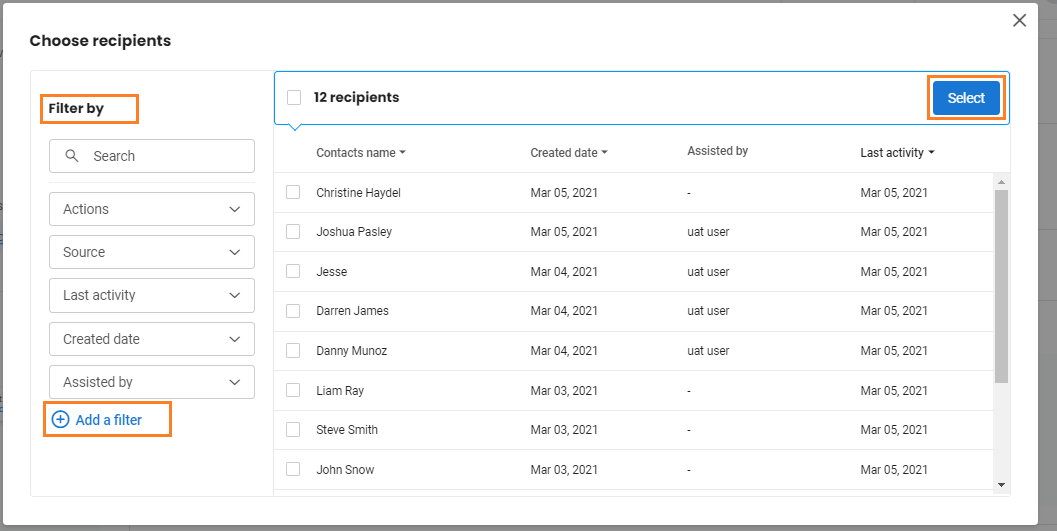
For a campaign, you need to define your recipients by selecting a group of contacts. To begin, click on the 'Choose recipients' button.

Now, select your recipients and click on the 'Select' button. You will also have the ability to use 'Custom fields' as filters using the 'Add a filter' button. When you click the button, you will be able to define the conditions for custom fields and configure a new filter.

Once you have selected a group of contacts, you can proceed to the next section.
SELECTING A TEMPLATE
In this section, you can select the desired template option. At any point, if you want to preview the template, click on the 'Preview' button next to the template drop-down menu(s). To edit a template, a click on the 'Edit' button.

SCHEDULING A CAMPAIGN
In this section, you can choose to send out your campaign immediately, over a period of time or with a delay. Choose an option from the drop-down menu. If you choose to send the campaign over a period of time, you will be asked to select a start date and an end date for your campaign. To learn more, read the help center article: How do I schedule a campaign?

SETTING REMINDERS
You can also send reminder emails/text at specific intervals to your contacts. By default, the reminders will be switched off for every campaign. To enable the reminders, switch on the toggle button.
Once the toggle button is switched on, you can customize the following sections:
| Reminder email subject | Add a subject to your reminder email and customize the default text in this field. |
| Number of reminders | Choose the number of reminders you wish to send the contacts. |
| Interval between reminders | Select the time intervals between the reminders. |

Once you complete all the configurations, you will see green ticks across all the sections. Now, you can click on the blue button at the bottom to launch the campaign.
