How To Set Up And Use AI Posts Planner
The AI posts planner transforms how businesses plan and publish content by delivering intelligent, on-brand post suggestions directly to your calendar and post library. By analyzing seasonal trends & themes, performance data, and your brand’s unique voice, it auto-generates ready-to-publish posts—complete with suggested images—tailored for each location. Eliminate the guesswork, reduce manual effort, and maintain a consistent, high-performing social presence across platforms. Whether managing one location or many, the AI posts planner helps you scale effortlessly, pre-slotted on the best time to post for higher engagement, and save time without increasing headcount.
Setting Up AI Posts
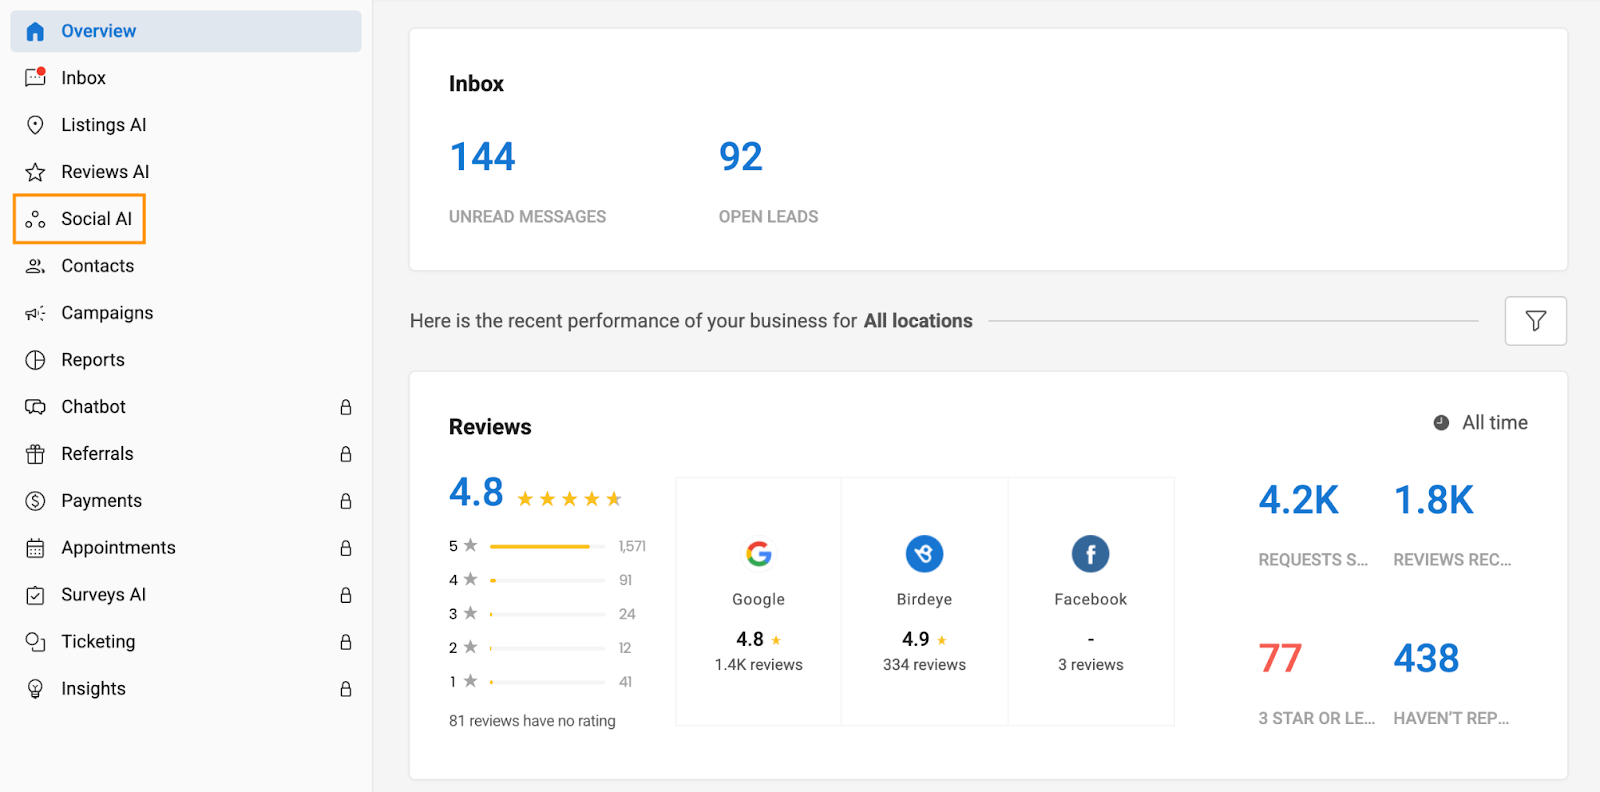
Go to the ‘Social AI’ tab.
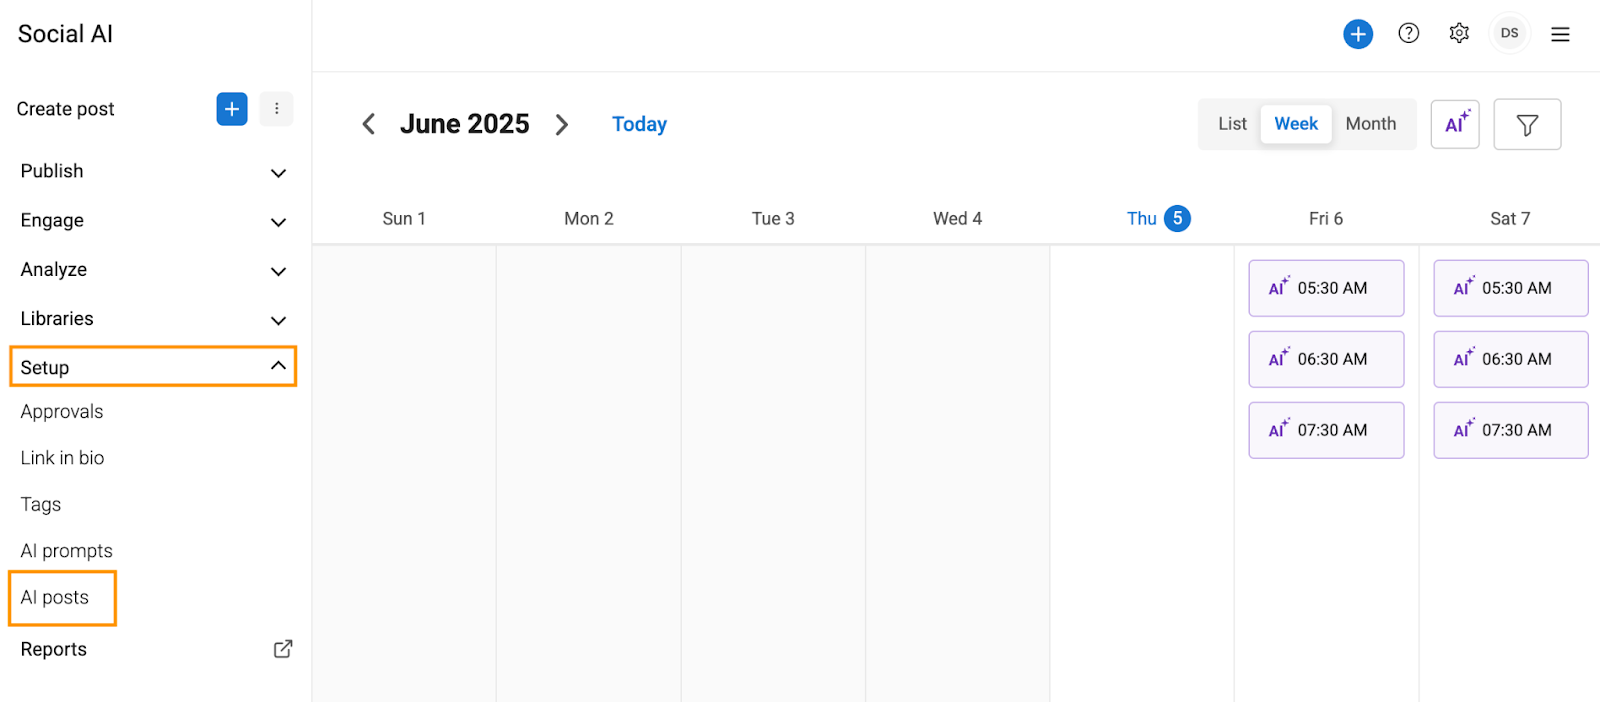
Click ‘Setup,’ and select ‘AI posts.’
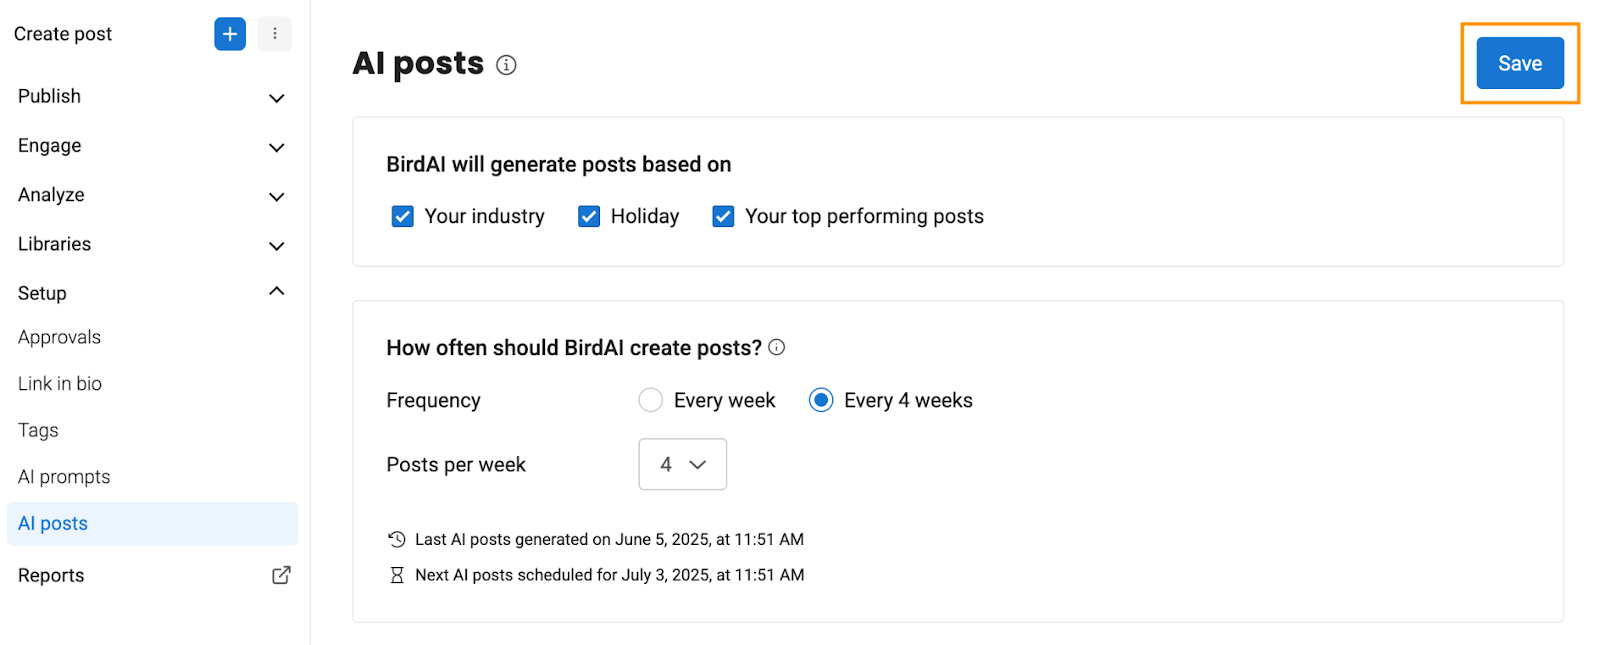
BirdAI generates posts based on ‘Your industry,’ ‘Holiday posts,’ and ‘Your top performing posts.’ You should select at least one of the options to let BirdAI generate posts on the Calendar and Post library to review and publish.
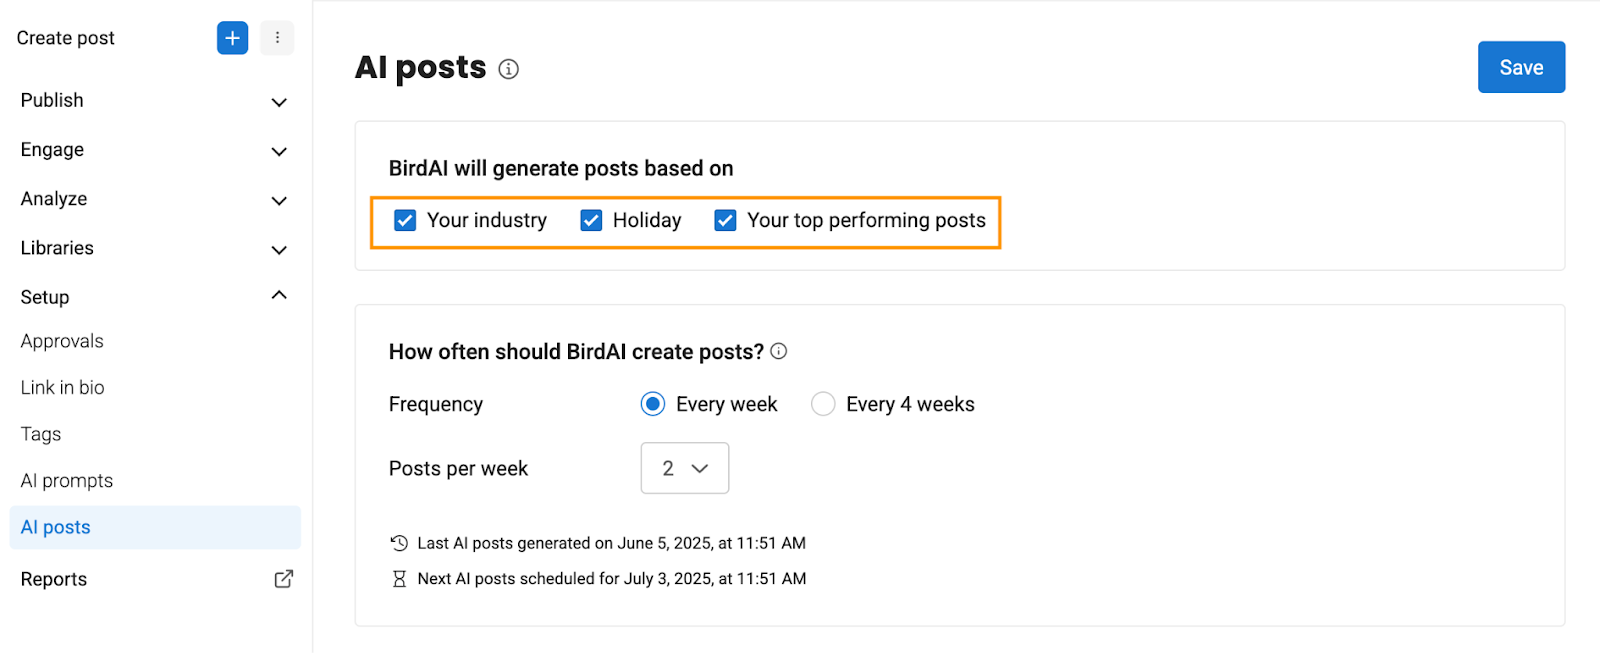
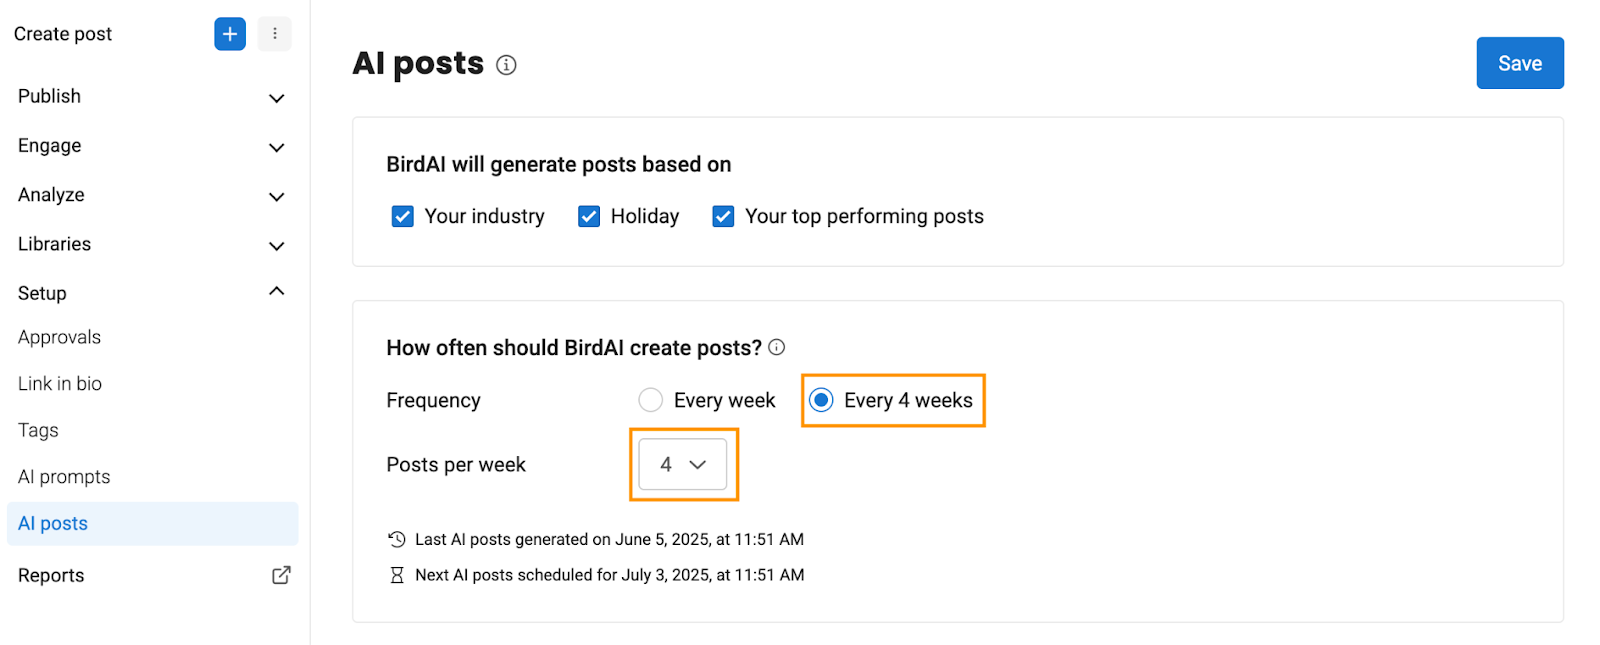
Choose how often BirdAI should generate posts—weekly or for the next 4 weeks.
NOTE:
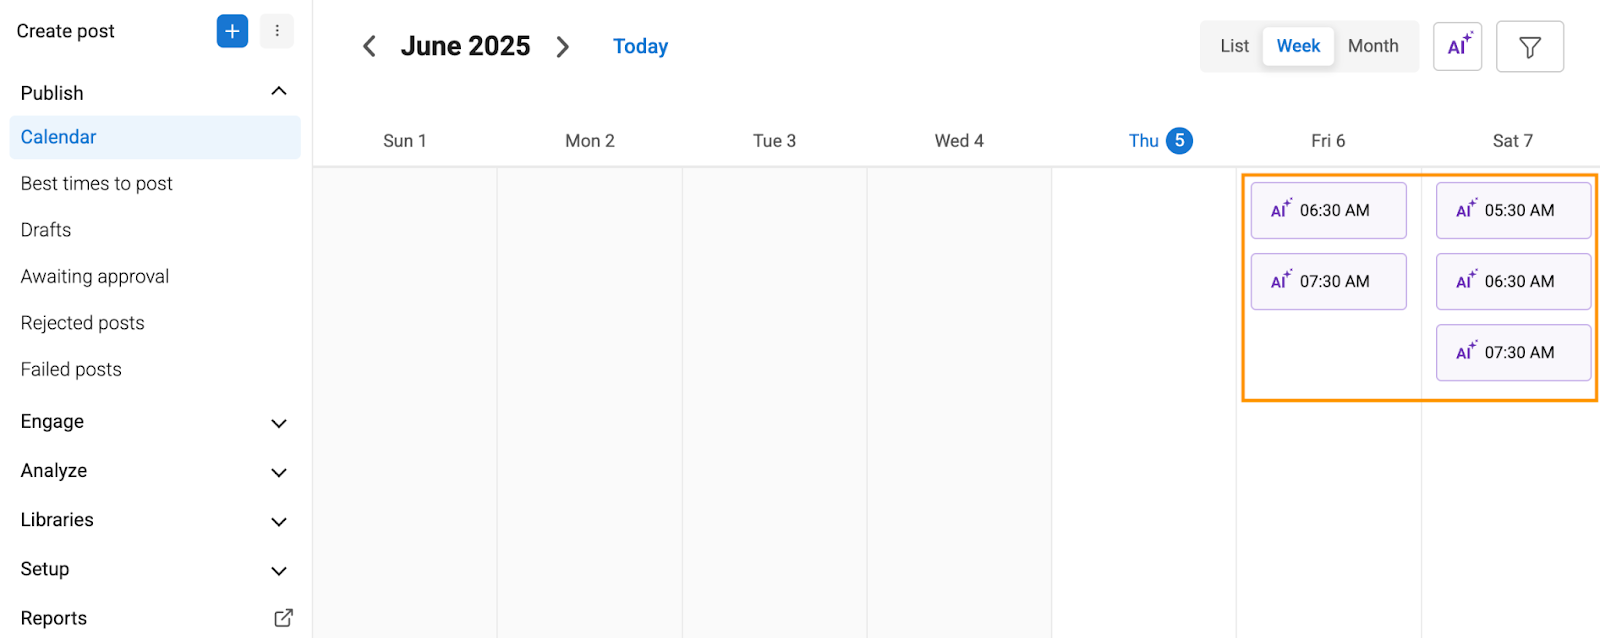
AI posts are always planned a week ahead. For example, posts for the week of June 14 to June 20 will be generated and available on June 6.
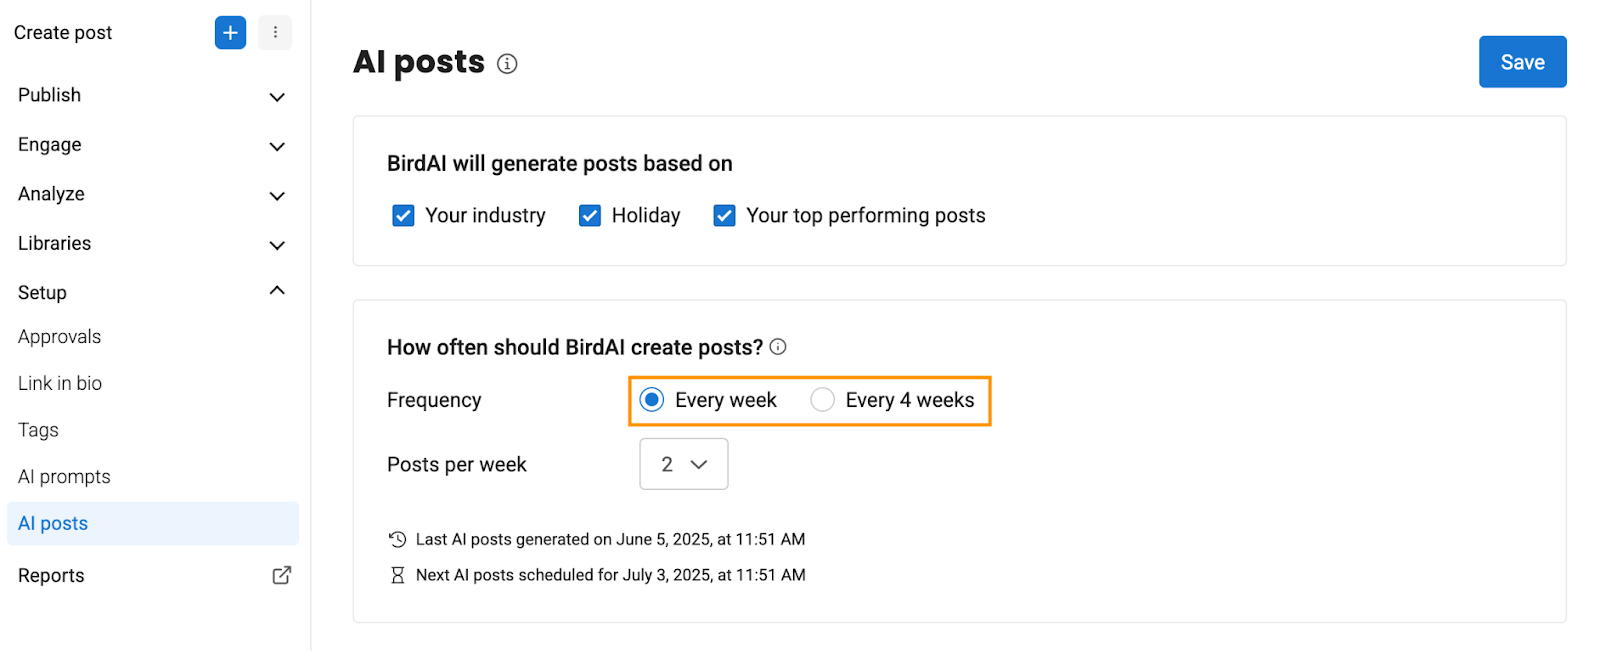
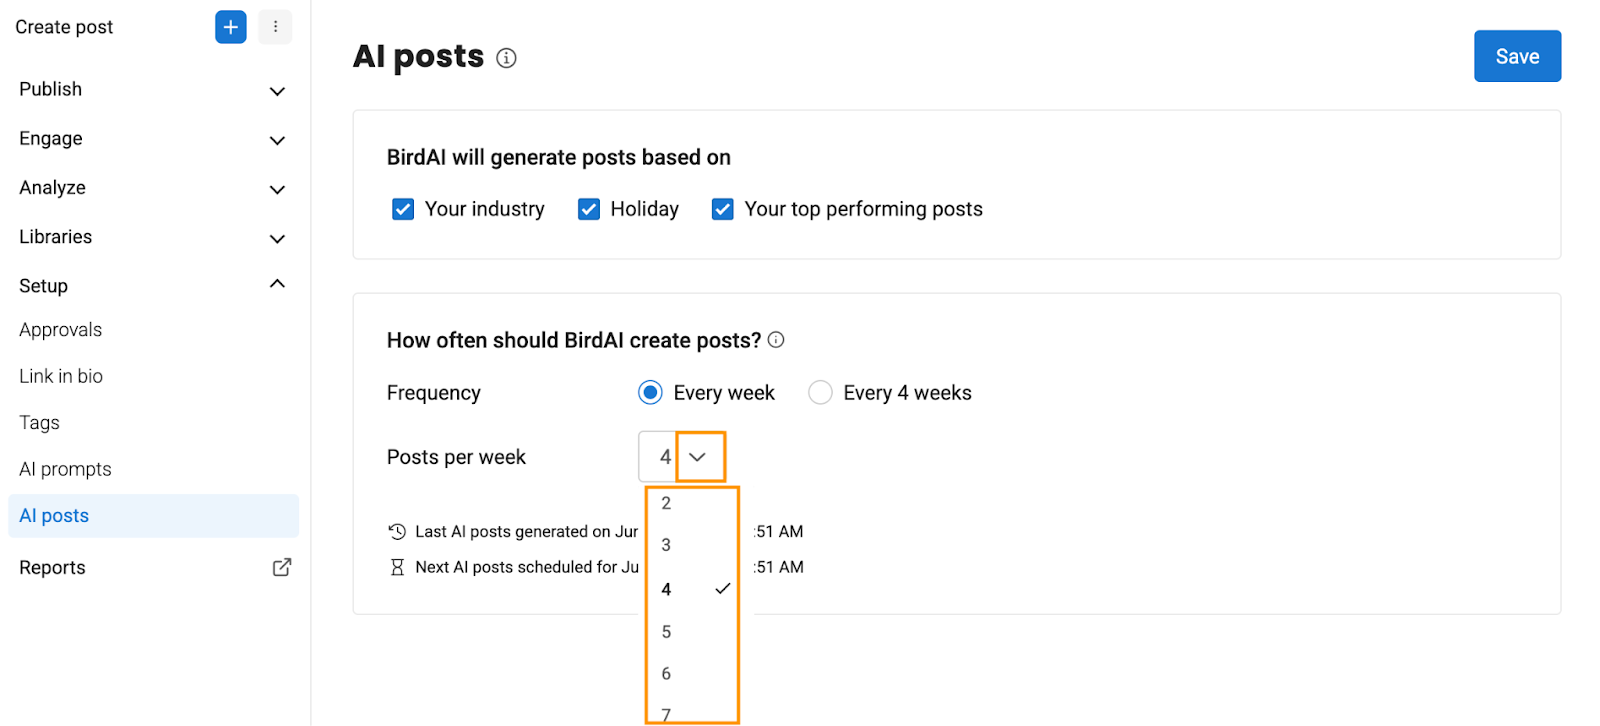
Select how many posts you want BirdAI to generate each week. Use the dropdown to choose a number, up to 7 posts per week.
For example, if you select the frequency as ‘Every week’ and choose ‘4’ posts per week, BirdAI will generate and display 4 posts each week on the Calendar and Post library. If you select ‘Every 4 weeks’ and choose ‘4’ posts per week, BirdAI will generate 16 posts—4 posts per week for the next 4 weeks.
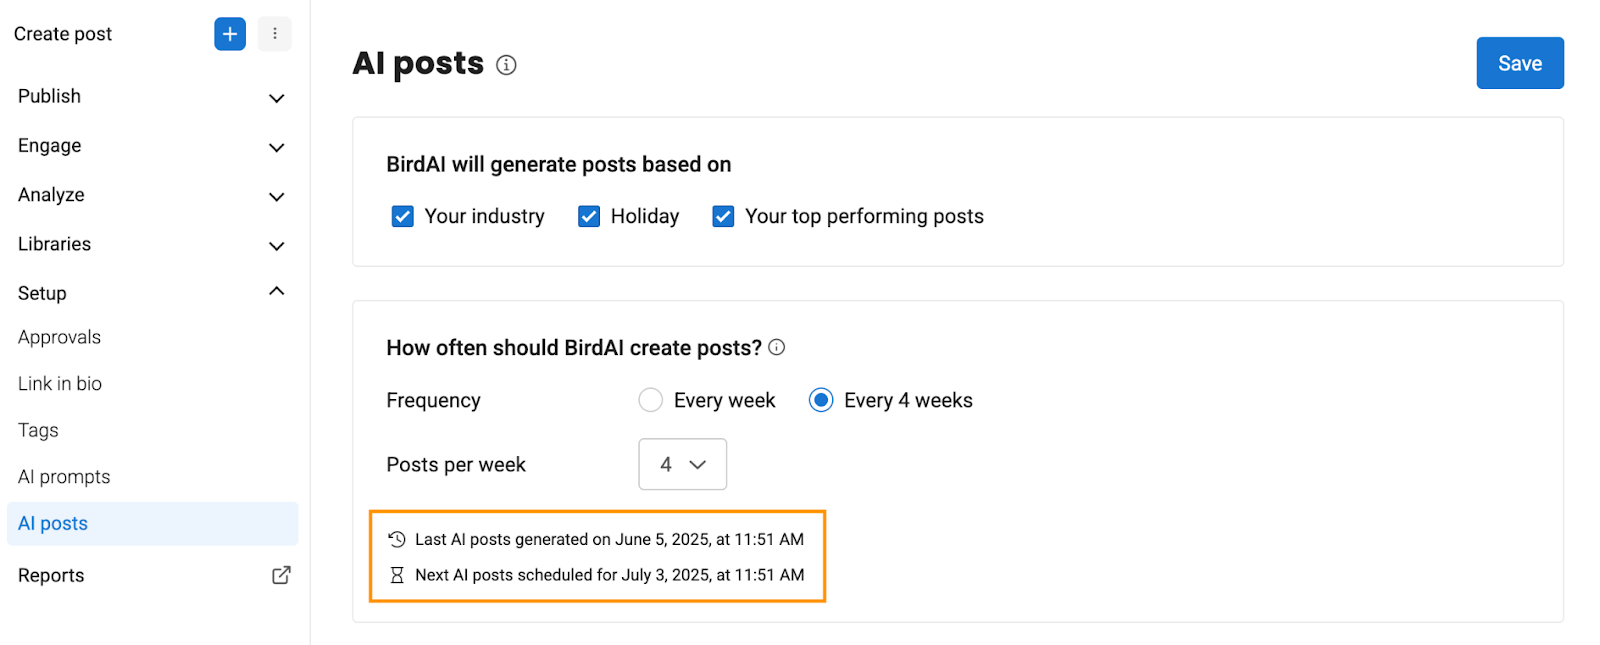
You can also view the date and time when the last AI posts were created and the next set of AI posts scheduled to be generated.
Click ‘Save’ to complete the setup.
Viewing AI-Generated Posts On The Calendar
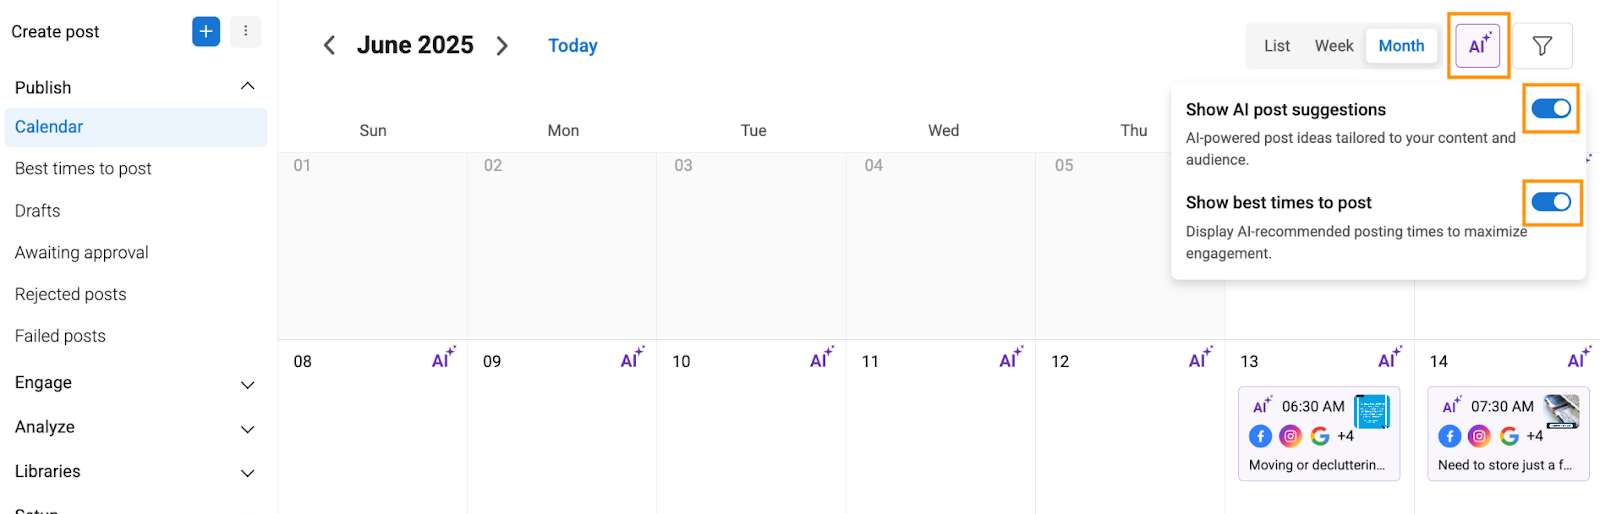
Click ‘Publish,’ and select ‘Calendar.’

You can view the purple card on the Calendar with an AI post slotted in the best time to post, which indicates this is an AI-generated post.
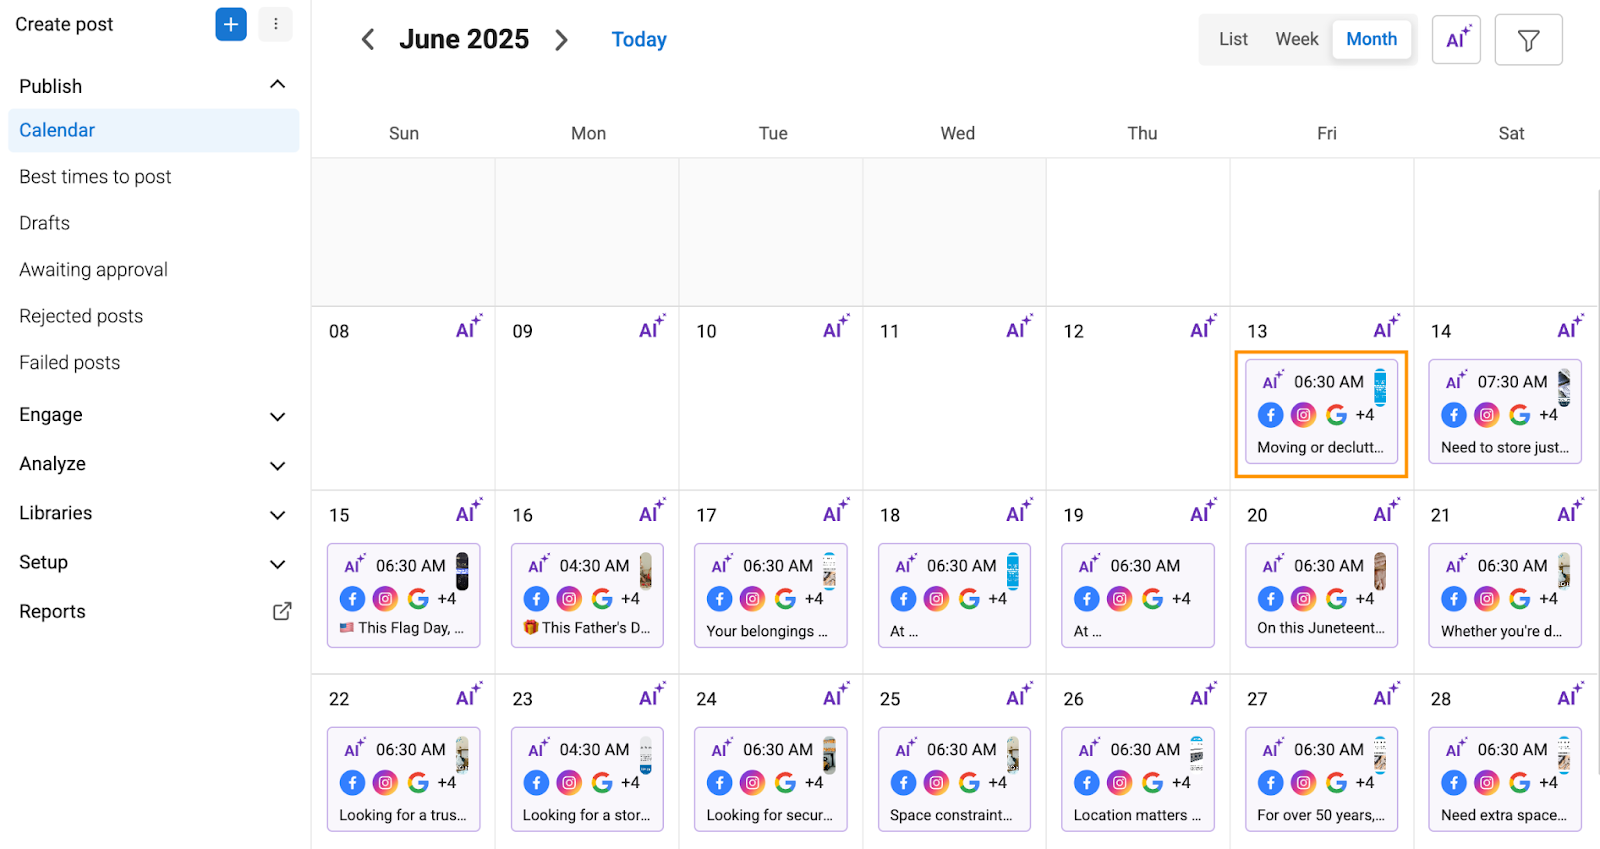
Purple cards with just the time window indicate the best time to post. To learn more about the best times to post, read our help center article: Enhance Your Social Media Strategy: Best Times to Post by BirdAI.
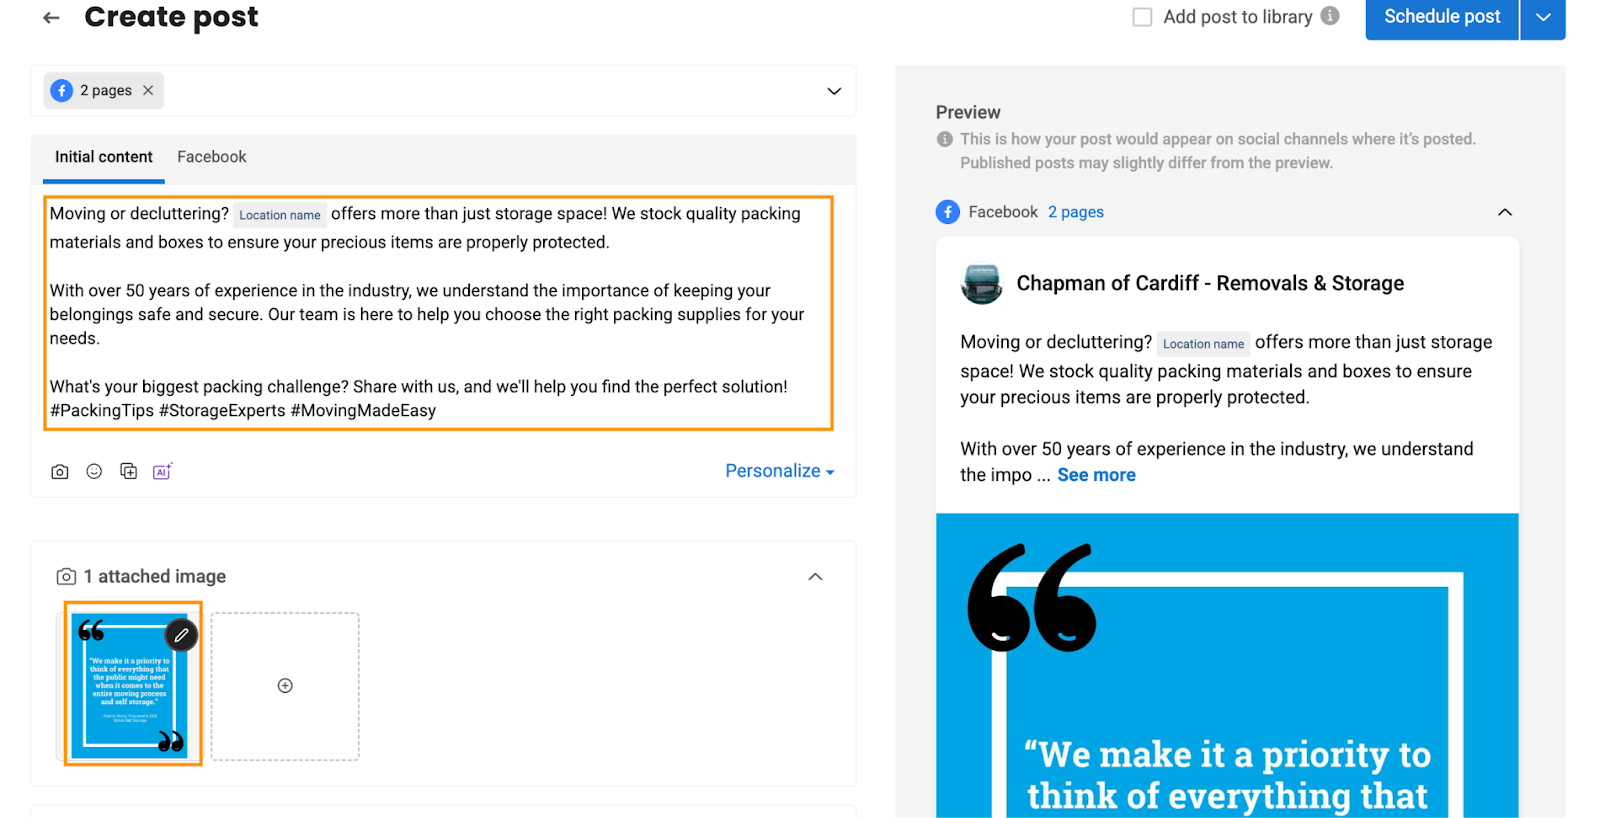
Click on the post to view its details. For example, click the AI-generated post scheduled for Friday, June 13.
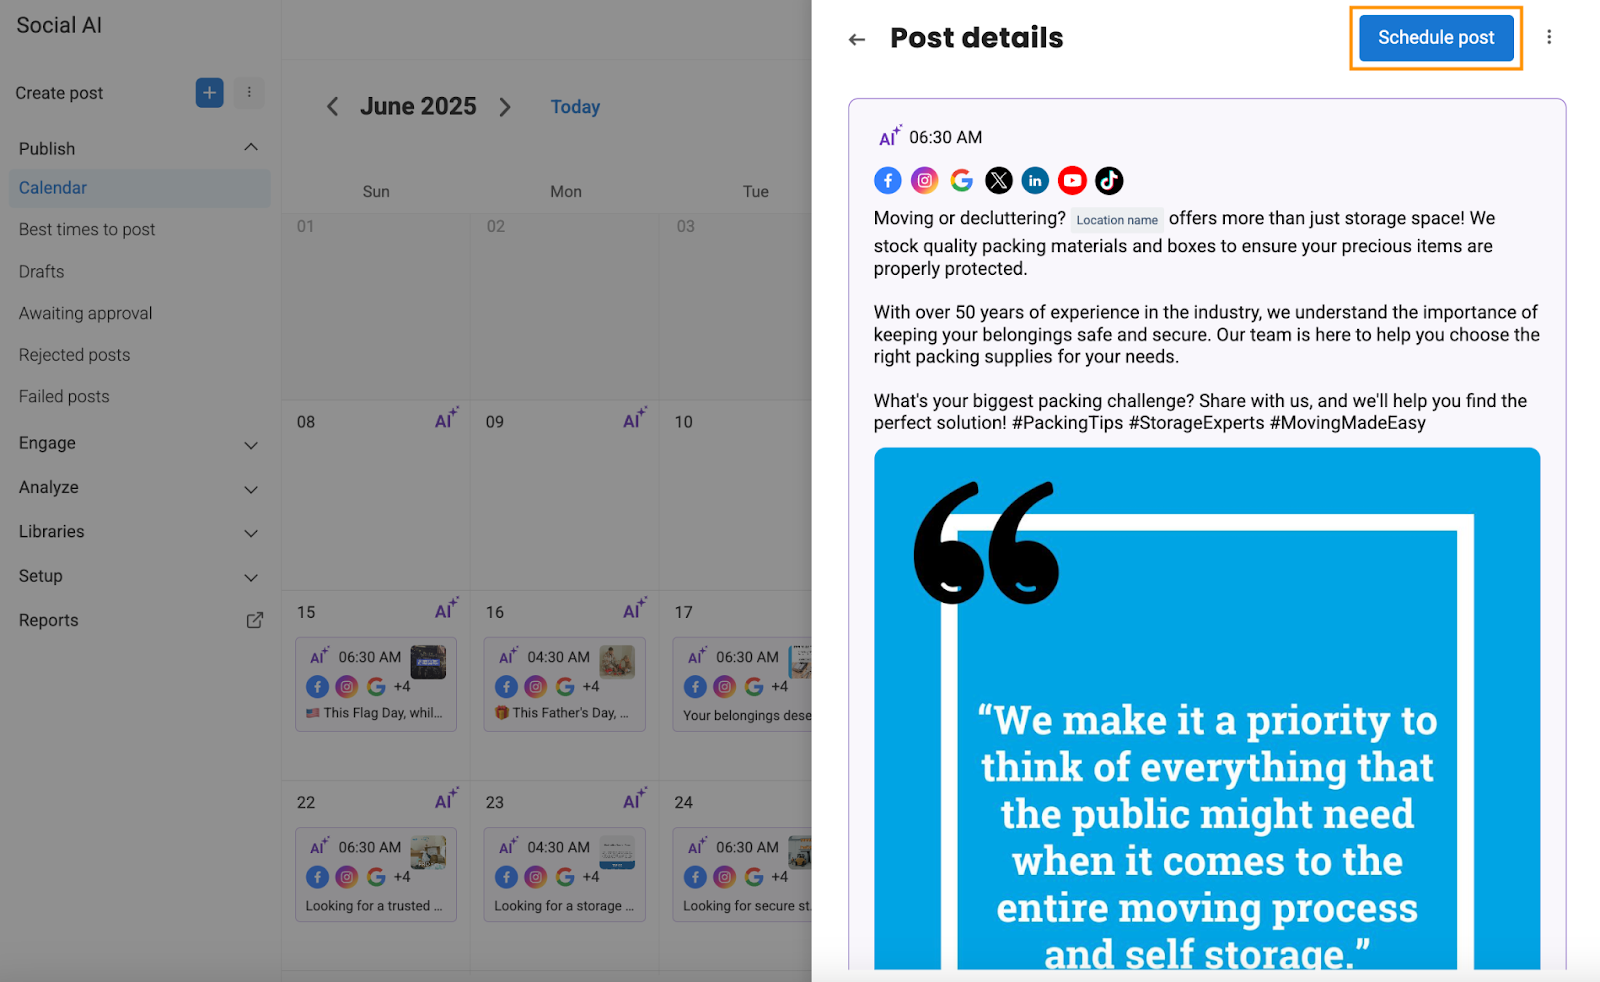
A drawer opens on the right side of the screen, showing the suggested best time to post, the social channels where it can be published, and the content with the attached image.
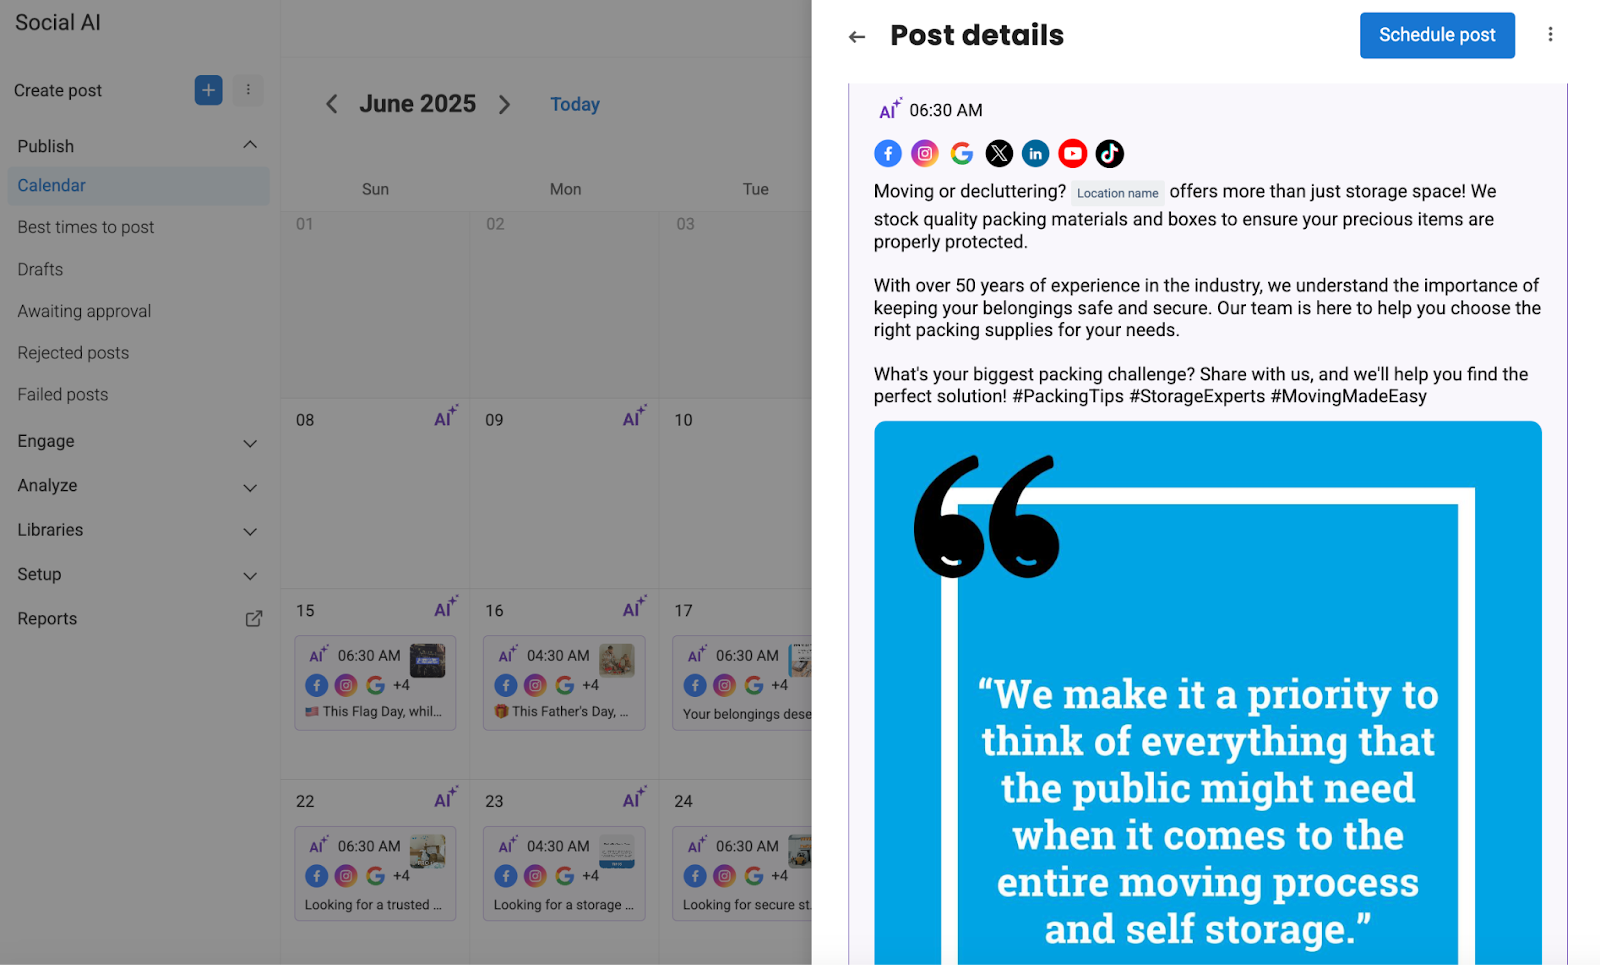
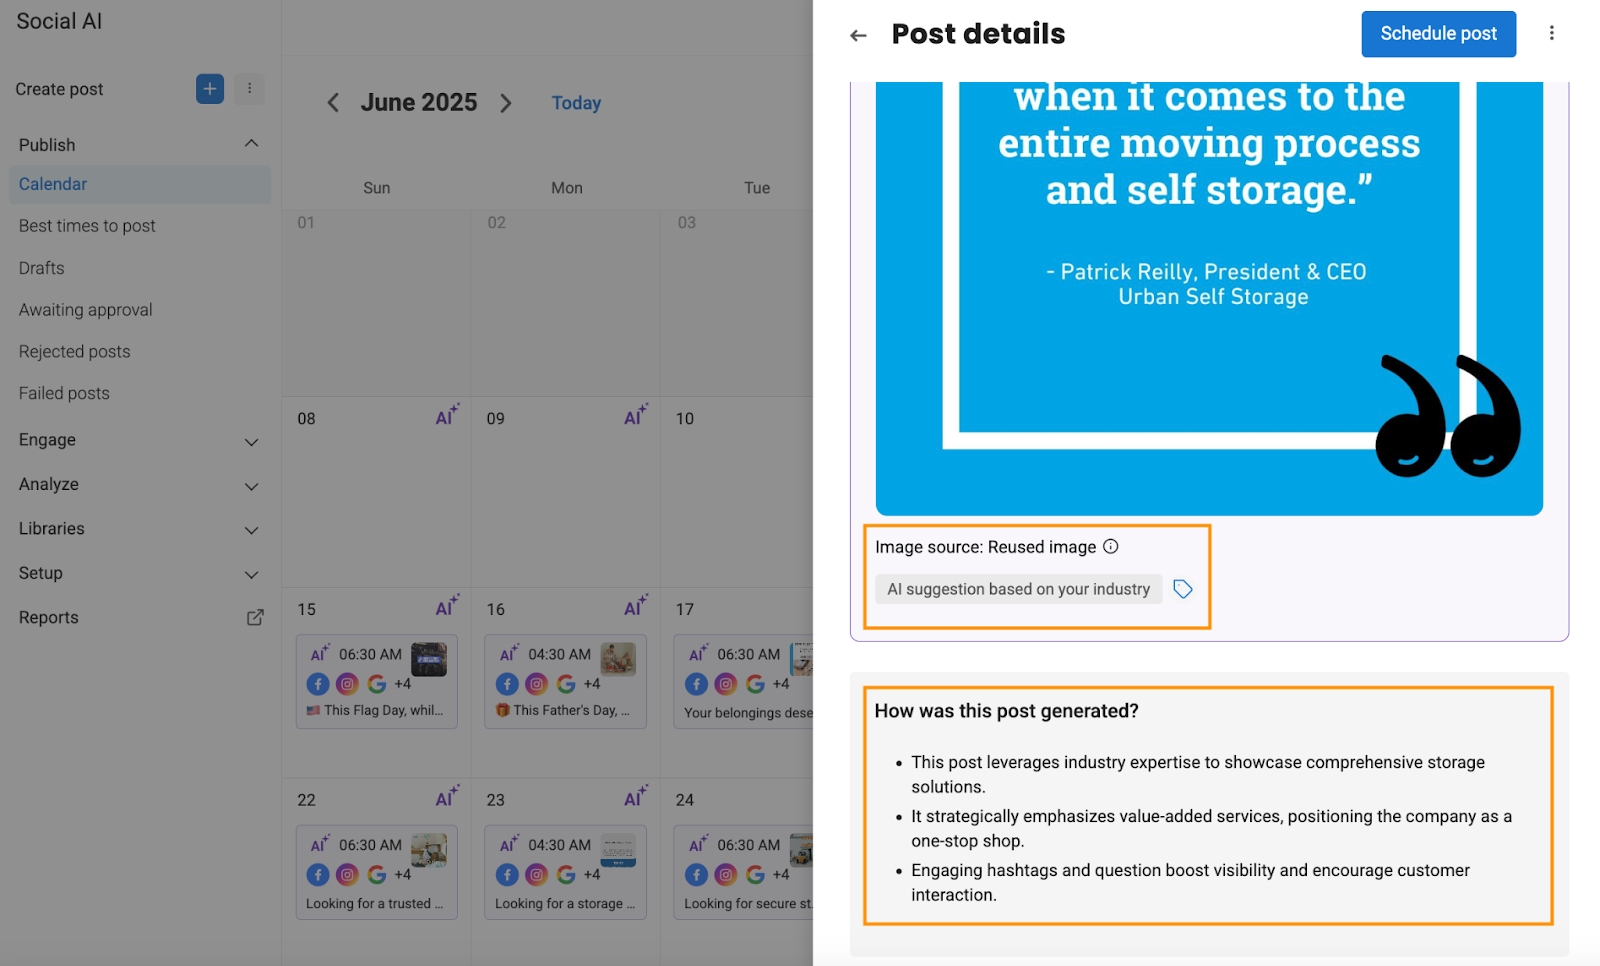
Scroll down to view the image source. The image source can be a ‘reused image,’ ‘open source image from Pexels,’ or ‘image from the Asset library.’ It also shows if the generated post is based on ‘your industry,’ ‘Holiday post,’ or ‘repurposed one of your top performing posts,’ and the post reasoning - how was this post generated and why BirdAI suggested this post.
The image below shows the ‘Image source’ labeled ‘Reused image.’ The post is an ‘AI suggestion based on your industry,’ it explains how and why this content was generated.
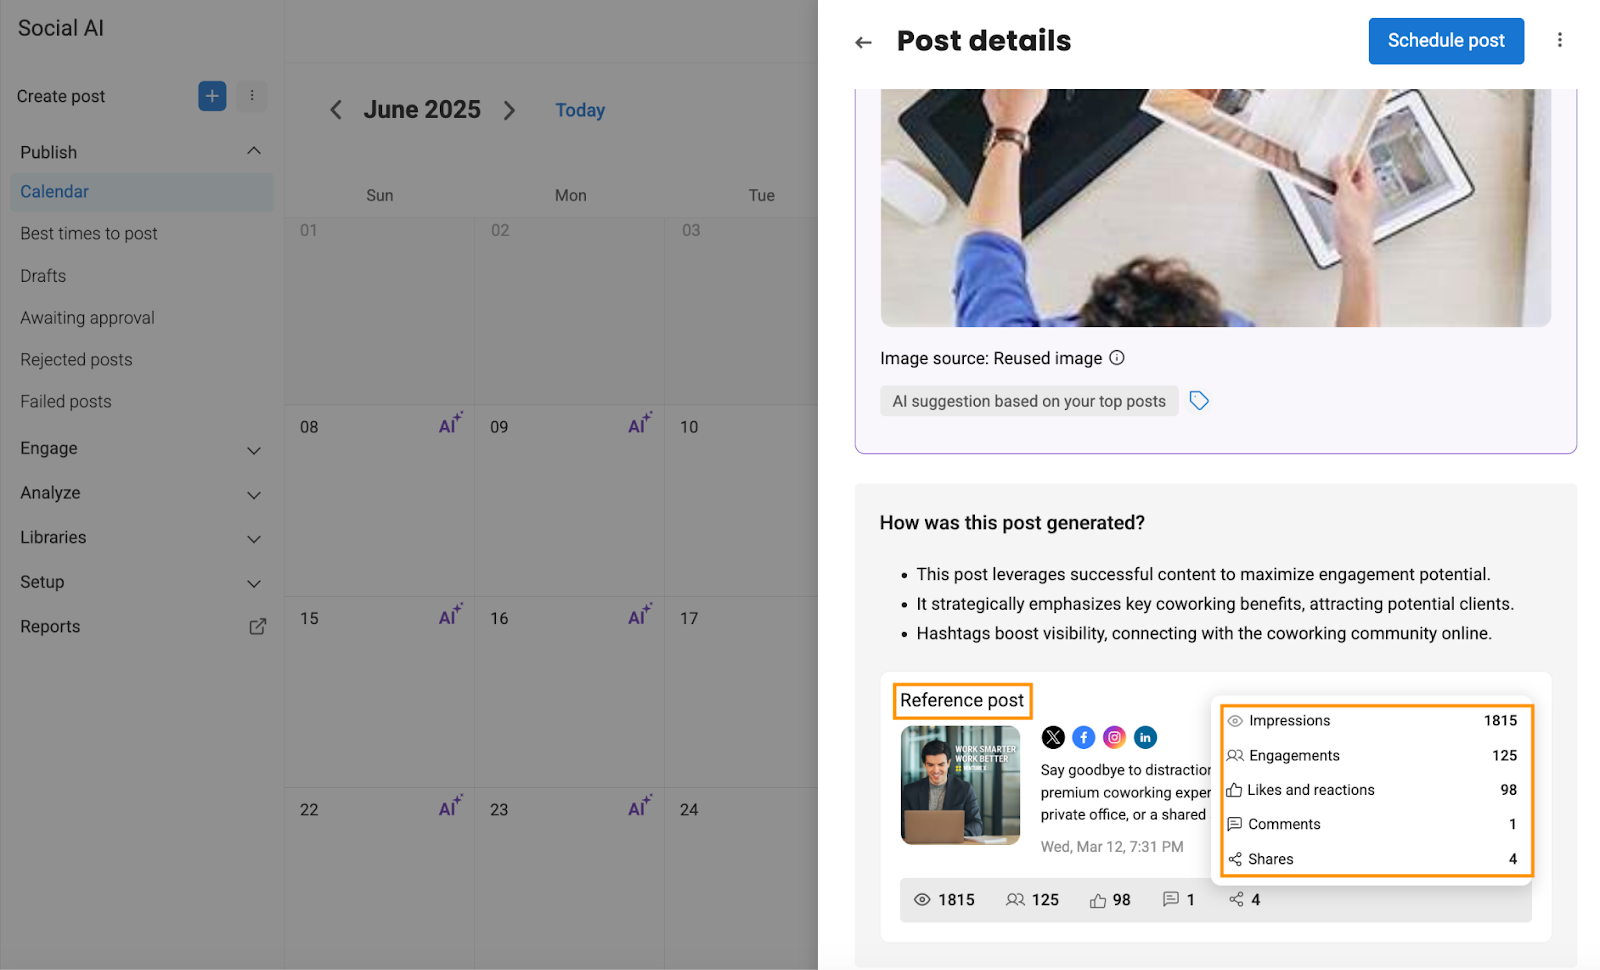
If a repurposed post is generated from one of your top-performing posts, you'll see the original reference post and key performance metrics that influenced the new content.
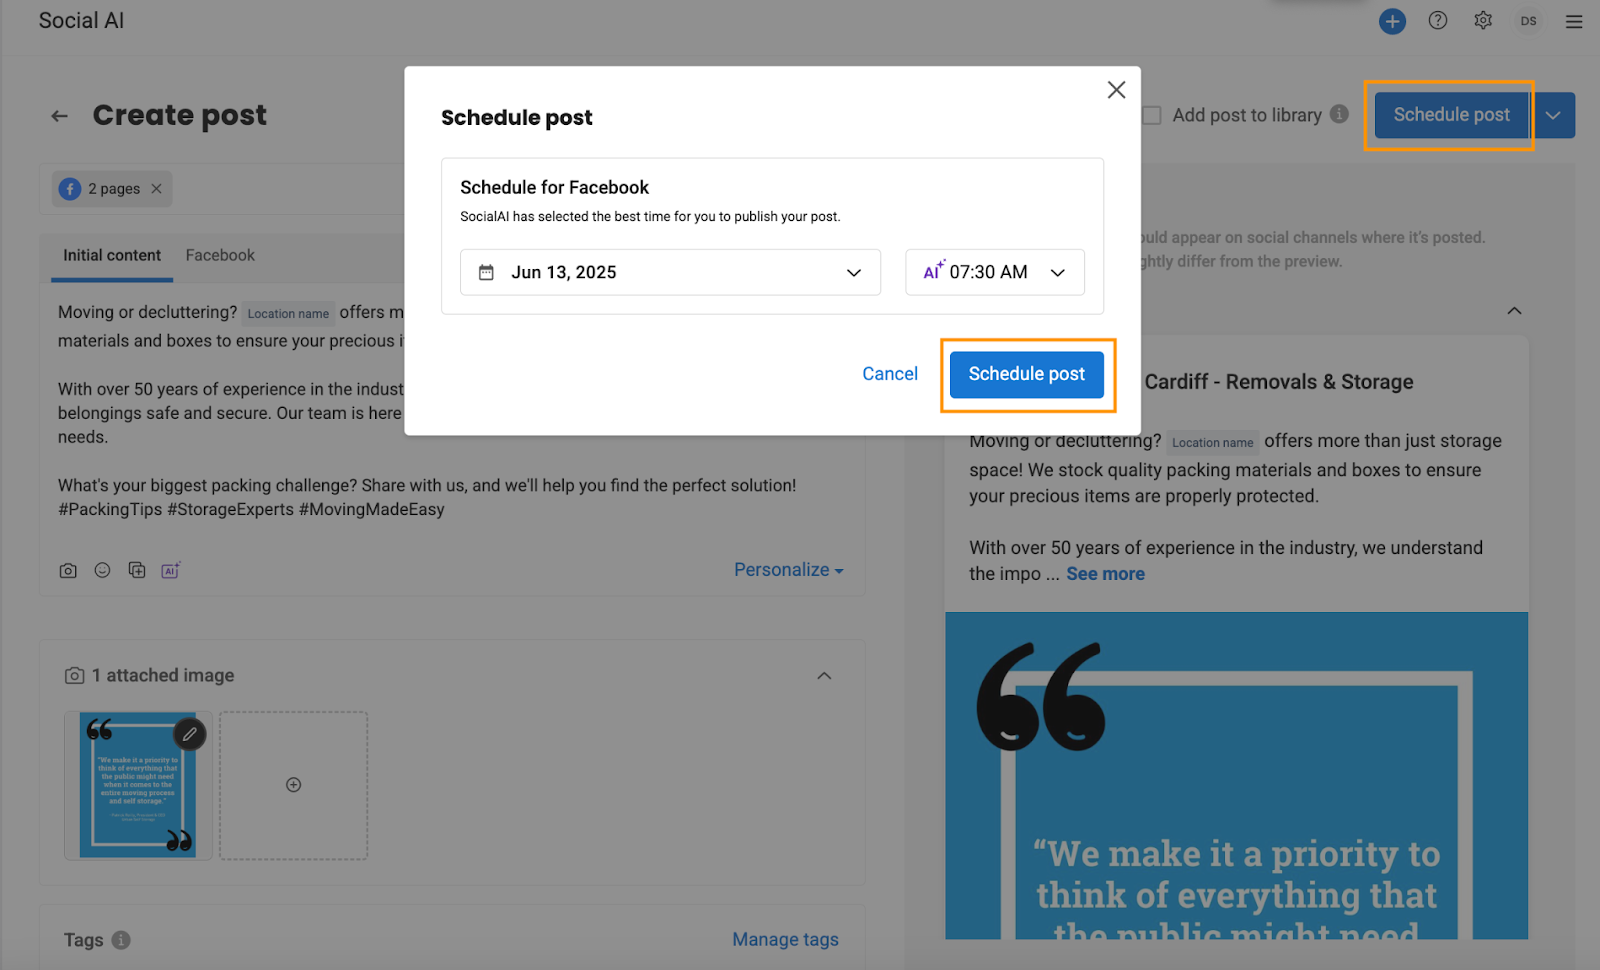
Click ‘Schedule post.’
You’ll be redirected to the ‘Create Post’ page, where the content is auto-filled. Select the social channel(s) and page(s) where you want to publish the post.
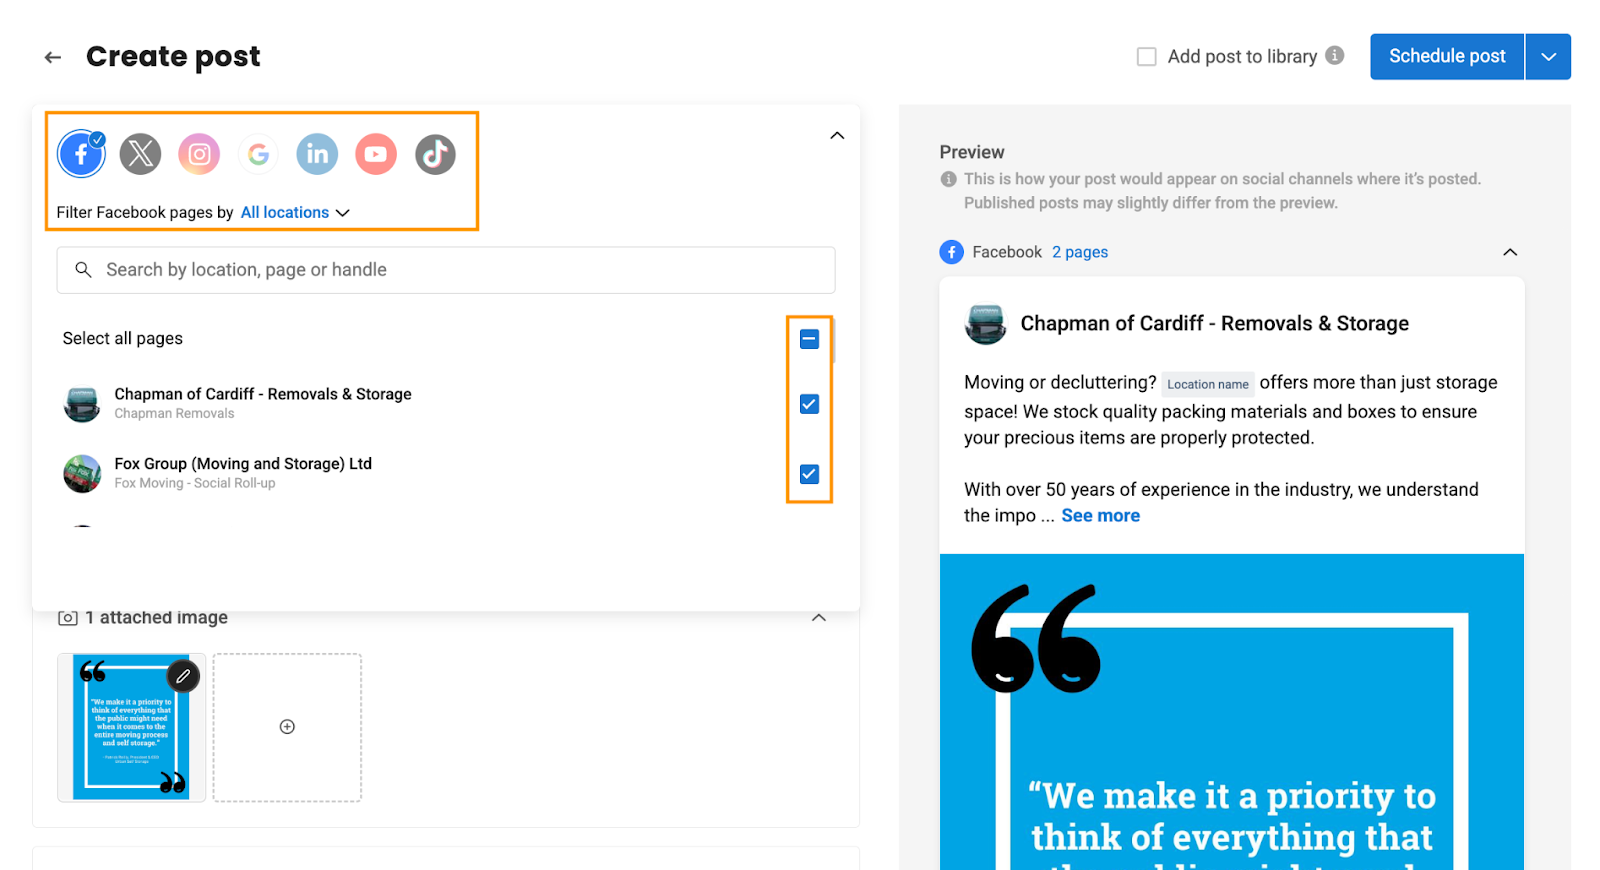
You can also modify the content based on your needs, attach more images, or remove the existing image.
Click the ‘Schedule post’ button at the top right corner of the page. Review the date and time of the post and click ‘Schedule post’ to schedule the post.
Click on ‘AI’ to enable or disable the ‘Show AI post suggestions’ and ‘Show best times to post’ from the Calendar.
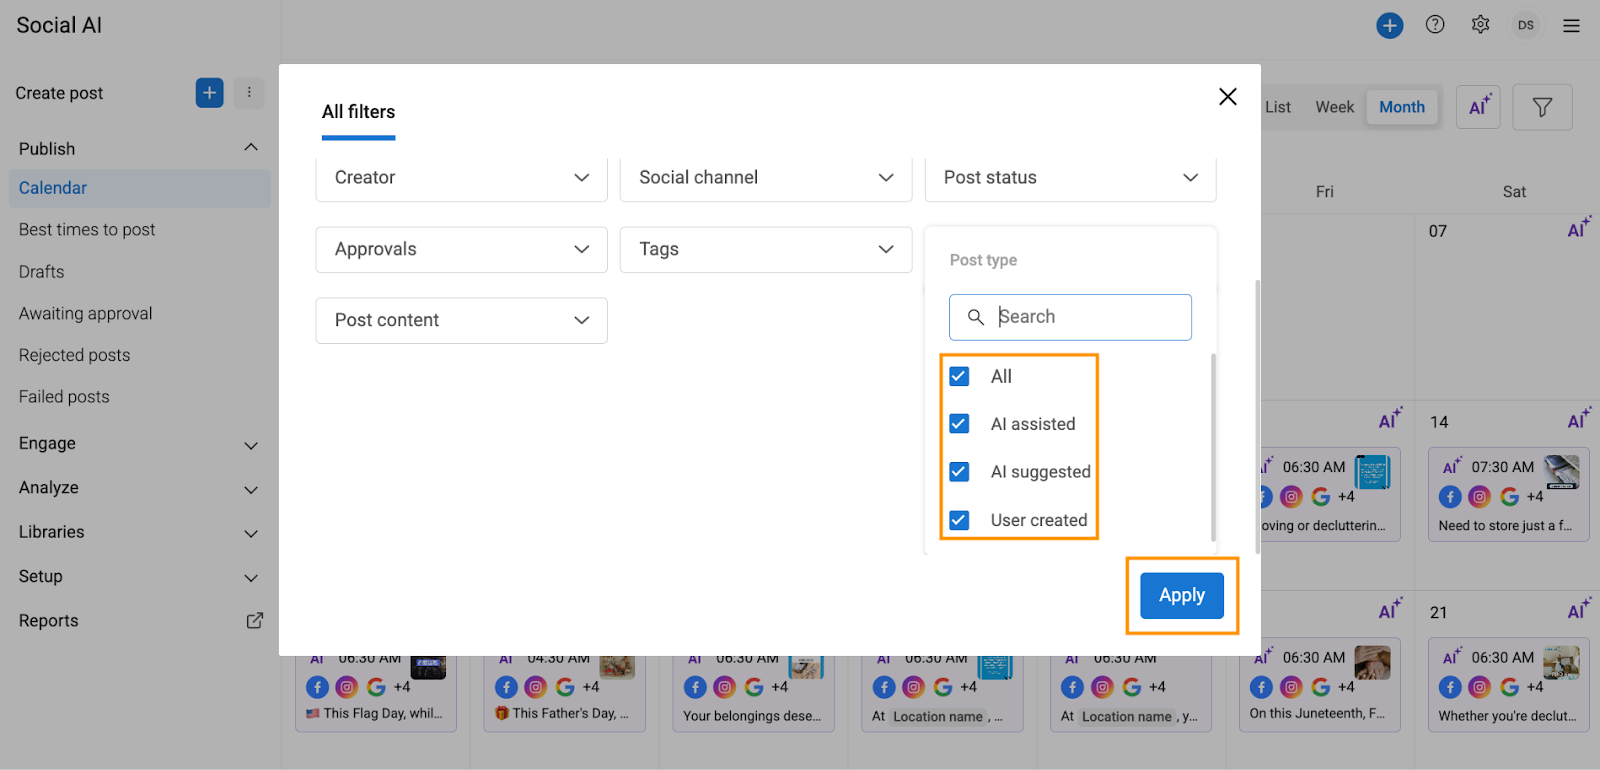
Click the ‘filter’ icon.

Go to ‘Post type.’
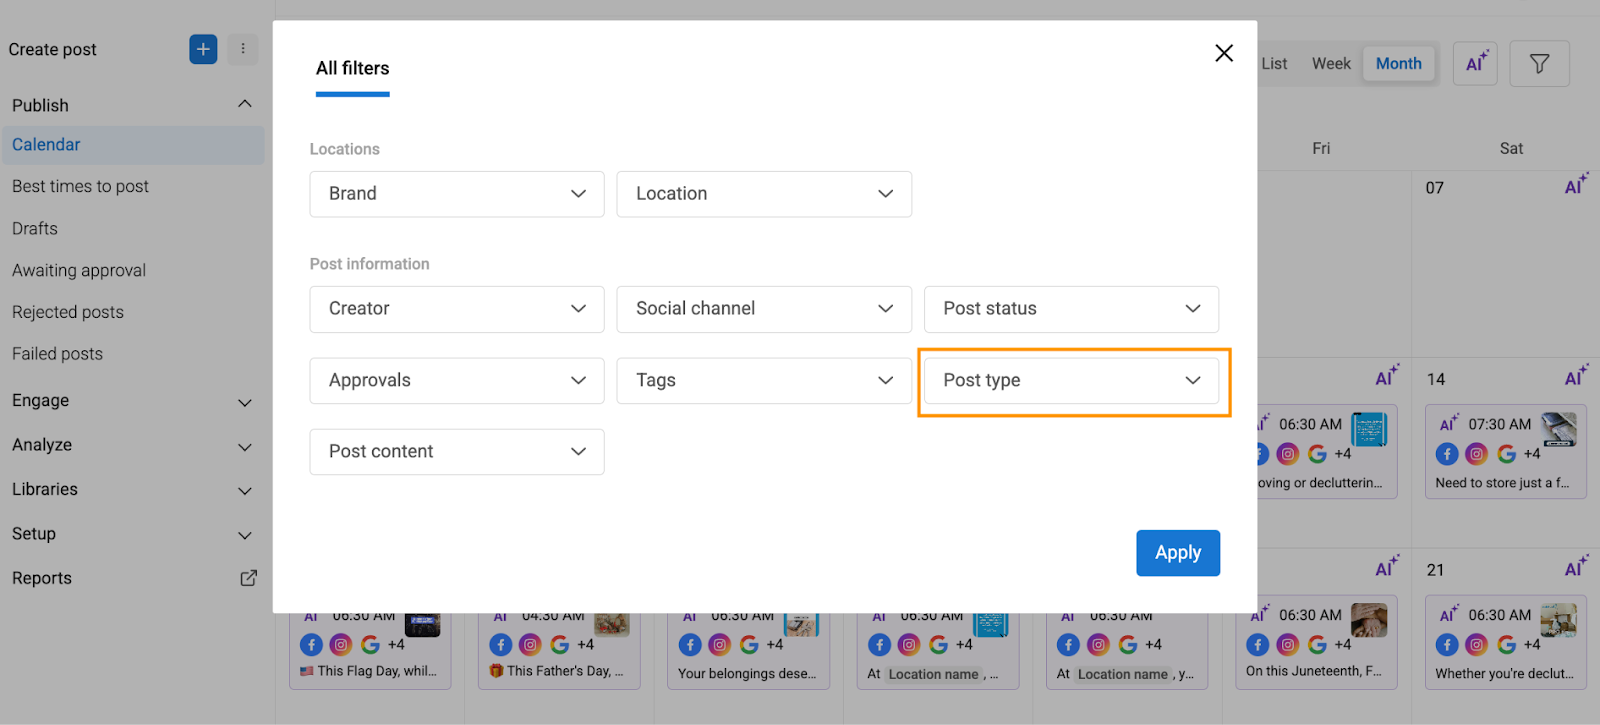
Filter and view posts on your Calendar that are ‘AI-assisted,’ ‘AI-suggested,’ ‘User-created,’ or ‘All’ and click ‘Apply.’
AI-suggested posts: Post suggestions from BirdAI.
AI-assisted posts: Posts created by users with BirdAI assistance.
User-created posts: Posts created by users without BirdAI assistance.
Click ‘Post content.’
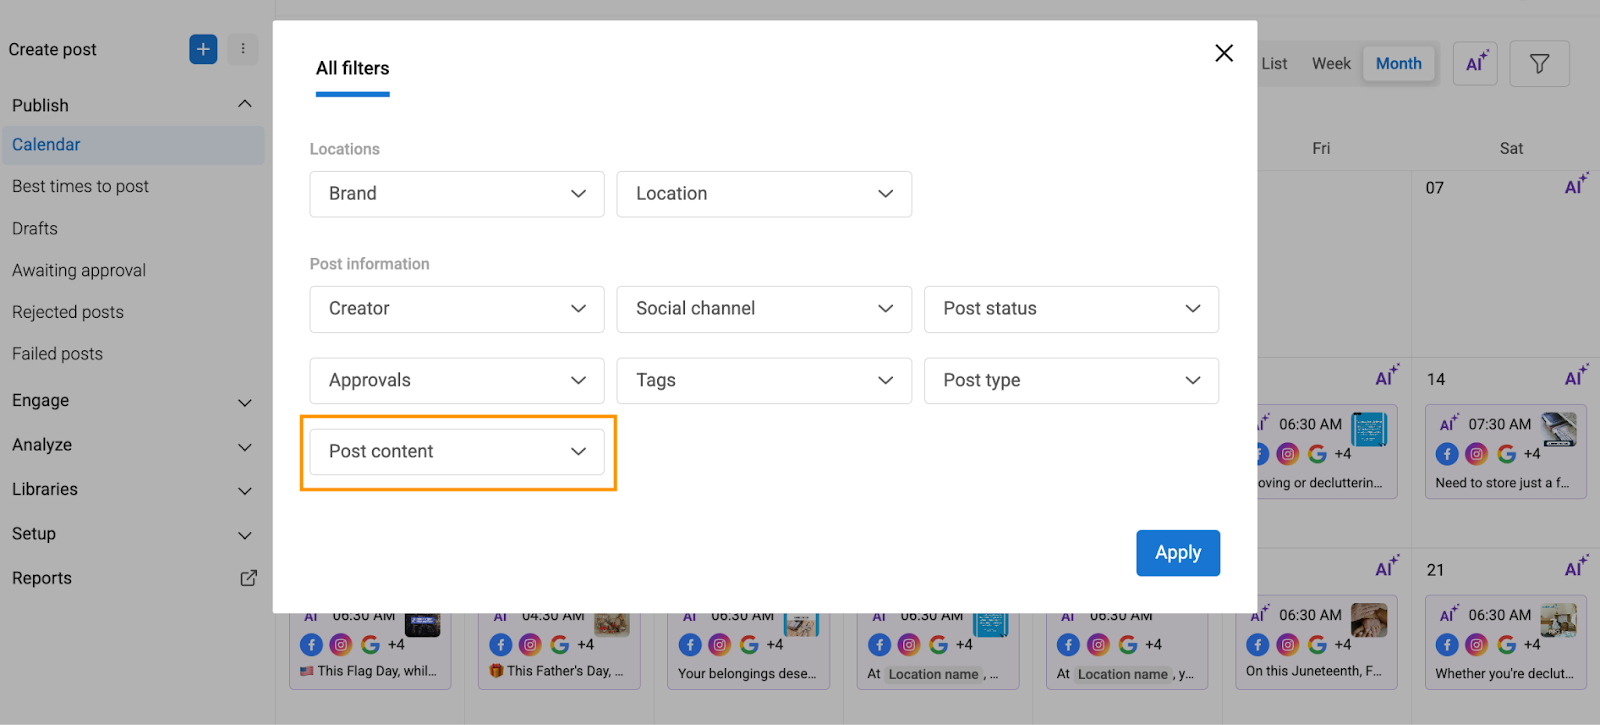
Filter and view posts on your Calendar that contain ‘photos,’ ‘videos,’ ‘Text only,’ or ‘All,’ and click ‘Apply.’
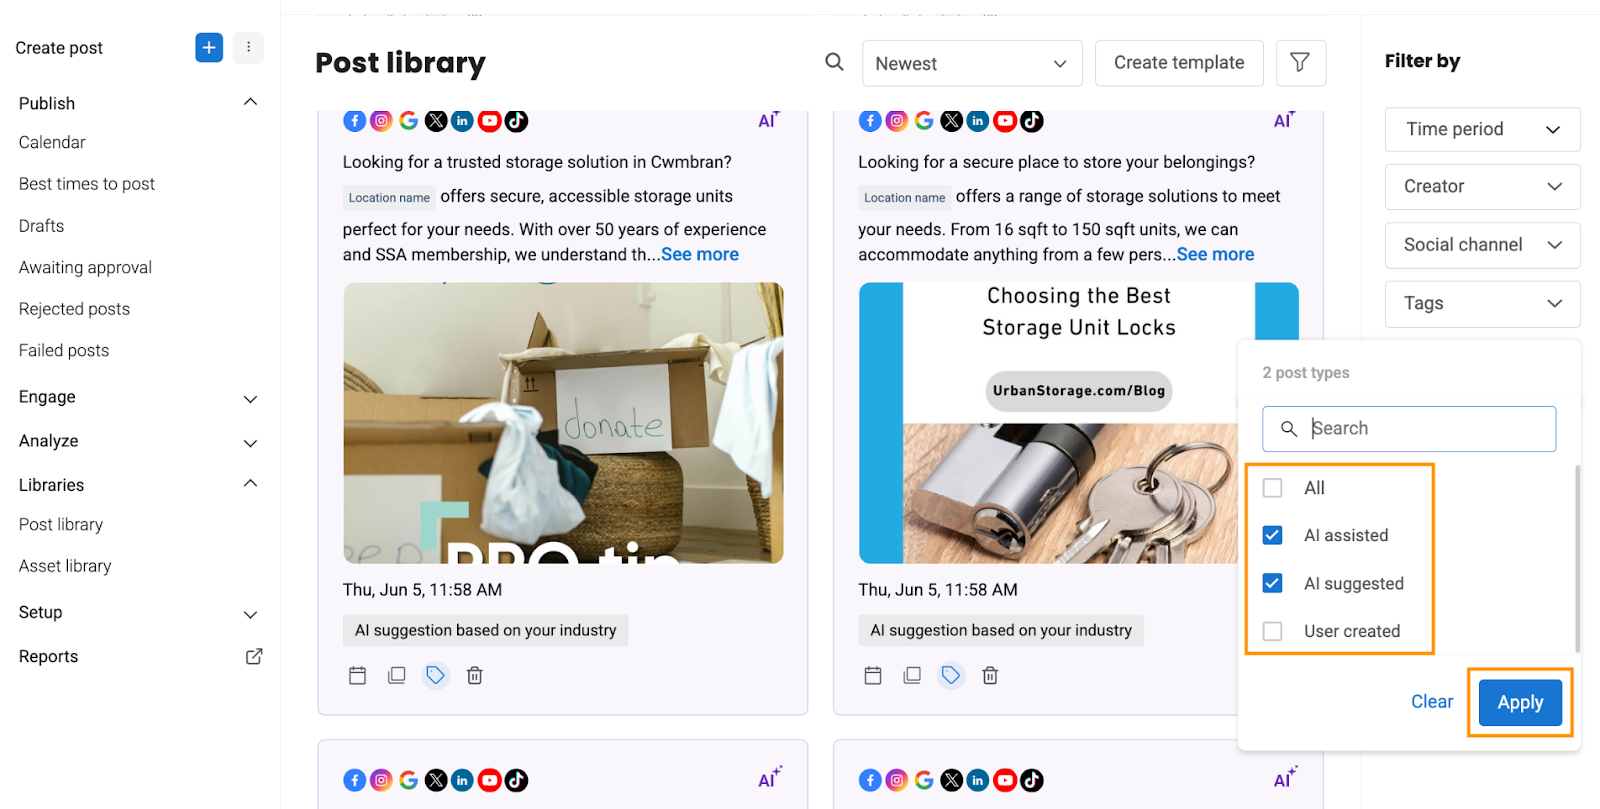
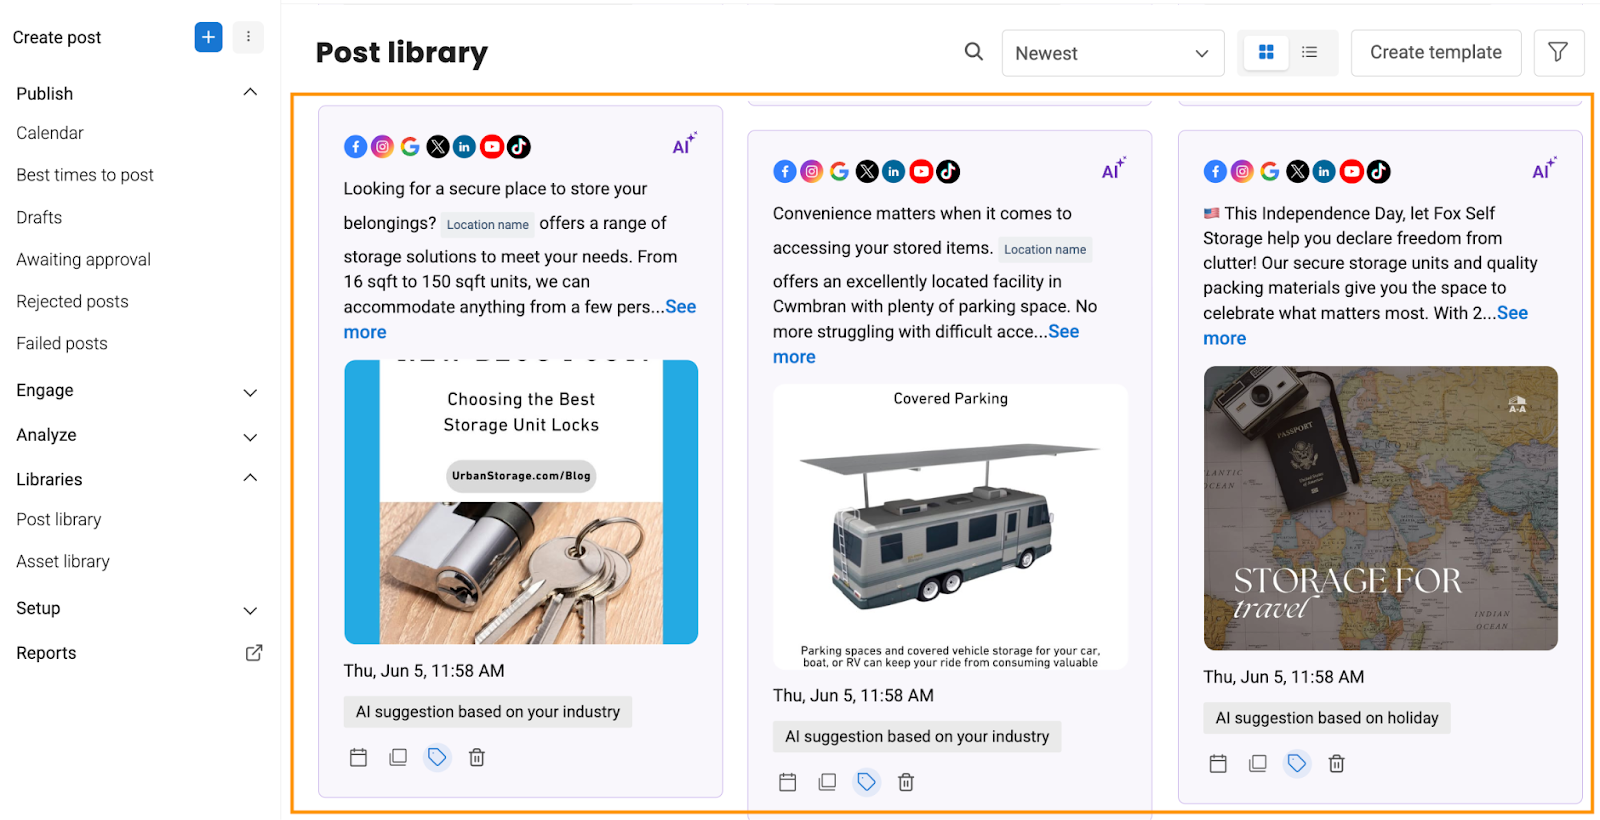
Viewing AI-Generated Posts in Post Library
Click ‘Libraries,’ and select ‘Post library.’
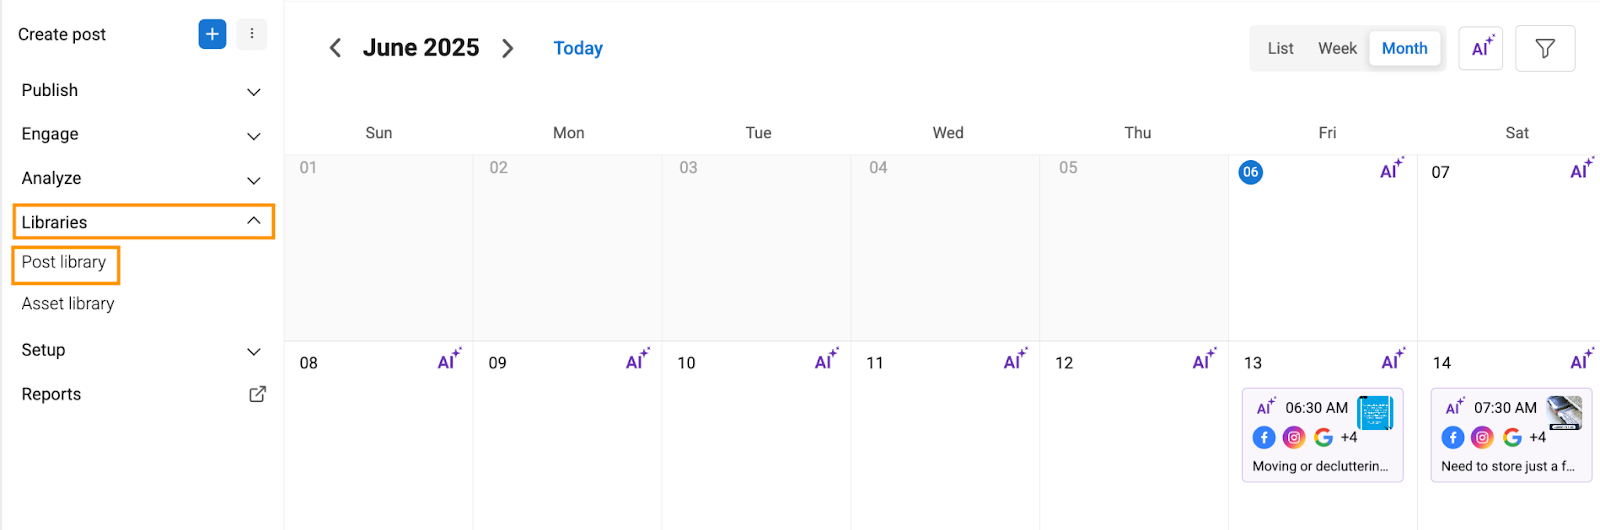
You can view AI-generated posts. Click the post to schedule the post.
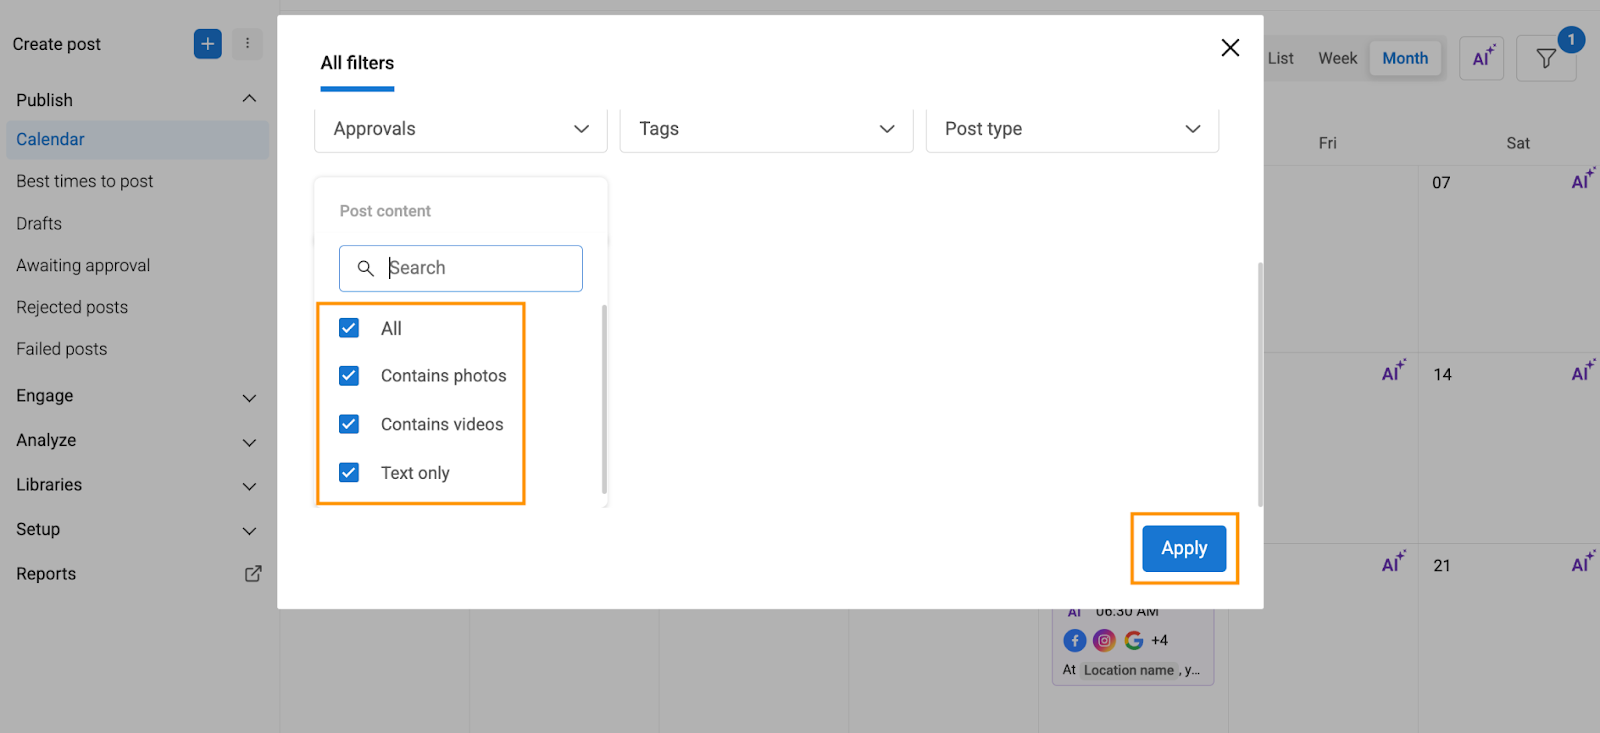
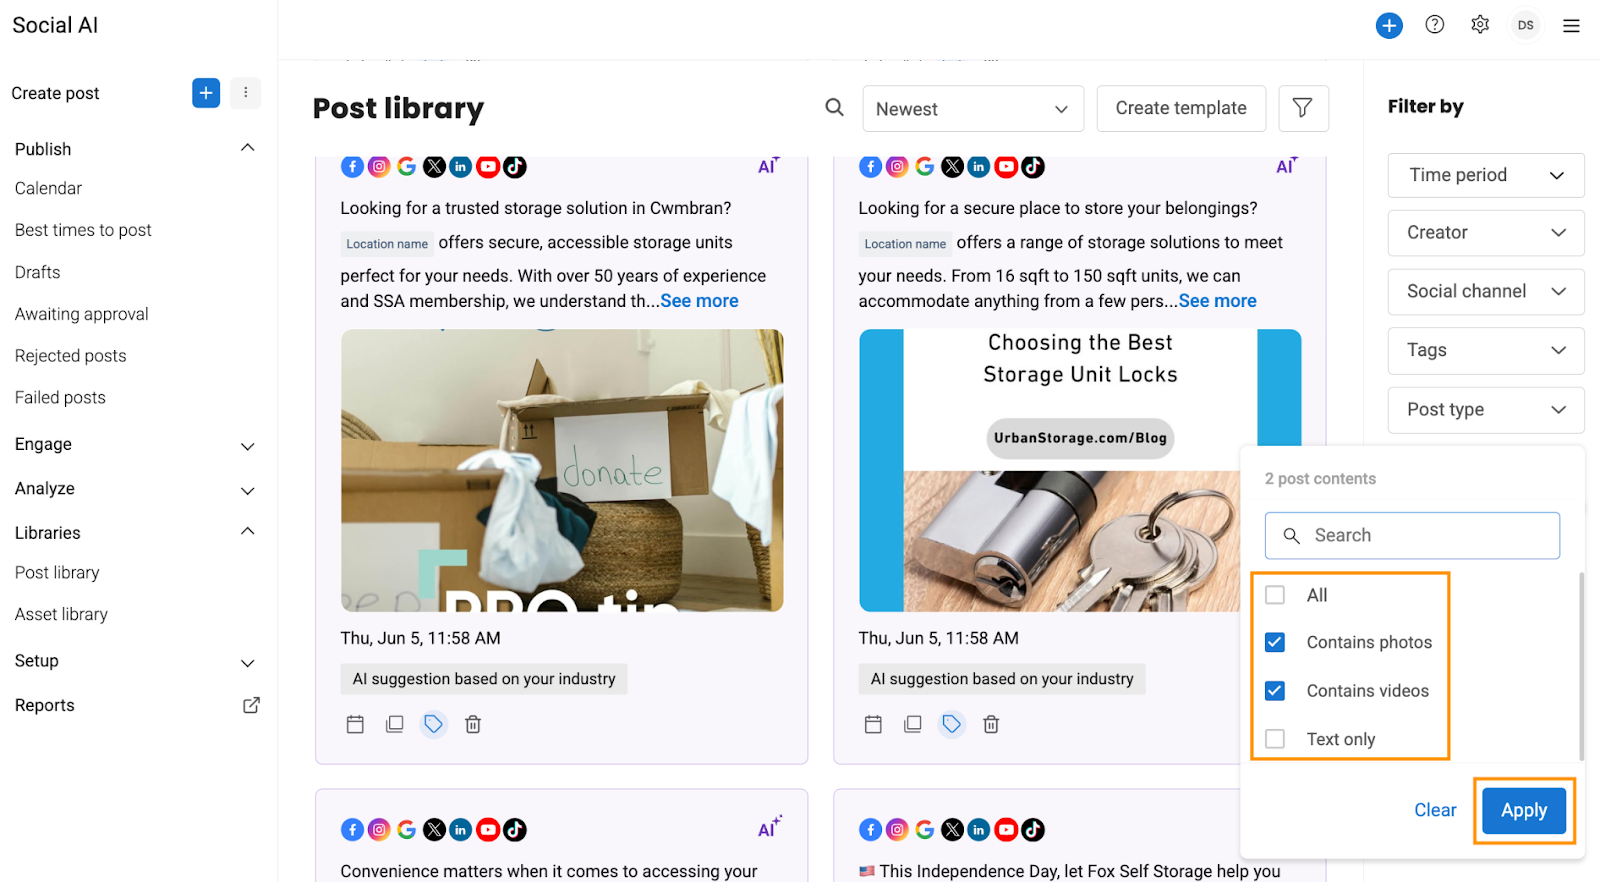
Click the filter icon and select ‘Post content.’
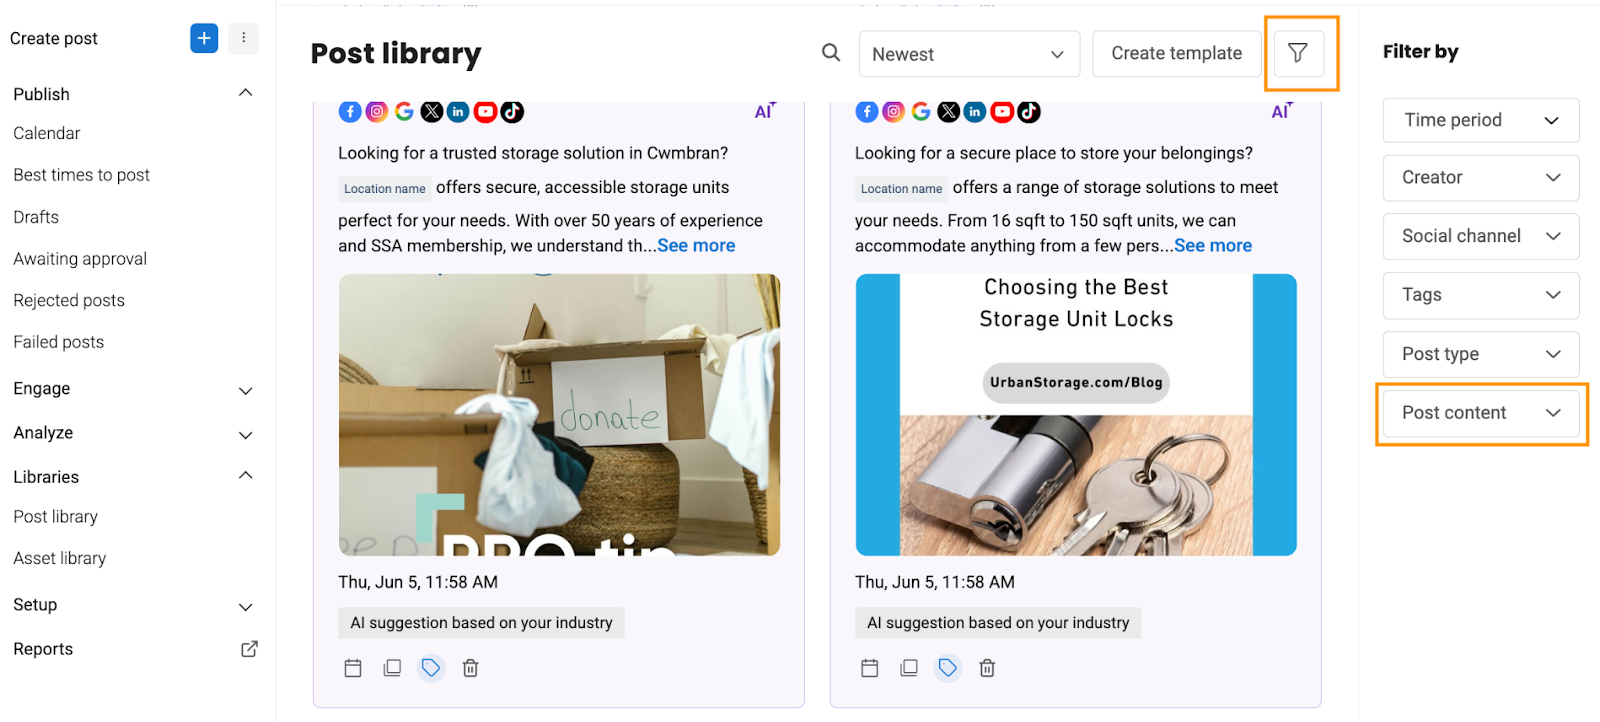
Filter and view posts that contain ‘photos,’ ‘videos,’ ‘Text only,’ or ‘All,’ and click ‘Apply.’
Select ‘Post type.’
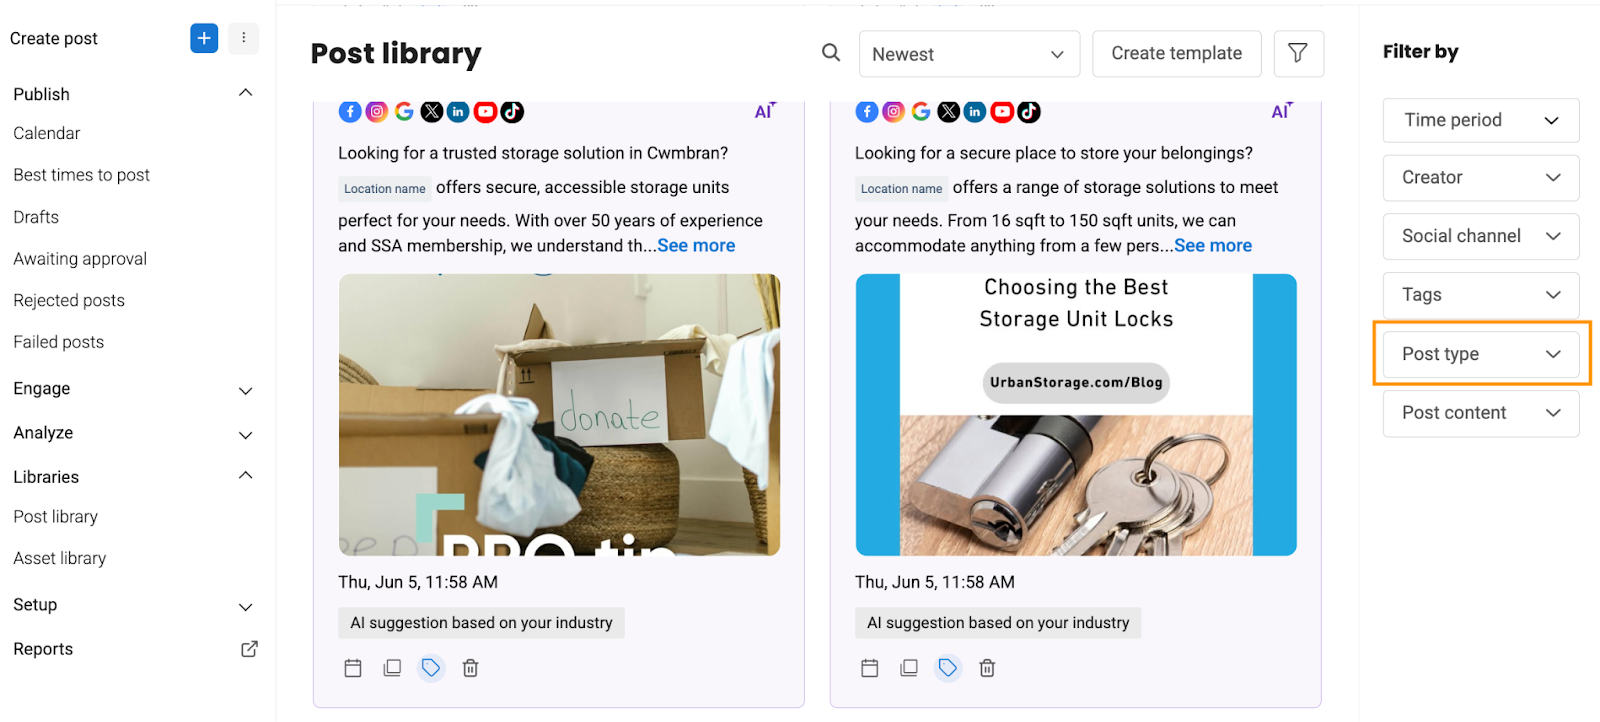
Filter and view posts that are ‘AI-assisted,’ ‘AI-suggested,’ ‘User-created,’ or ‘All’ and click ‘Apply.’