How do I export Inbox conversations using Birdeye API?
Birdeye supports REST-based APIs to help you export Inbox conversations. You need your account's unique API Key and Business ID to initiate this process. After you fetch the business ID and API key, you can run the script to export Inbox conversations.
EXPORTING INBOX CONVERSATIONS USING BIRDEYE API
To generate the API Key and find the business ID associated with your Birdeye account, click on the 'Settings' tab on the left navigation rail of your Birdeye dashboard. Once on the 'Settings' page, click on the 'Integrations' and select the 'API' option.
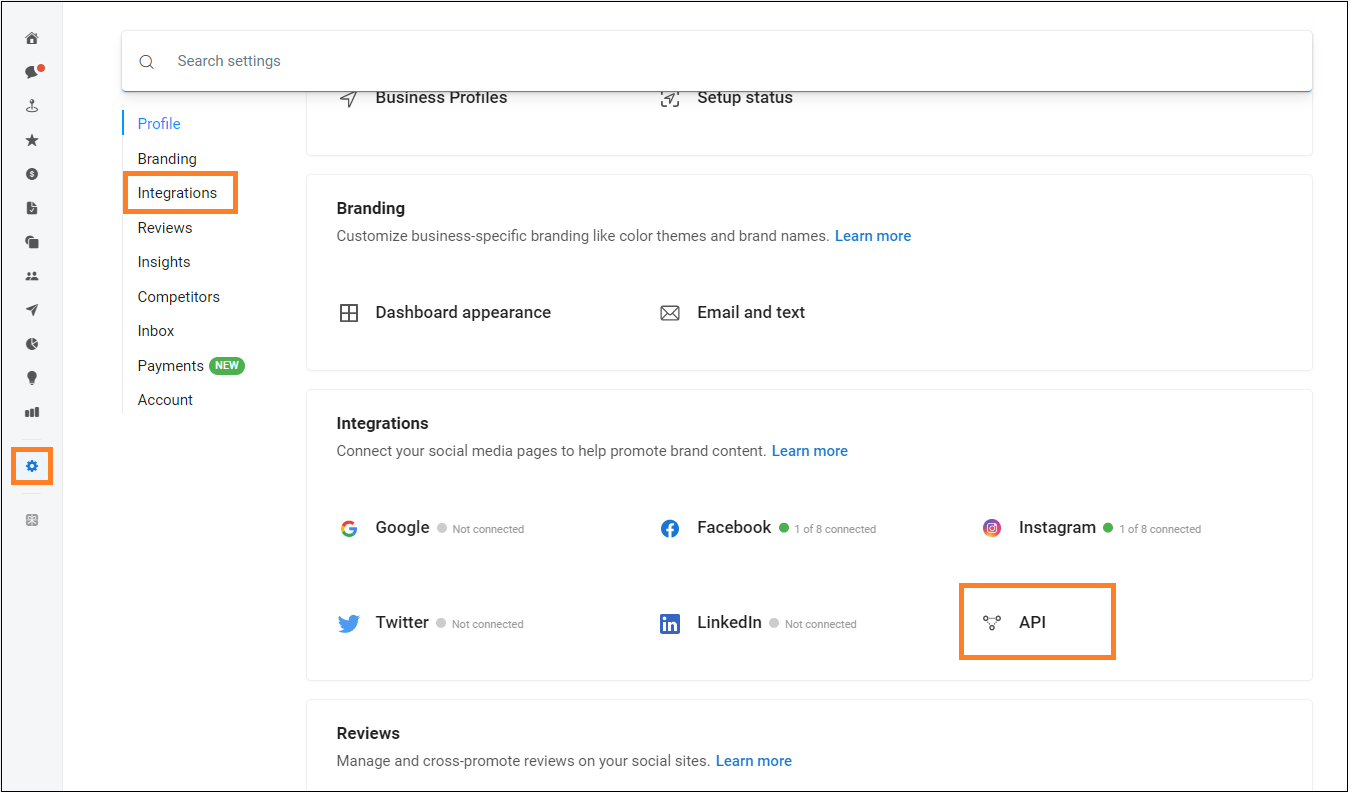
On the new page, click on the 'Generate API key' button, to see your 'Business ID' and 'API key'.
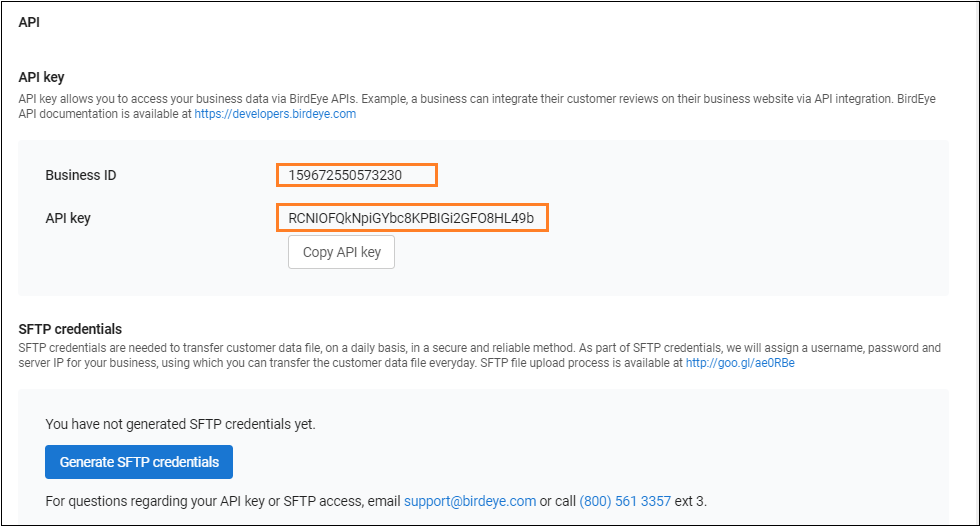
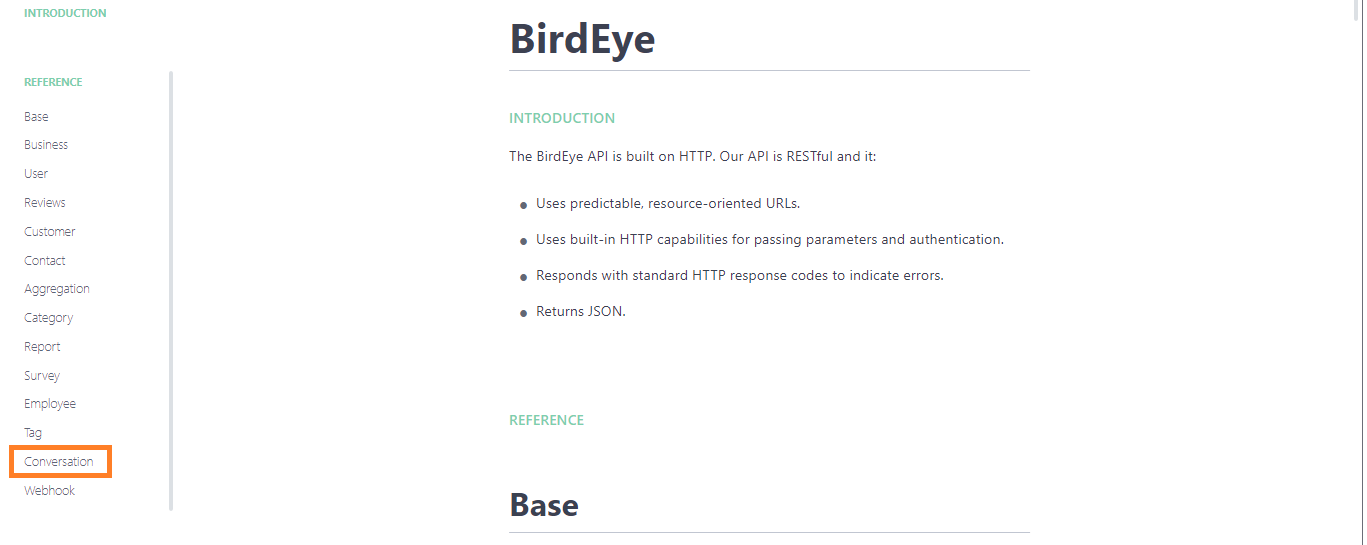
After you have obtained your unique 'Business ID' and the 'API key', navigate to https://developers.birdeye.com to fetch the API script for exporting the Inbox conversations. On the homepage, click on the 'Conversation' tab located on the left navigation rail.
On the 'Conversation' page, you can see the CURL Command under the 'List Conversations' header.
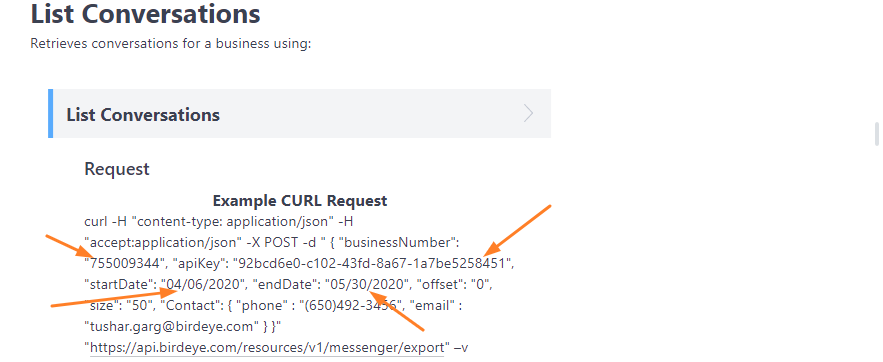
Replace the following fields with the information related to your business:
| Required fields | Description |
| Business Number | This is the business number for which the details need to be fetched. In the case of multi-location businesses, it can be either the 'Enterprise ID' or the 'Location ID' of all the business locations. |
| API Key | This is the business-specific key required for authorization. |
| Start Date | Messages will be fetched starting from this date in MM/DD/YYYY format. |
| End Date | Messages will be fetched till this date in MM/DD/YYYY format. |
| Optional fields | Description |
| Offset | This is the number of objects to skip from the beginning. The Default is '0'. |
| Size | This is the number of maximum objects to return in each request. The maximum value can be 100. |
| Contact | If passed, the data will be fetched for this contact. |
After you run the API script, all the conversations will be extracted from your Inbox.
HOW TO GET REAL-TIME UPDATES FOR INBOX CONVERSATIONS VIA WEBHOOKS
Webhooks enable real-time notifications of events to be delivered to endpoints on your own server. A Webhook can be configured with a URL and a list of events that should be subscribed to for notifications.
To begin, start by clicking on the 'Webhooks' tab located on the left navigation rail.
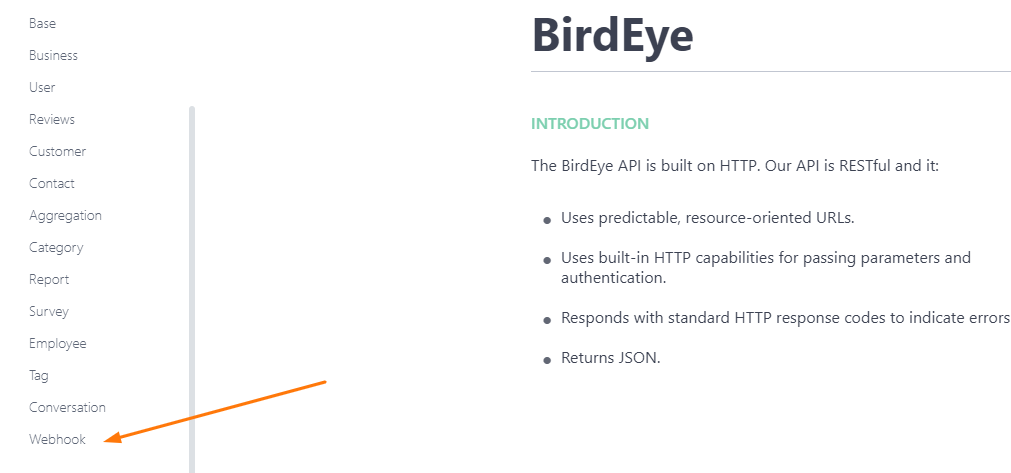
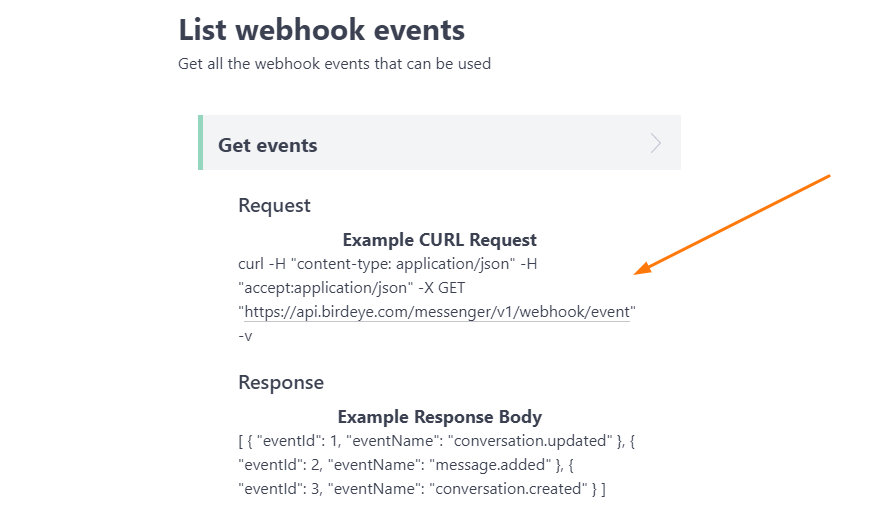
To create a customized Webhook, you would need to extract all the events available for your business. To extract all the Webhook events which can be used, run the API script under the 'List Webhook events' header. The response from the API script will have a list of all the events available.
Once you have all the events, you need to create a Webhook. To create a Webhook, run the API script available under the 'Create Webhook' header.
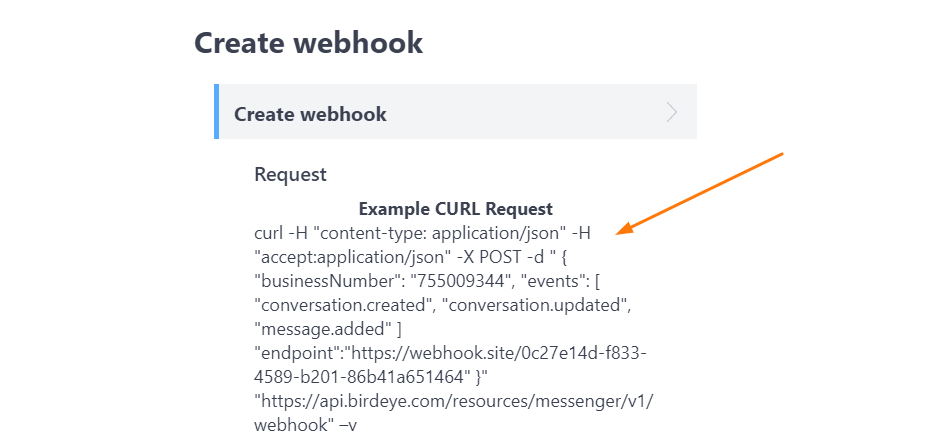
Replace the following fields with the information related to your business:
|
Field |
Description |
| Business Number |
This is the business number for which the details need to be fetched. In the case of multi-location businesses, it can be either the 'Enterprise ID' or the 'Location ID' of all the business locations. |
| Events |
A list of event name strings from the list of available events that should trigger this Webhook. |
| Endpoint |
The endpoint URL on your server that requests are sent to. |