How to create and manage custom fields?
Using custom fields, businesses will have the ability to personalize customer communication at scale and increase response rates. You can bucket multiple contacts under custom fields and create segments to run more targeted campaigns/automation.
You can also use custom fields as filters to configure target audiences for a campaign and send messages which matter. You can either import custom fields through SFTP feed files, CRM integration, check-in API, and bulk contact upload, or manually create them on Birdeye.
CREATING CUSTOM FIELDS MANUALLY
To create a custom field, go to the ‘Contacts’ tab on the left navigation rail. On the new screen, click on the ‘More’ drop-down button and select the ‘Manage custom fields’ option.
.png)
Now, you can create a new custom field using the ‘Create custom field’ button.
.png)
You need to enter the field name, field type, and a description of the field.
.png)
HIDDEN FIELD
If you enable the ‘Hidden field’ section, you will not be able to use the custom field in any filter or token. It will only be used for tracking data..png) You will now be able to view the new custom field, field type and description added next to the field name.
You will now be able to view the new custom field, field type and description added next to the field name.
.png)
Now, you can create a new custom field using the ‘Create custom field’ button.
.png)
You need to enter the field name, field type, and a description of the field.
.png)
HIDDEN FIELD
If you enable the ‘Hidden field’ section, you will not be able to use the custom field in any filter or token. It will only be used for tracking data.
.png) You will now be able to view the new custom field, field type and description added next to the field name.
You will now be able to view the new custom field, field type and description added next to the field name..png)
SECURE FIELD
Enabling the ‘Secure field’ section will enhance the security of that particular property (Order ID). The FAQs and Webchat related to that property can only be sent via text.
.png)
You will be able to view the new 'Secure field' type and description added next to the field name.
.png)
To learn about how to create secure field FAQs, read the article: How do I setup Chatbot FAQs within my account?
You can also create custom fields within Birdeye while adding a new contact or uploading multiple contacts using the Excel template. If a field does not exist while mapping custom fields with the respective contact fields, click on the ‘Create custom fields’ option to create a new custom field. For more information, read the help article: How do I add contacts to my Birdeye account?
You can also create custom fields within Birdeye while adding a new contact or uploading multiple contacts using the Excel template. If a field does not exist while mapping custom fields with the respective contact fields, click on the ‘Create custom fields’ option to create a new custom field. For more information, read the help article: How do I add contacts to my Birdeye account?
MANAGING CUSTOM FIELDS
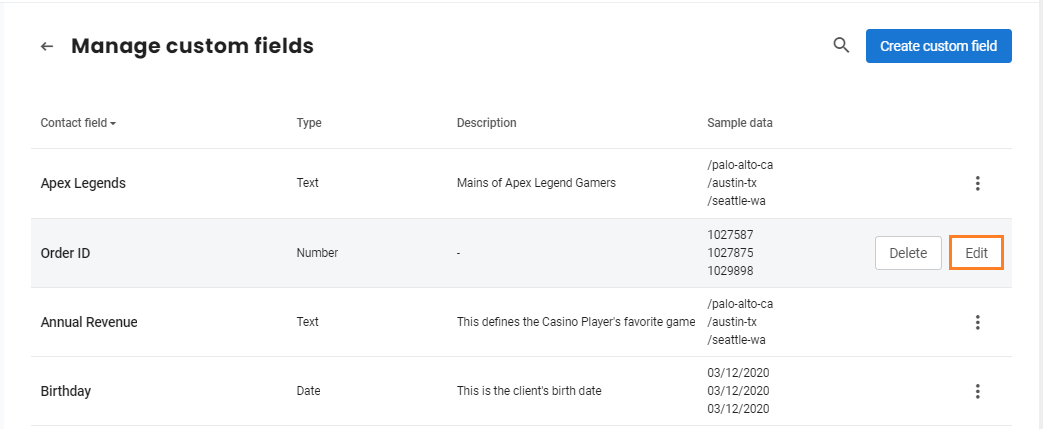
Once custom fields are created, you will be able to view the contact fields, type, description, and the sample data associated with the field. You will also be able to create, edit and delete a custom field. Using the ‘Lens’ icon, you will be able to search and find an existing field.
.png)
EDITING A CUSTOM FIELD
To edit a custom field, hover over the field and click the corresponding ‘Edit’ button.

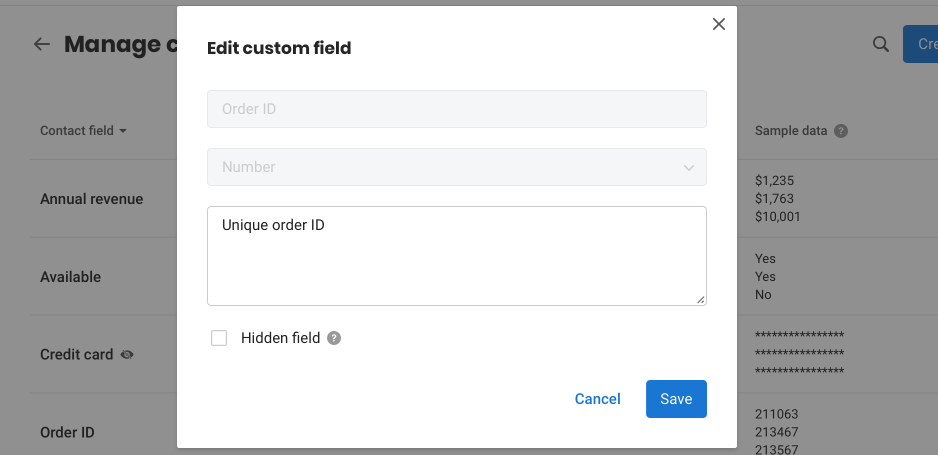
Now, you will be able to edit the field description and choose whether you want to hide the custom field or not.

DELETING A CUSTOM FIELD
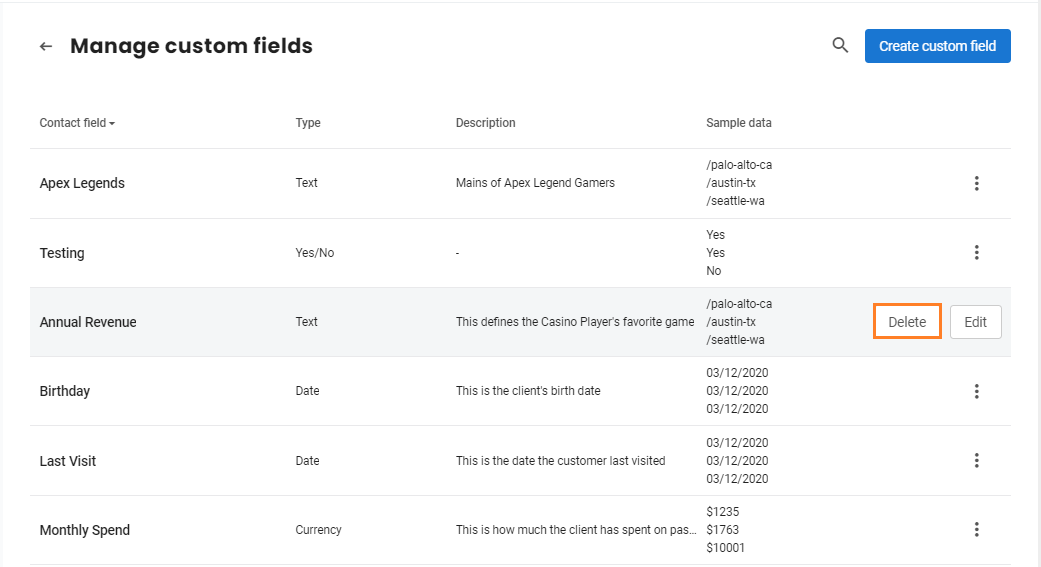
To delete a custom field, hover over the field and click the ‘Delete’ button.
.png)
EDITING A CUSTOM FIELD
To edit a custom field, hover over the field and click the corresponding ‘Edit’ button.

Now, you will be able to edit the field description and choose whether you want to hide the custom field or not.

DELETING A CUSTOM FIELD
To delete a custom field, hover over the field and click the ‘Delete’ button.

When a window pops-up, click on the ‘Delete’ button.
