Integrating Birdeye with Dealertrack

Dealertrack is a cloud-based dealership management system (DMS) used for franchise dealerships. It offers solutions to transform businesses through connected processes, open integration and intelligent technology. Integrating Dealertrack with Birdeye will automate the process of sending out review requests to clients on a daily basis.
Once Dealertrack is integrated with Birdeye, Birdeye will pull client information from Dealertrack once daily from the cases that were closed on the previous day. Birdeye collects the first name, last name, email address and phone number of your clients and automatically sends them review requests based on the preferences set within the Birdeye dashboard.
Birdeye allows you to fetch data from your PMS using some predefined triggers. You can choose any combination from the list of available triggers and inform the support team about your selection. Here are the supported triggers for Dealertrack:
| Trigger Name | Trigger Description |
| Dealertrack Service Order Closed Trigger | This trigger is used to fetch customer data based on the service order closed. |
| Dealertrack Deal Closed Trigger | This trigger is used to fetch customer data based on the deal closed. |
Birdeye Lead Trigger |
This trigger is used to push lead details from Birdeye into CRM. |
To set up the initial part of the integration with Birdeye, please reach out to the Birdeye technical support team @ 1-800-561-3357 Ext. 3 or email them at - support@birdeye.com. Also, keep your Dealertrack base-URL handy and provide it to the technical support team while setting up the integration, (this can be copied from the address bar of your browser). After the initial integration is set up by the Birdeye technical support team, you can log in to your Birdeye account to complete the integration process.
Setting up vendor access on Dealertrack DMS
An authorized user will need to define the Vendor’s settings for each API (Application Programming Interface) they intend to access. ‘Authorize to OpenTrack’ must be selected in Data Extraction User Security to access OpenTrack.
Locate dealership information
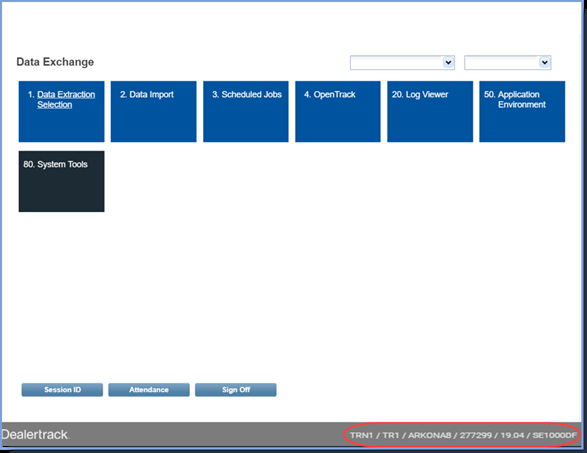
Information for the dealership can is located in the bottom right-hand corner of the DMS. You will view the following information:
- DMS Enterprise Code (For example: ‘TRN1’ in the image below)
- Company Code (For example: ‘TR1’ in the image below)
- Server ID (For example: ‘ARKONAB’ in the image below)
Add new API
In order to add an API, you need to follow the steps detailed below:
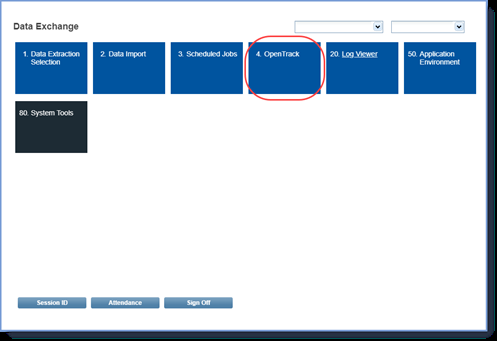
- Click on the ‘OpenTrack’ option under ‘Data Exchange’.
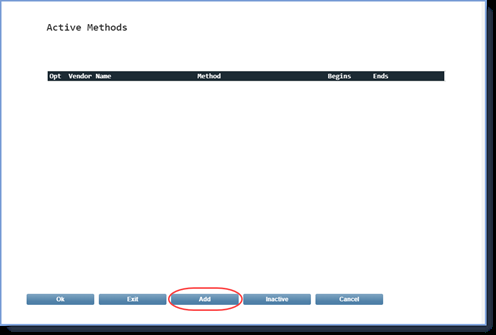
- Click on the ‘Add’ button on the ‘Active Methods’ page.
- On the Vendor Access definition screen, you need to define the Vendor specifications.
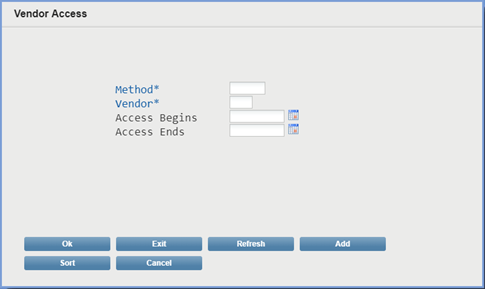
- Here are details you need to enter:
-
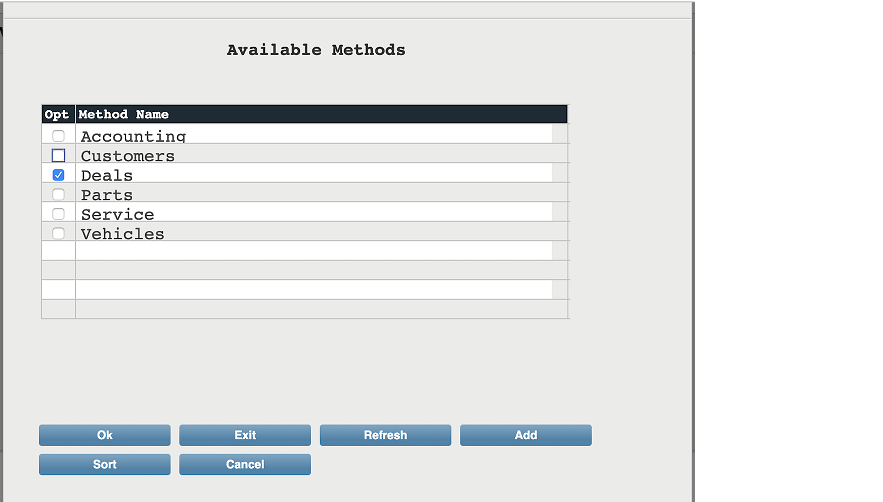
Method- Click on the ‘Method’ option and from the ‘Available Methods’ list, select from the following API methods: ‘Customers’, ‘Deals’ and ‘Service’ while providing access for each API. Then click on the ‘Ok’ button at the bottom to save the settings.
-
Vendor -
Click on the ‘Vendor’ option and choose ‘Birdeye’ from the certified vendor list. Then click on the ‘Ok’ button to save the settings.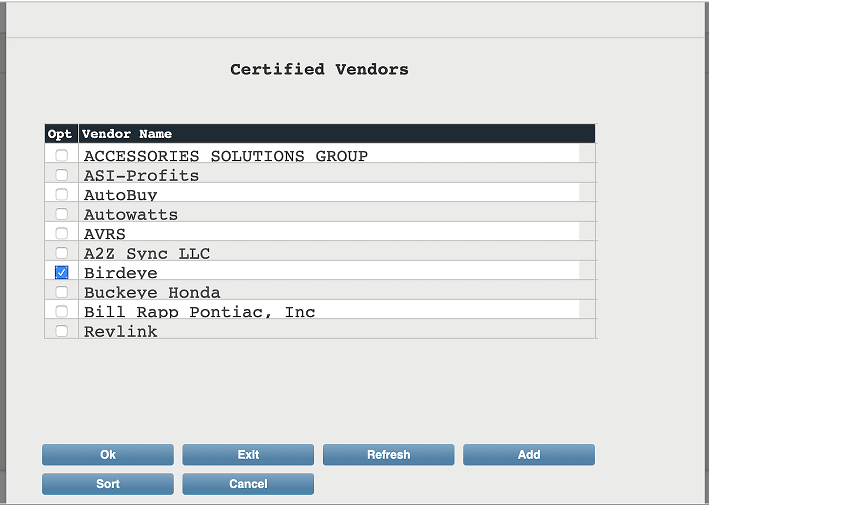
-
Access Begins- Select the date from the calendar when the vendor access begins.
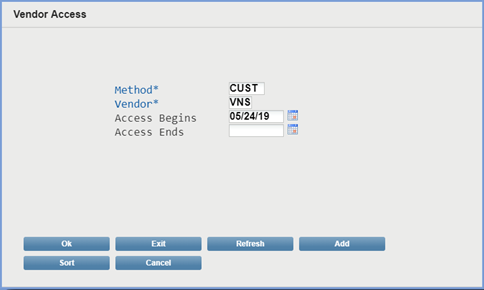
- Access Ends- Select the date from the calendar when the vendor access ends. Access stops the end of the day entered.
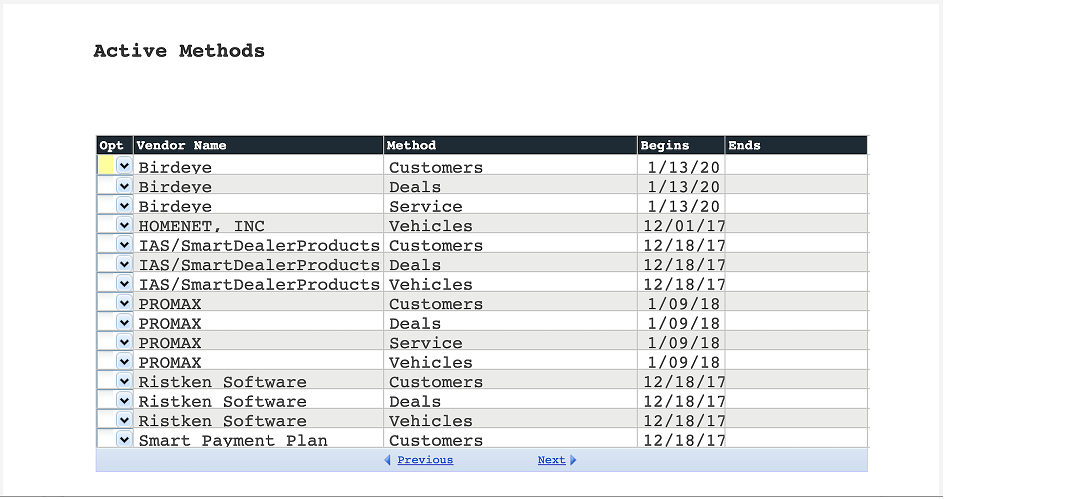
- Click on the ‘Ok’ button to save the defined API. Repeat the steps for each required API. A check will be performed to ensure that the combination of ‘Vendor’ and ‘Method’ does not preexist. If the Vendor/Method combinations exist, the following message displays: “Access to this Method for the selected Vendor exists.”
-
Method- Click on the ‘Method’ option and from the ‘Available Methods’ list, select from the following API methods: ‘Customers’, ‘Deals’ and ‘Service’ while providing access for each API. Then click on the ‘Ok’ button at the bottom to save the settings.
Make changes or deactivate a defined API
To make changes or make an API inactive, you need to perform the following steps:
- Select the ‘Change’ or ‘Deactivate’ option by the desired API. This will open the ‘Vendor Access’ screen of the defined API.
- Update the API as needed or deactivate the API by selecting a date in the Access Ends field.
