How do I transact card entry payments via Quick send?
Birdeye makes it easy for its customers to collect payments in seconds. Businesses can request and collect payments via 'Quick send' as well as view real-time payment status in a comprehensive dashboard.
REQUEST PAYMENTS VIA CARD ENTRY FOR AN EXISTING CONTACT
- Click on ‘Quick send’ and select ‘Payments.’
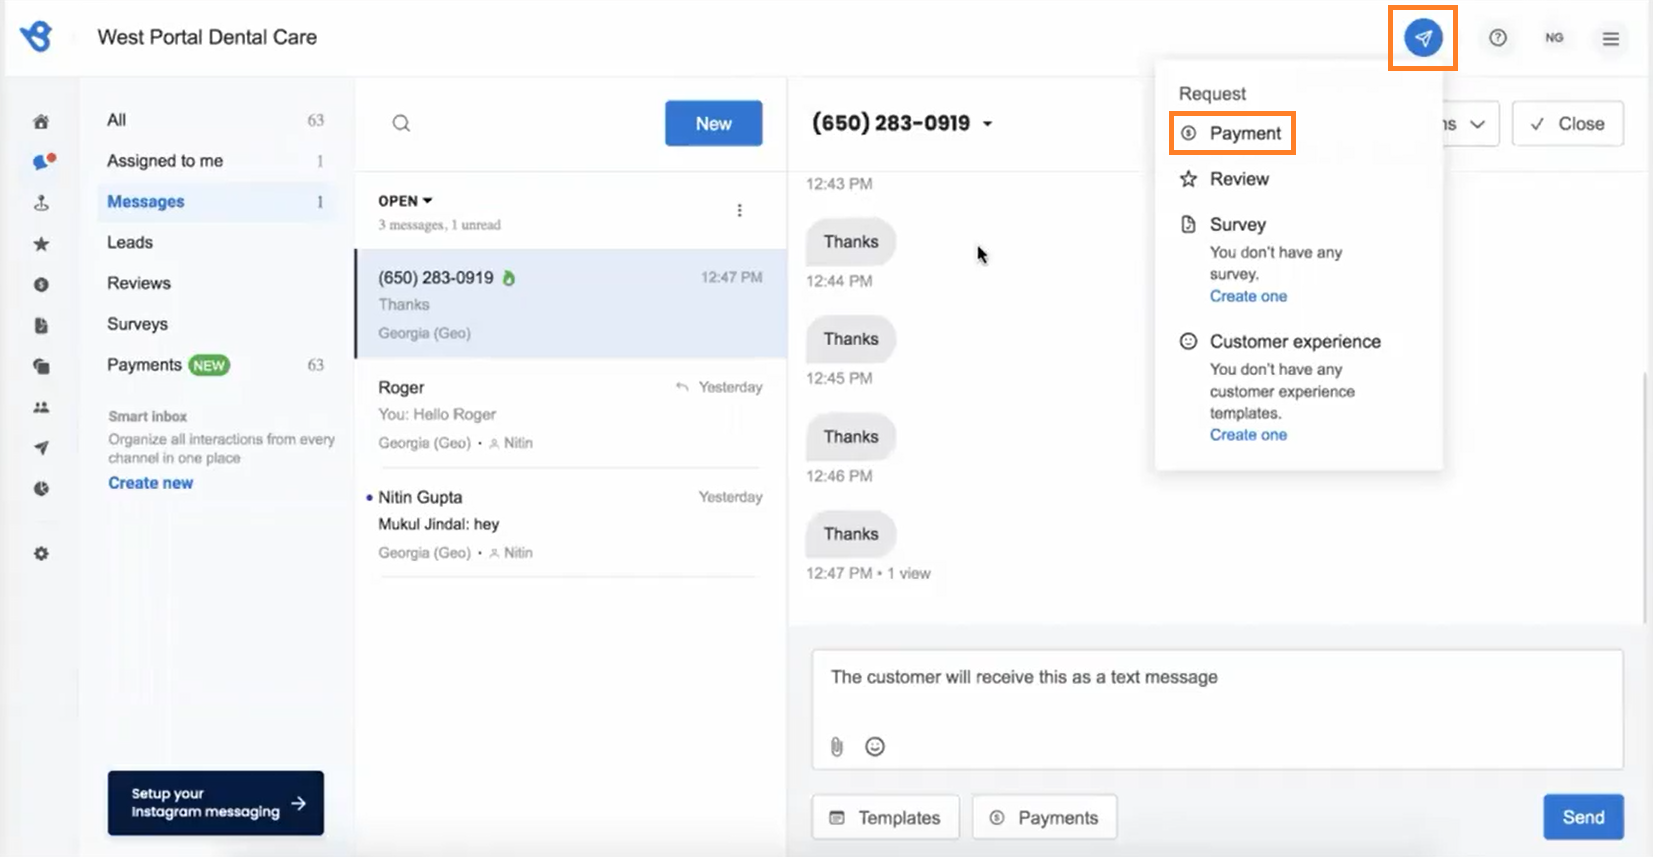
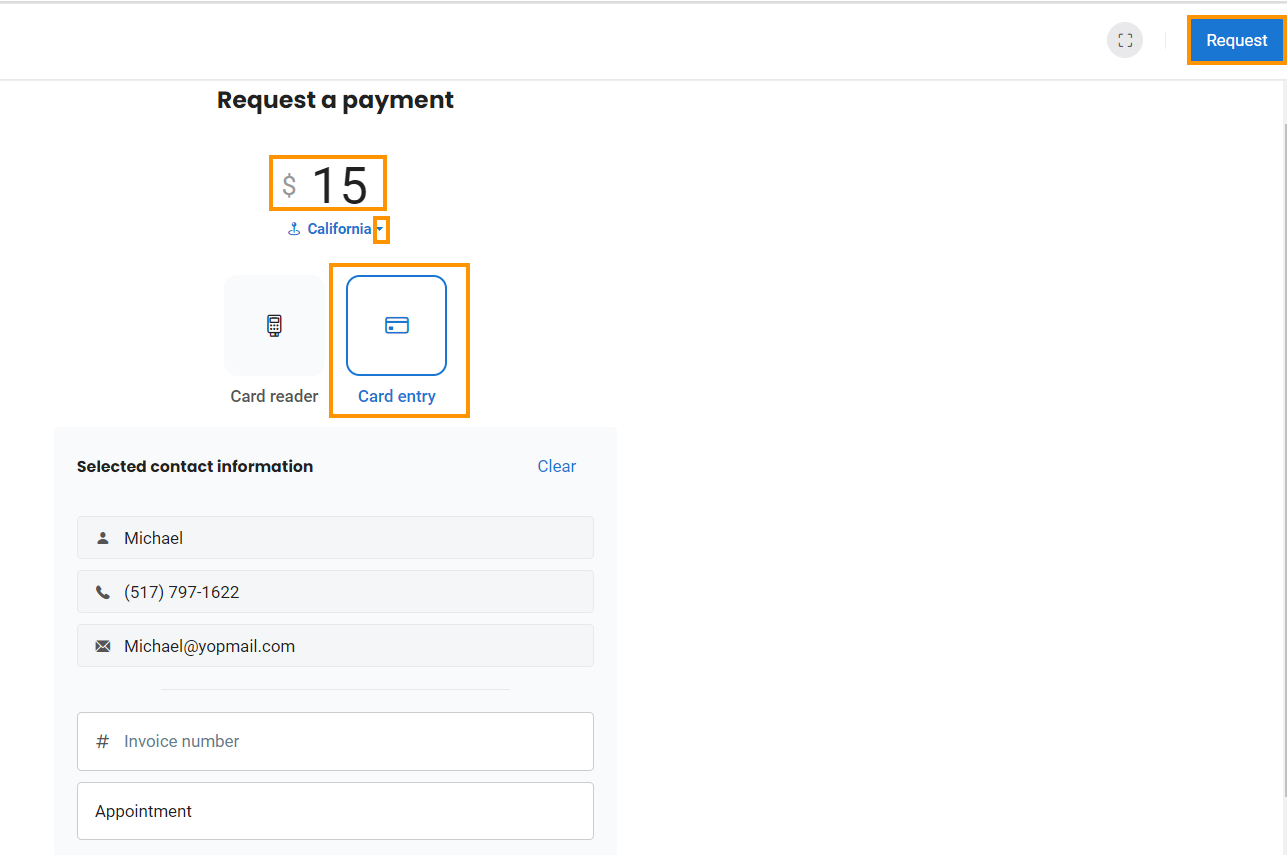
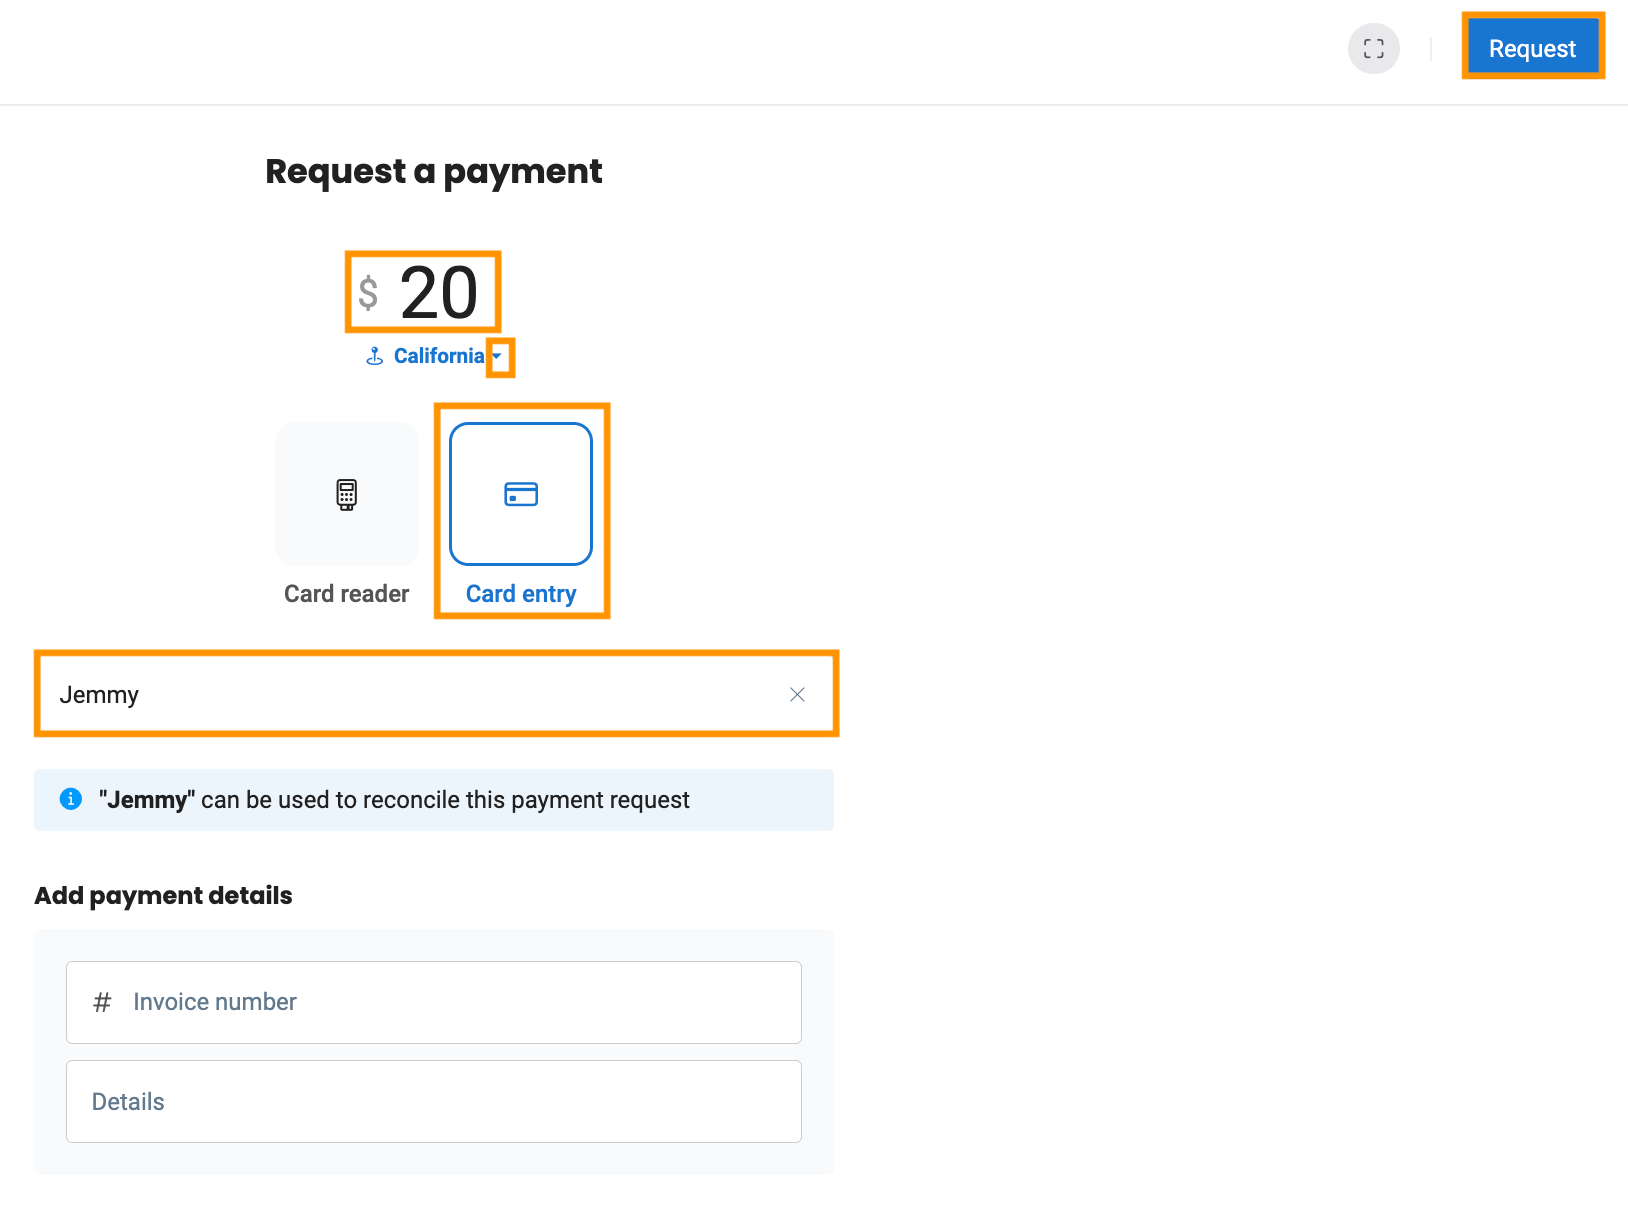
- A screen will appear, enter the amount and select ‘Card entry’ as a payment option.
- Enter the contact information such as name, phone number, email id, or invoice number, and the contact will appear in the suggestions below; then select the contact to proceed.
- Provide details of the payment. Add ‘Invoice number’ then click on the ‘Request’ button.
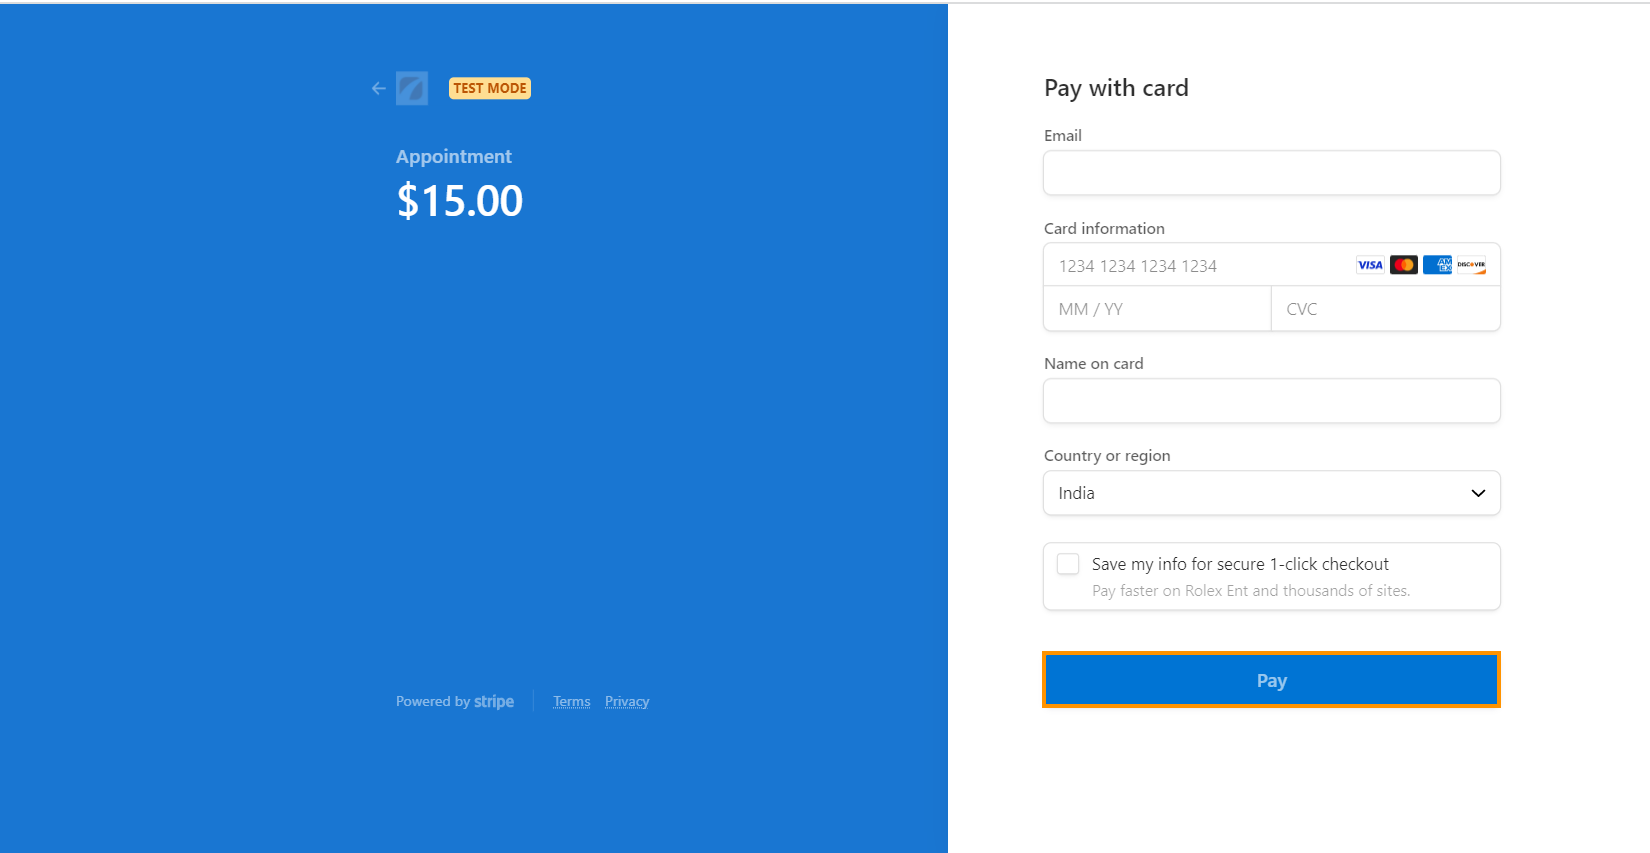
- You will be redirected to the new page, enter your email id, card information, and other relevant information, and then click on ‘Pay.’
 Here's how the post-payment confirmation screen will appear.
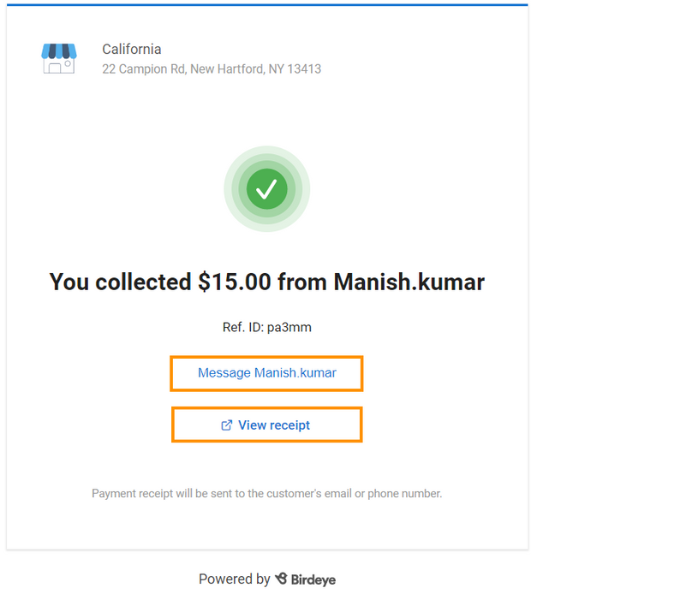
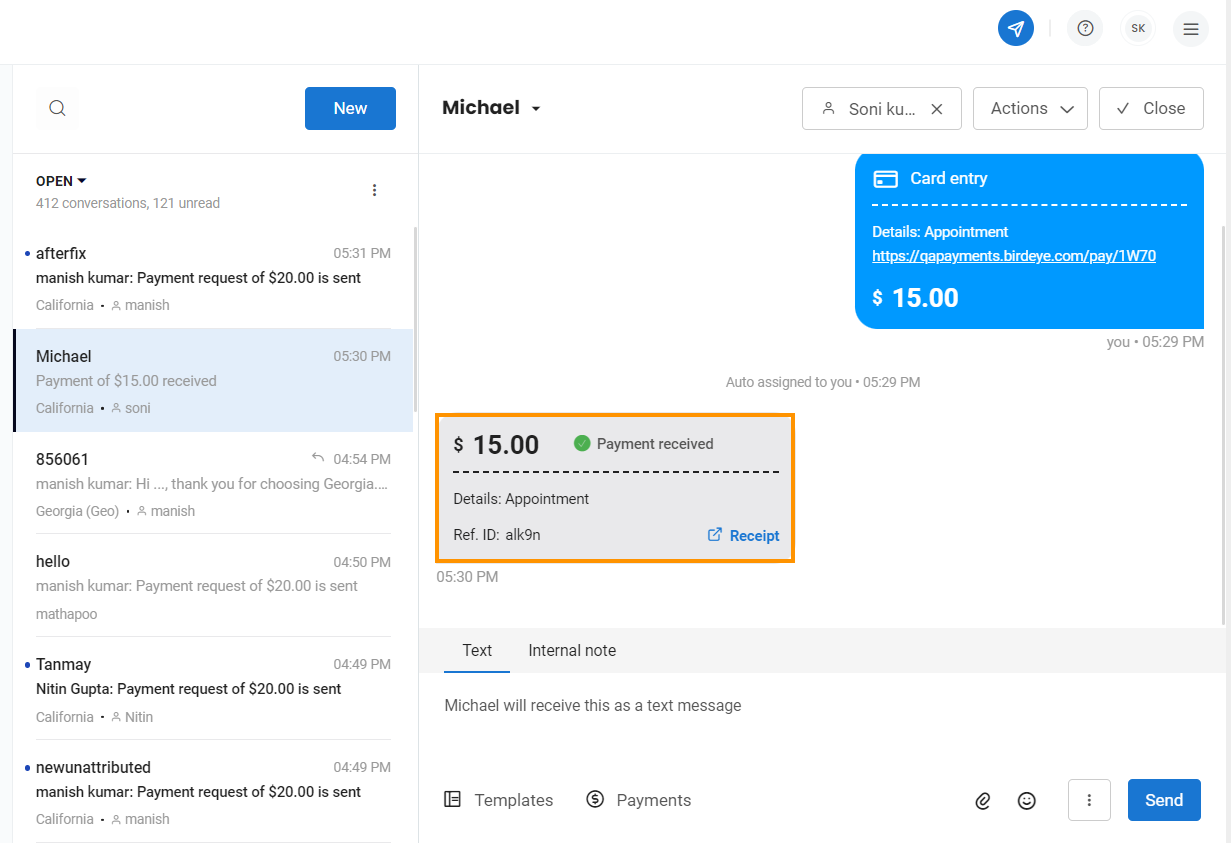
- Click on the ‘Message’ button, and you will view the message of payment received in the ‘Inbox.’
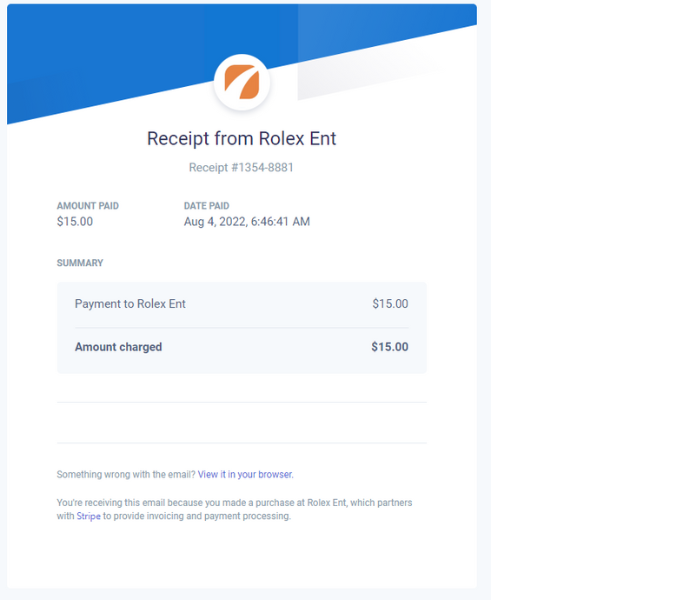
- To view the details, click the ‘View receipt’ button from the post-payment confirmation screen.
REQUEST PAYMENTS WITHOUT CREATING OR ADDING A CONTACT
- Enter the amount and name in the respective field, and click on the ‘Request’ button to send the request to collect the payment.
- You will be redirected to the new page, enter your email id, card information, and other relevant information, and then click on ‘Pay.’
ADD CONTACT THROUGH THE INBOX DASHBOARD
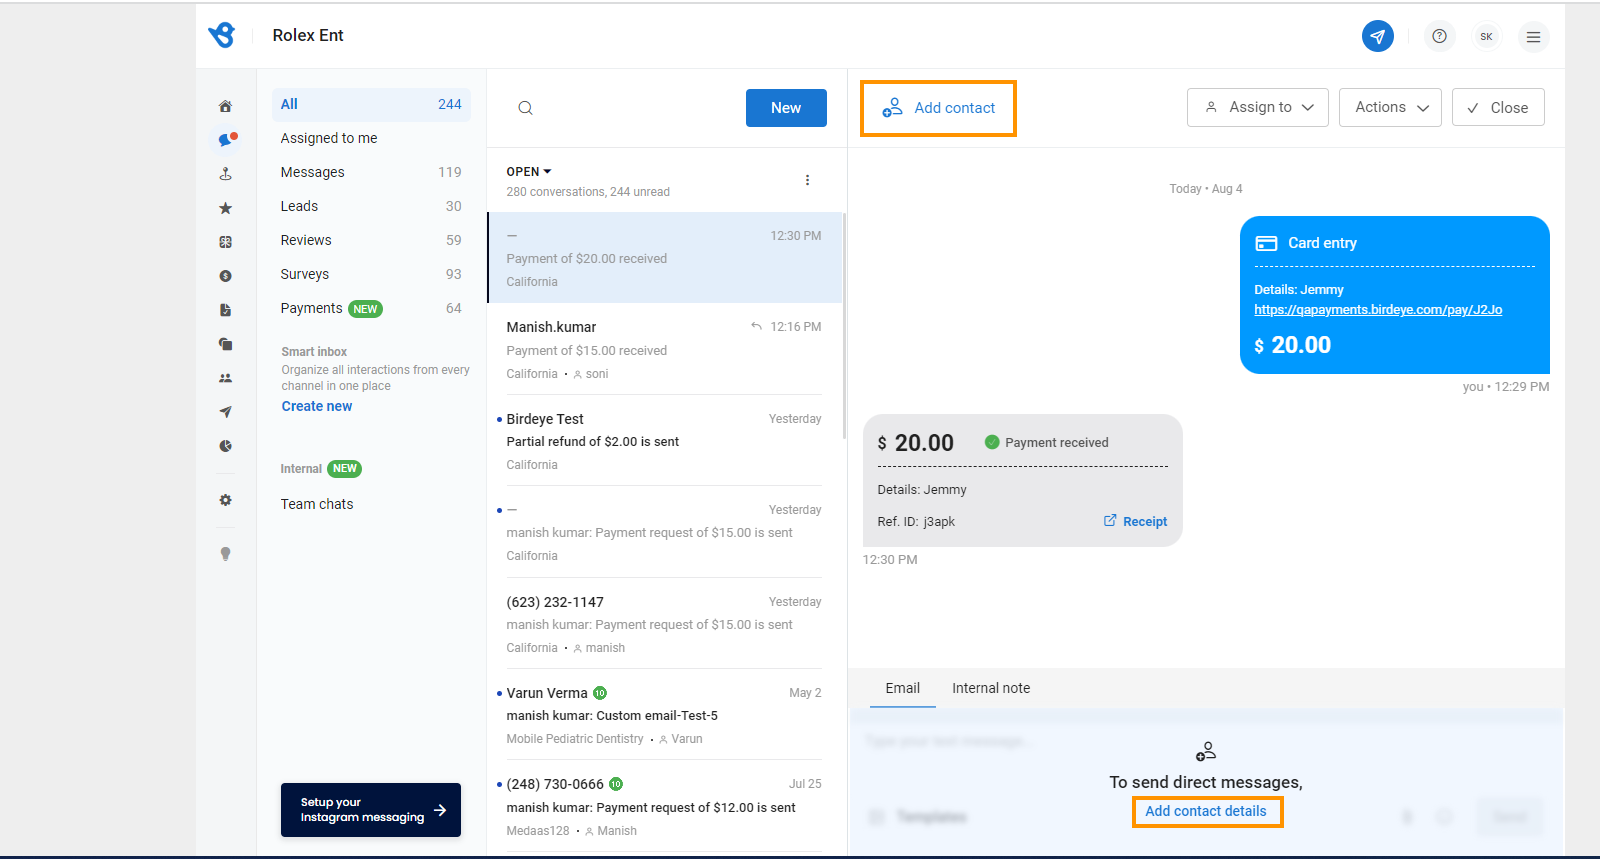
If contact is not added, the user cannot send a message to the contact.
- You have two options to add a contact by clicking on the ‘Add contact’ beside the new button or ‘Add contact details’ from the bottom.
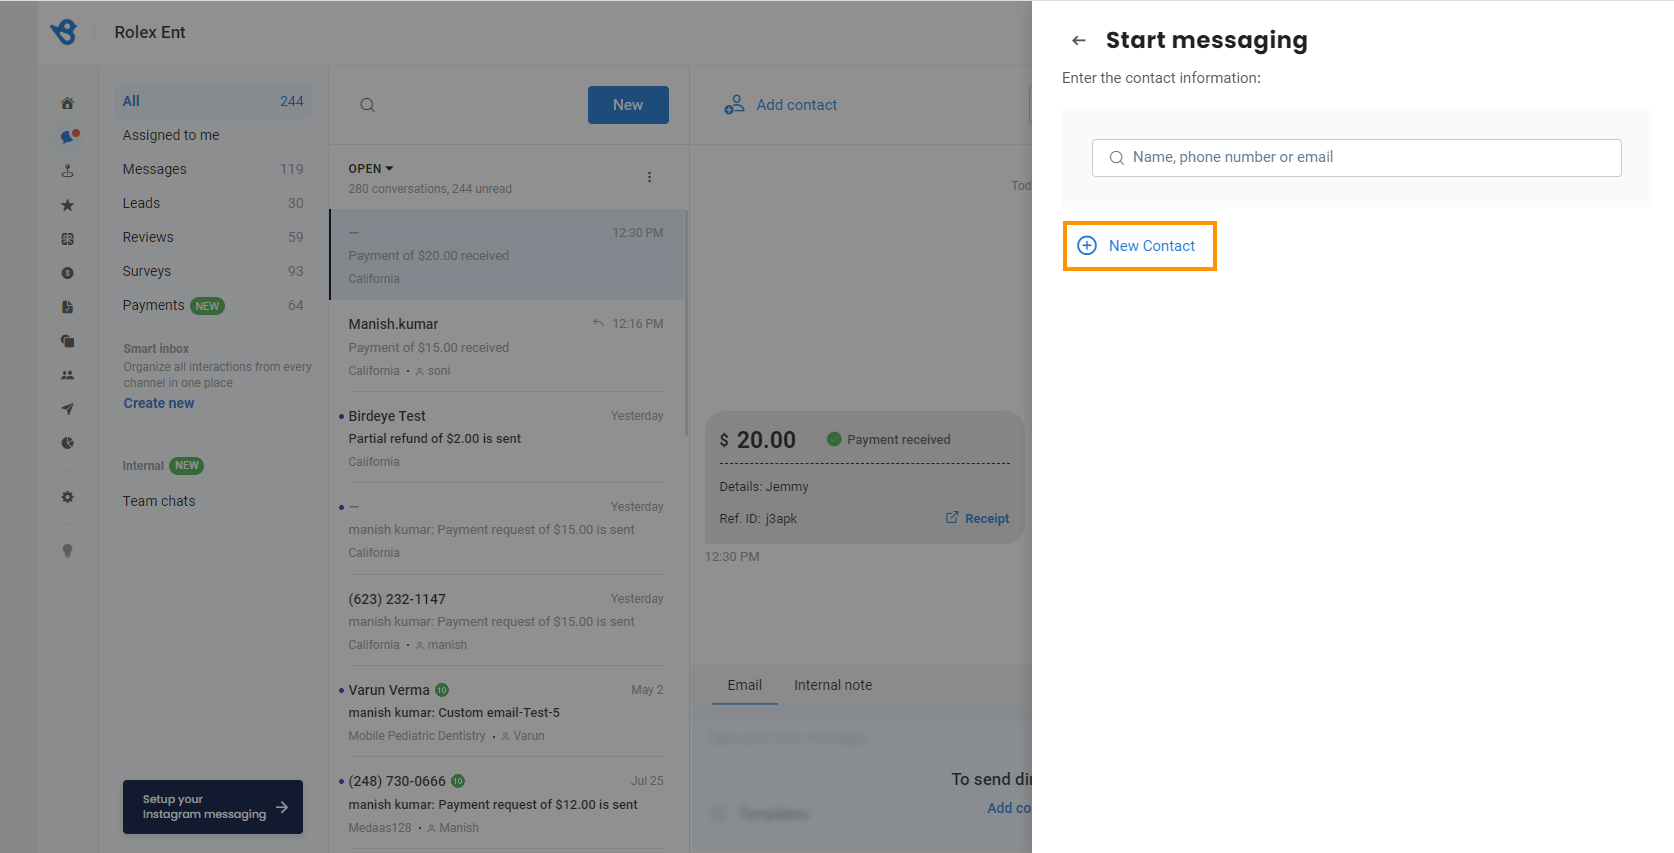
- A drawer will appear on the screen from the right-hand side, and then click on the ‘New Contact.’
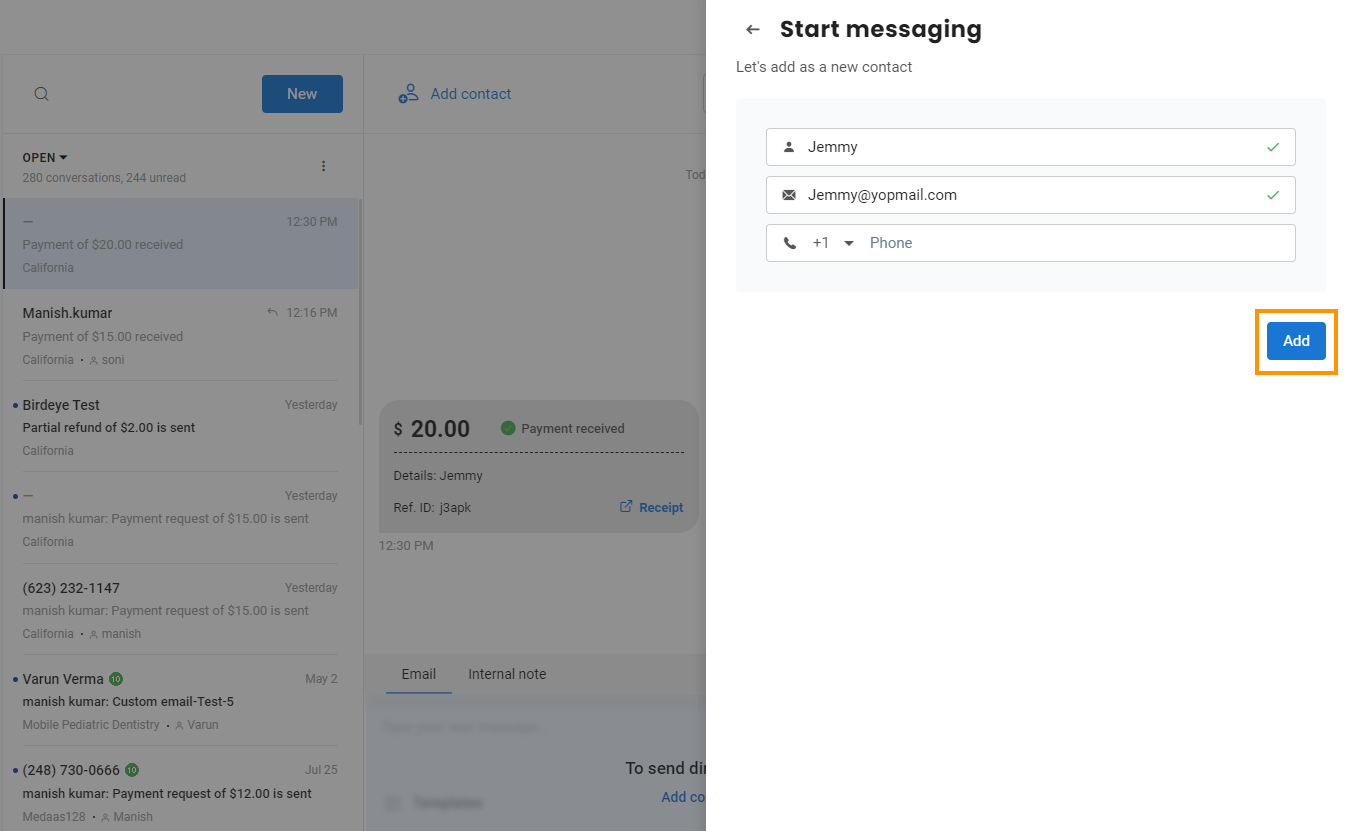
- Provide details and click the ‘Add’ button to add the contact to the contact list.
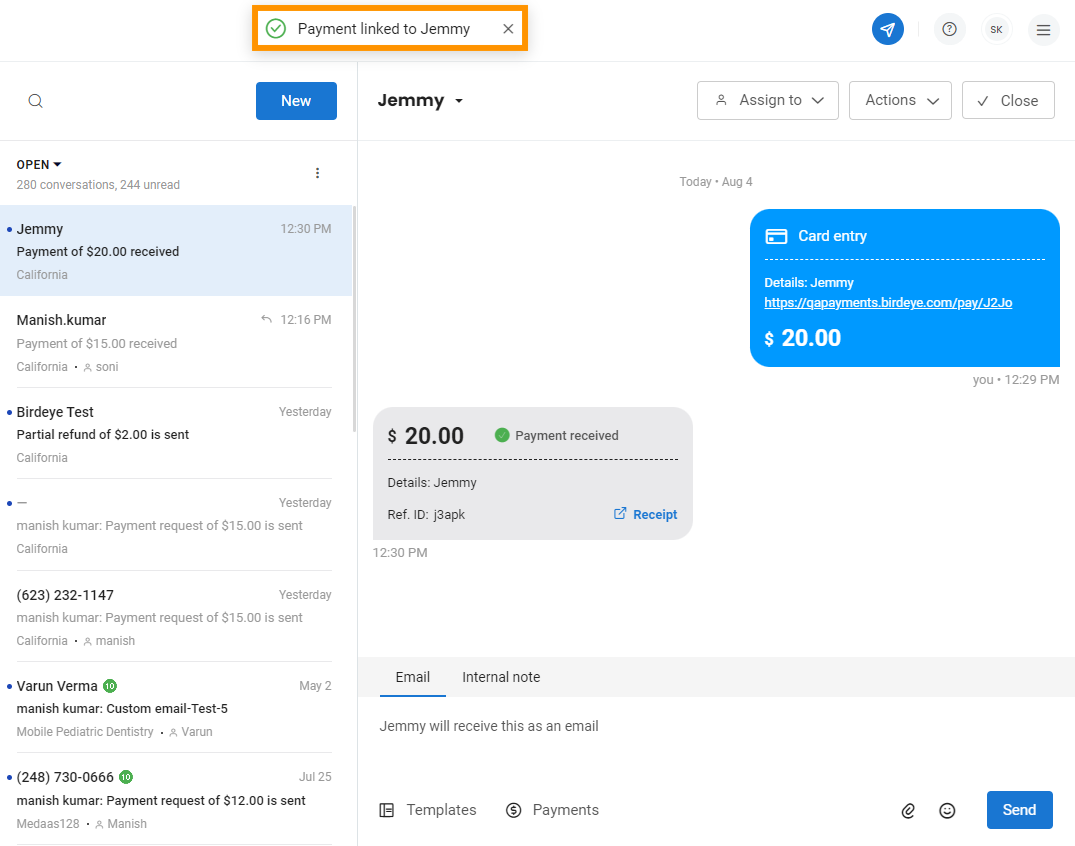
- A pop-up window will appear on the screen.
ADD CONTACT THROUGH THE PAYMENTS DASHBOARD
- Go to the ‘Payments’ dashboard and scroll down to the contact whose name is not added in the system to add a contact.
- Click on the ‘Add contact’ or 'icon', and a drawer will open. Enter the name, email or phone number to add the contact to the list. It will be redirected to the ‘Add contact’ page through which the user can be added.
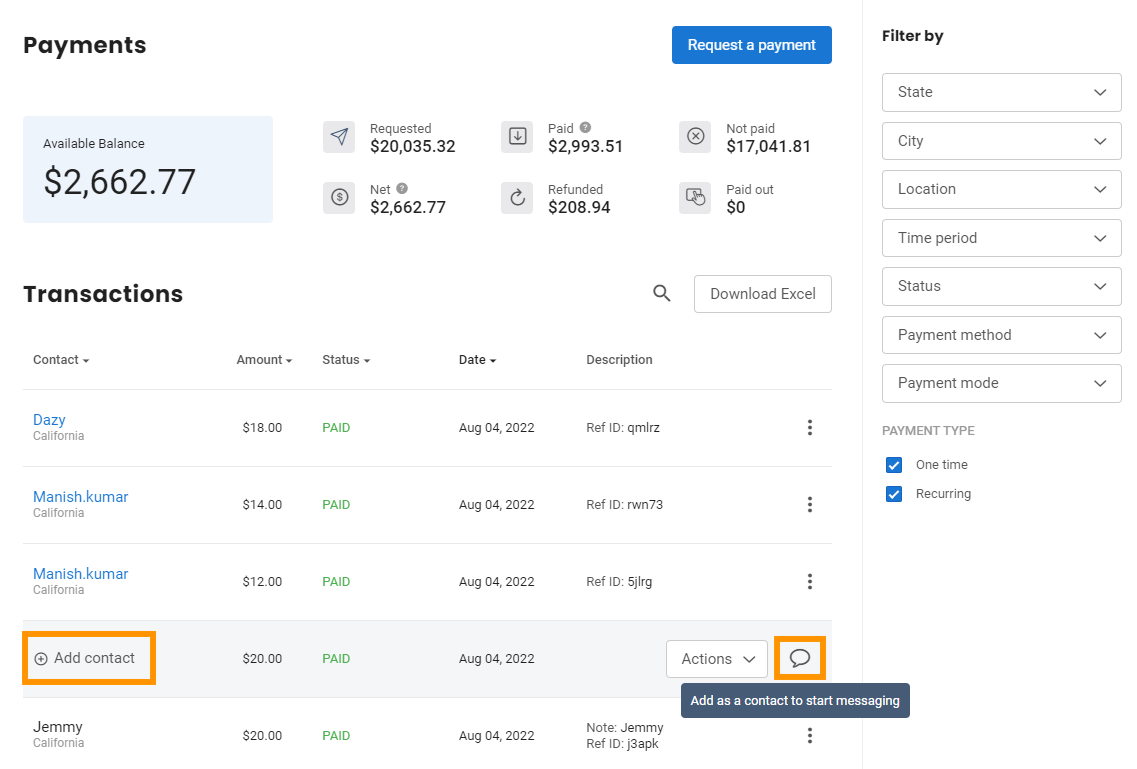
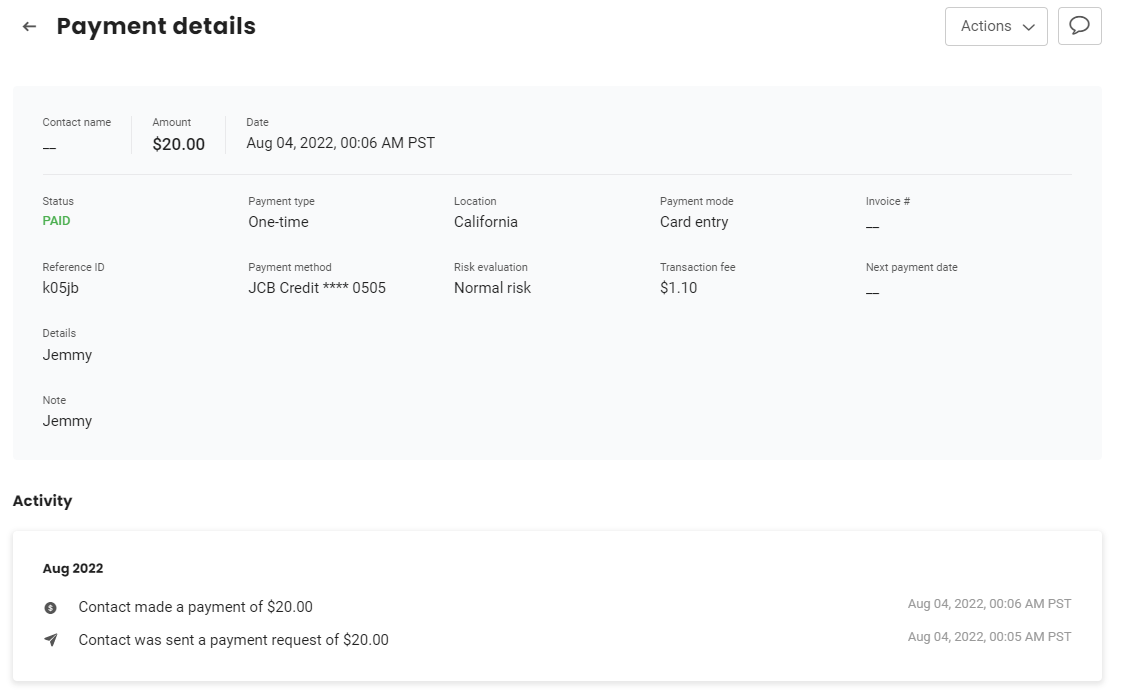
- Click on the ‘Actions’ drop-down menu and then ‘View details’ to view the details of a particular transaction.
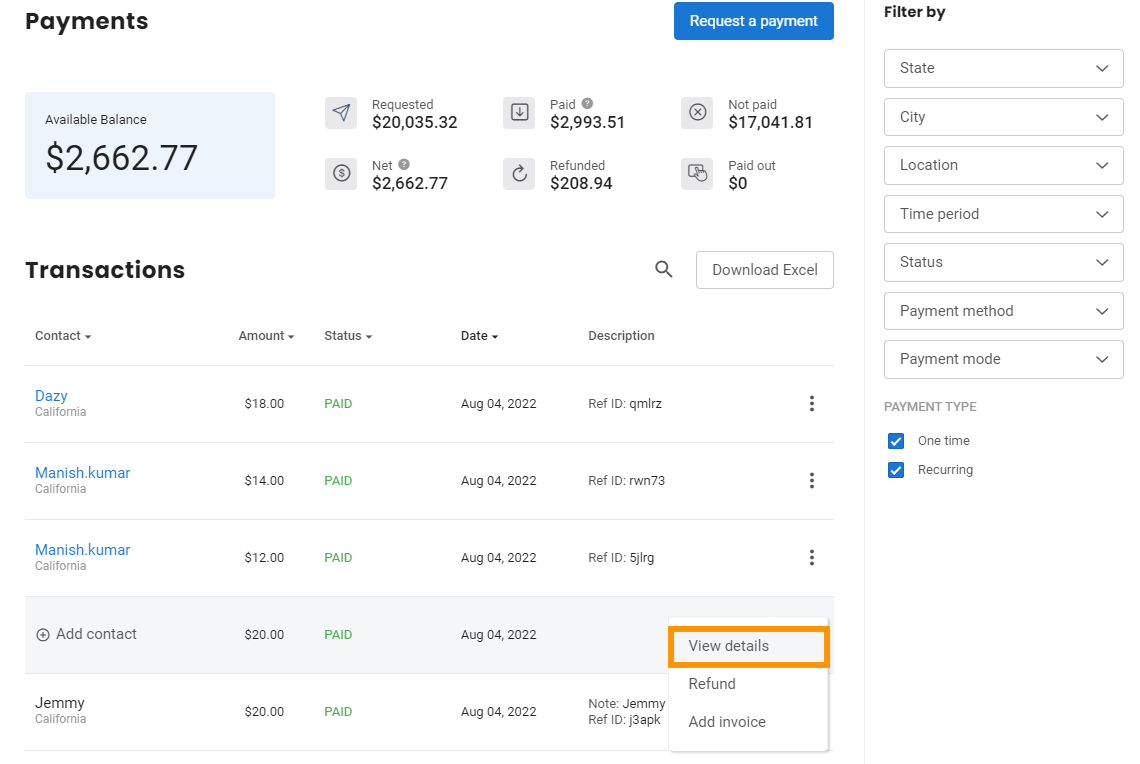 Here's how the details screen will appear.