How to enable features for your managed businesses through the reseller dashboard?
If you are a reseller registered with Birdeye, you have the flexibility to enable products/add-ons from the purchased products for managed businesses right from your dashboard.
CREATING SMB BUSINESS FROM RESELLER DASHBOARD
Step 1- Login to your Birdeye reseller account and go to the 'Businesses' tab on the left navigation rail. On the 'Businesses' page, click on the 'Add Business' button on the top right.
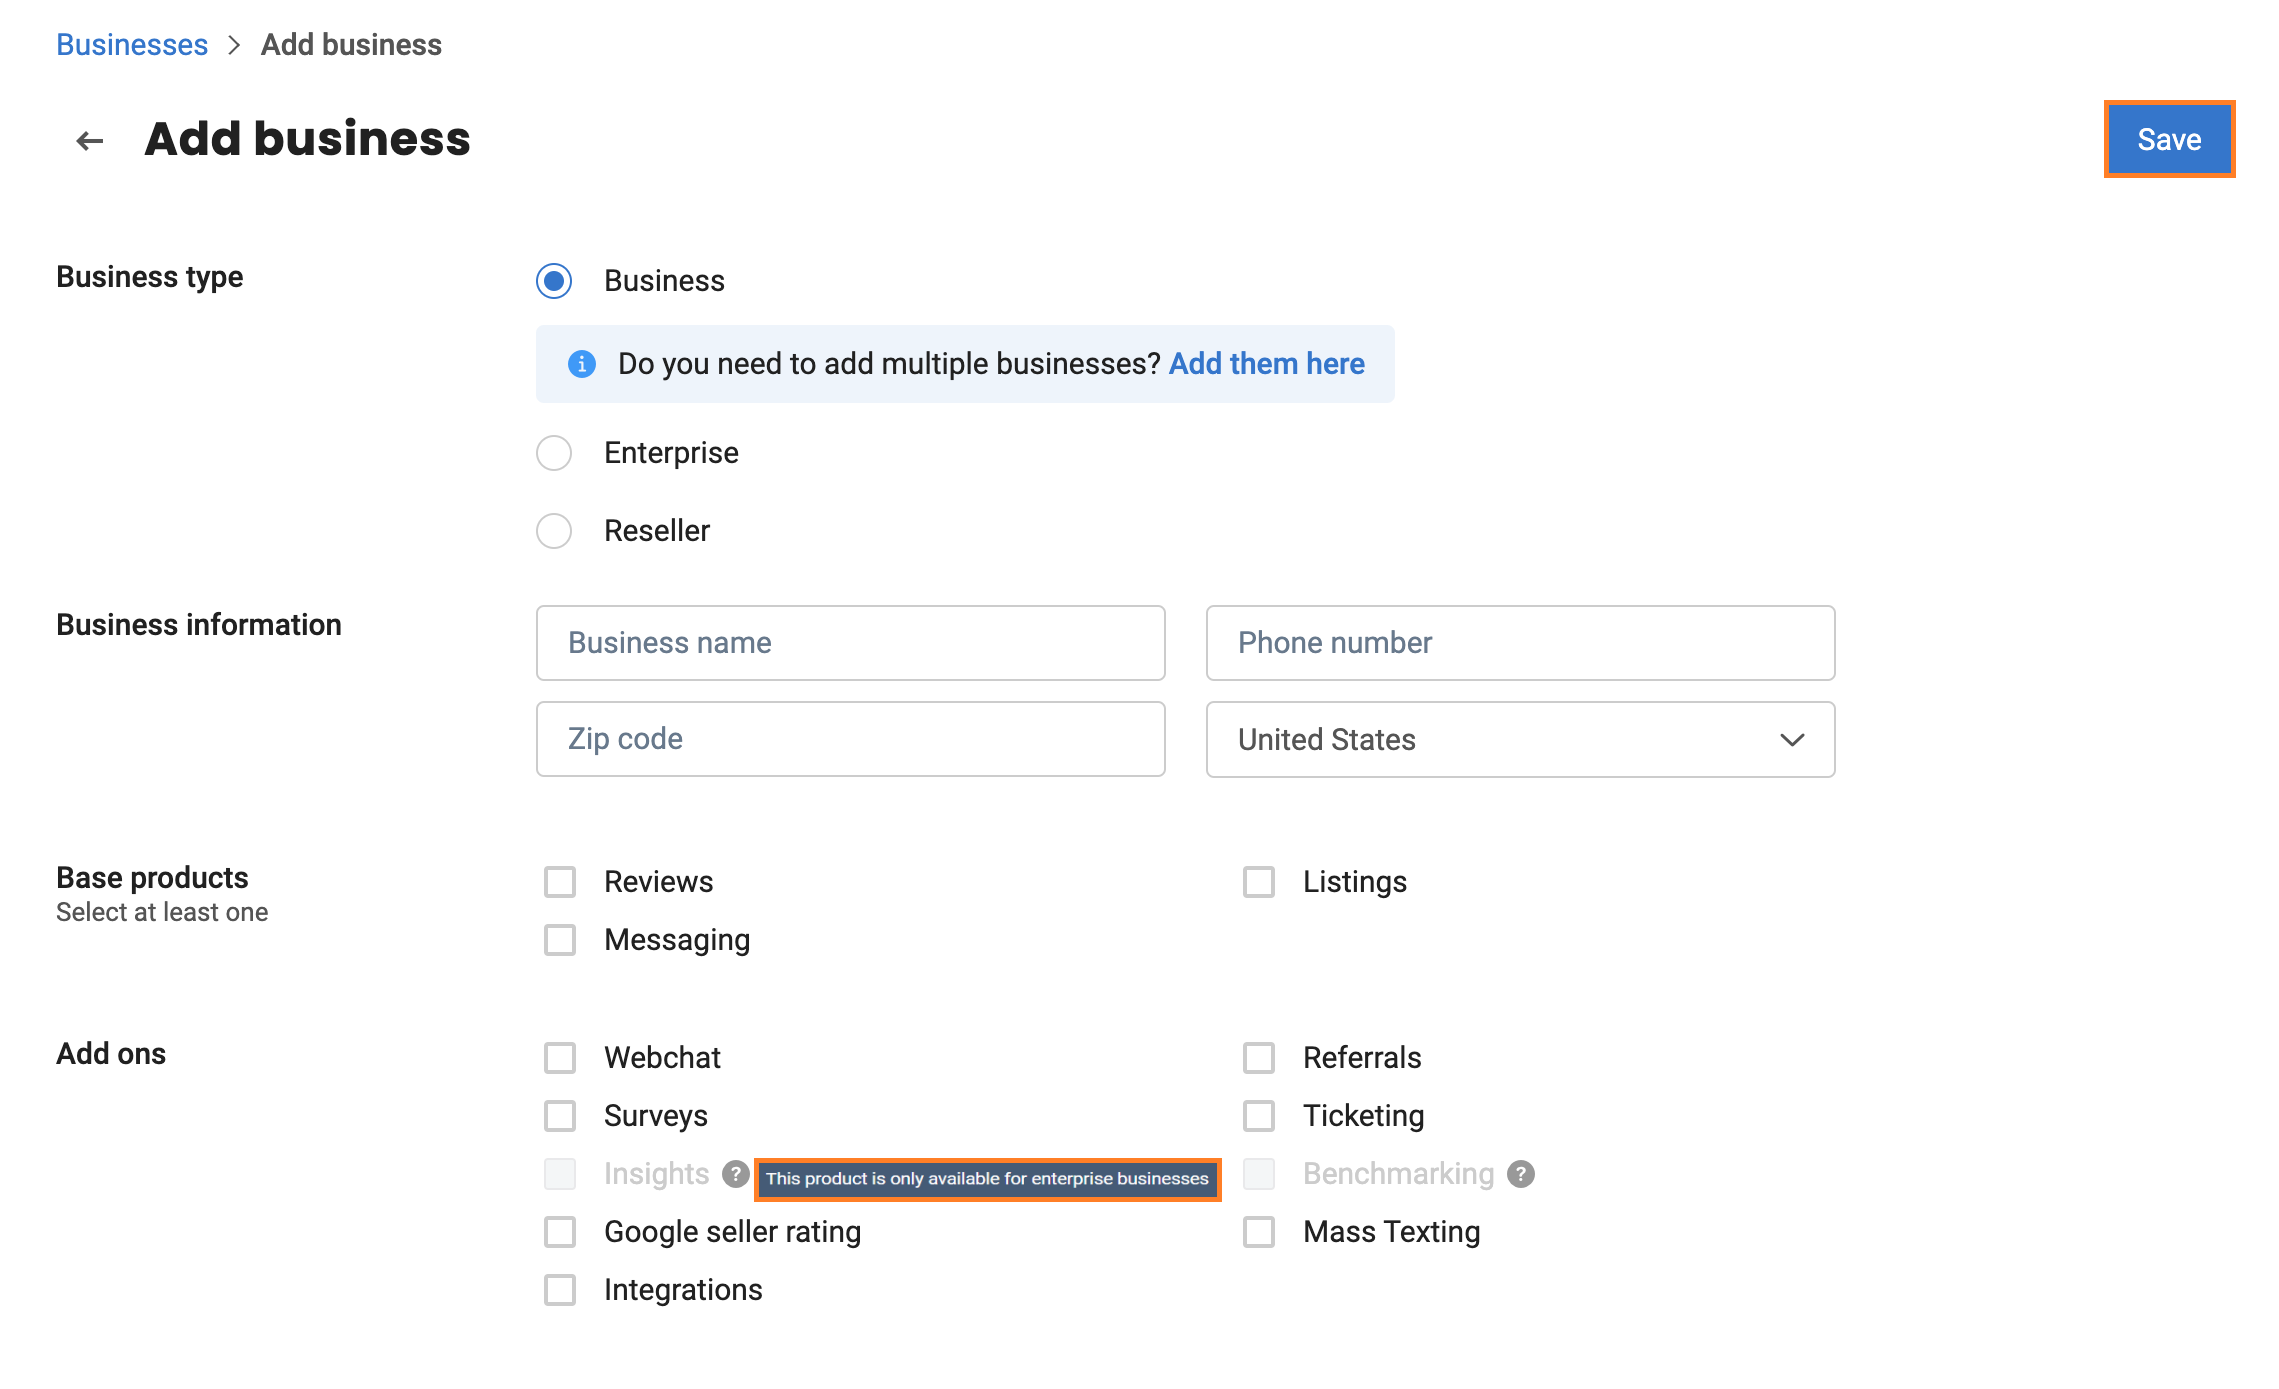
Step 2- Select ‘Business‘ from the ‘Business type’ menu to add either a single or a multi-location SMB account. Further, fill in the business information (shown below).
Step 3- Select the products you want to enable for the business. The add-ons list will show only the purchased features. Of all the add-ons, insights & Benchmarking are not SMB compatible (if purchased will be shown disabled for SMB).
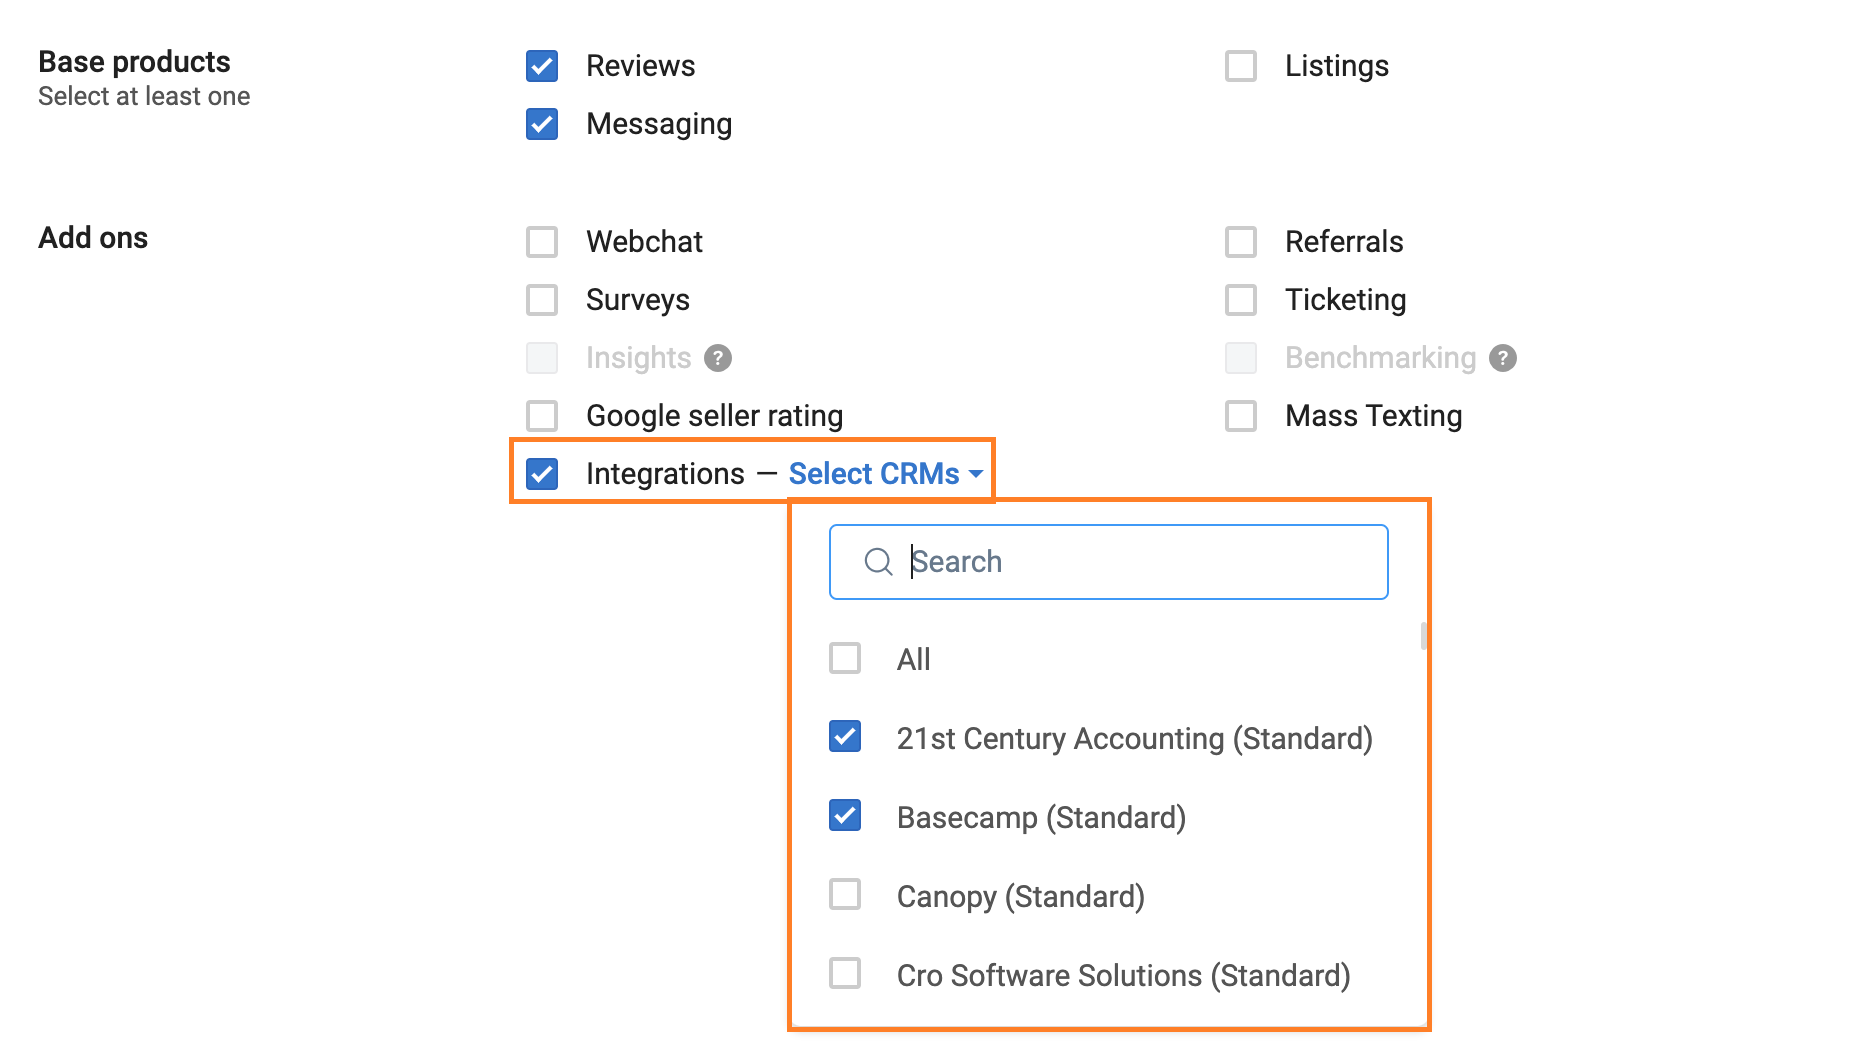
Step 4- Click on ‘Integrations’ in the ‘Products’ list to select the CRM of your choice. A drop-down will be shown next to CRM integrations. This dropdown will show the list of supported CRMs with the type mentioned next to it.
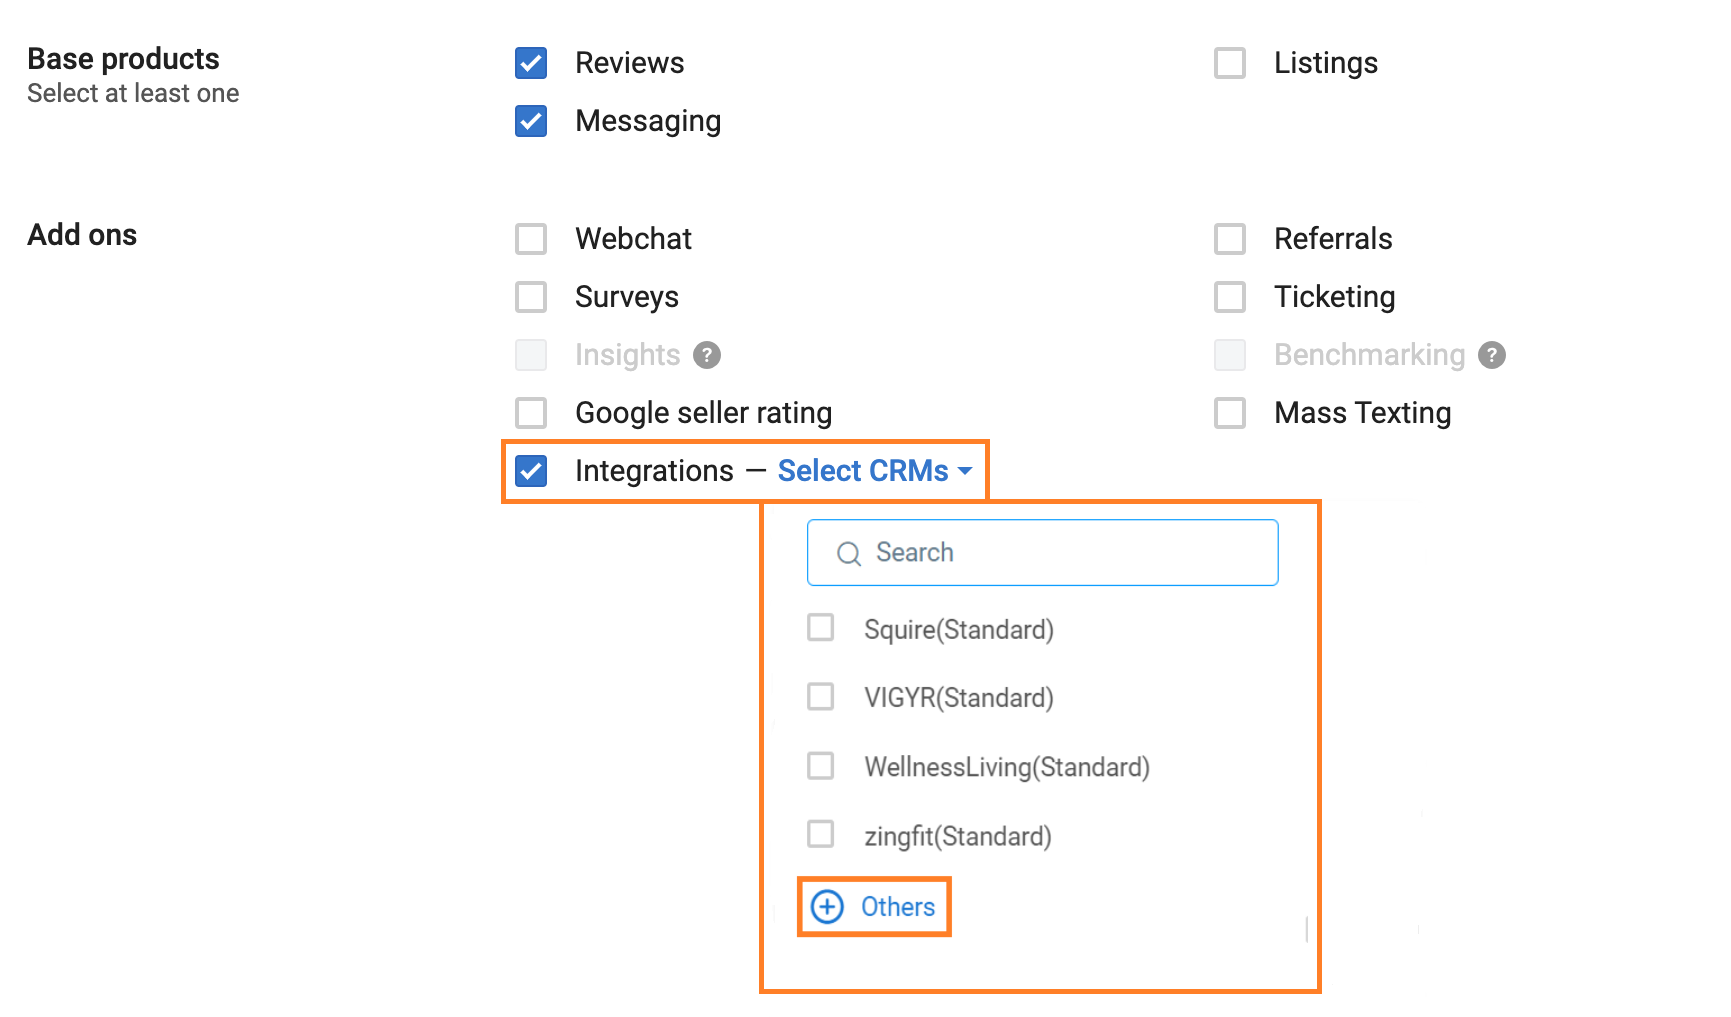
If your preferred CRM is not mentioned in the list, click on ‘Others’ and fill in the details to get the CRM enabled for your business.
Specify the CRM name in the dialog box and click on ‘Add’ to add the integration. Further click on ‘Save’ to save the changes.

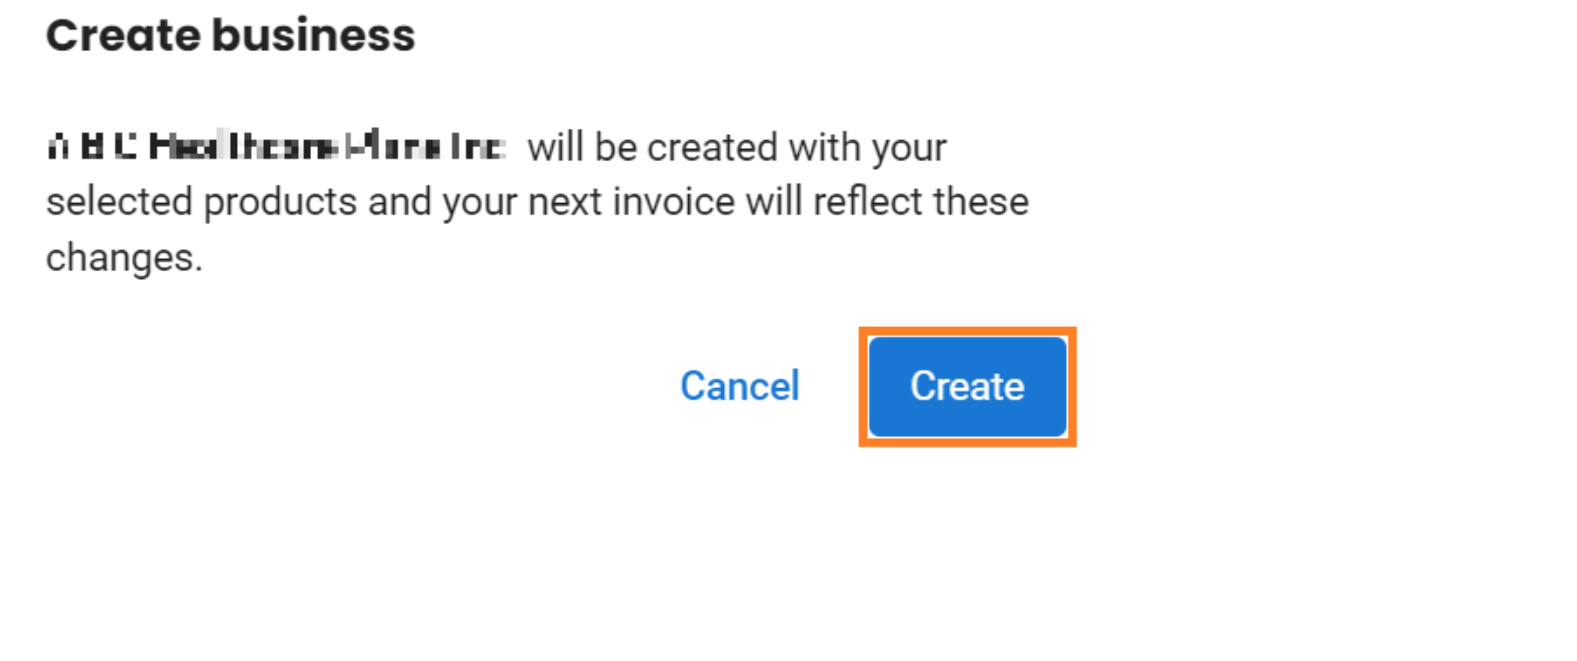
Step 5- Click the ‘Save’ button on the top right of the screen. Further, Click on ‘Create’ in the confirmation box to create the business.
CREATING ENTERPRISE BUSINESS FROM RESELLER DASHBOARD
Step 1- Login to your Birdeye reseller account and go to the 'Businesses' tab on the left navigation rail. On the 'Businesses' page, click on the 'Add Business' button on the top right.
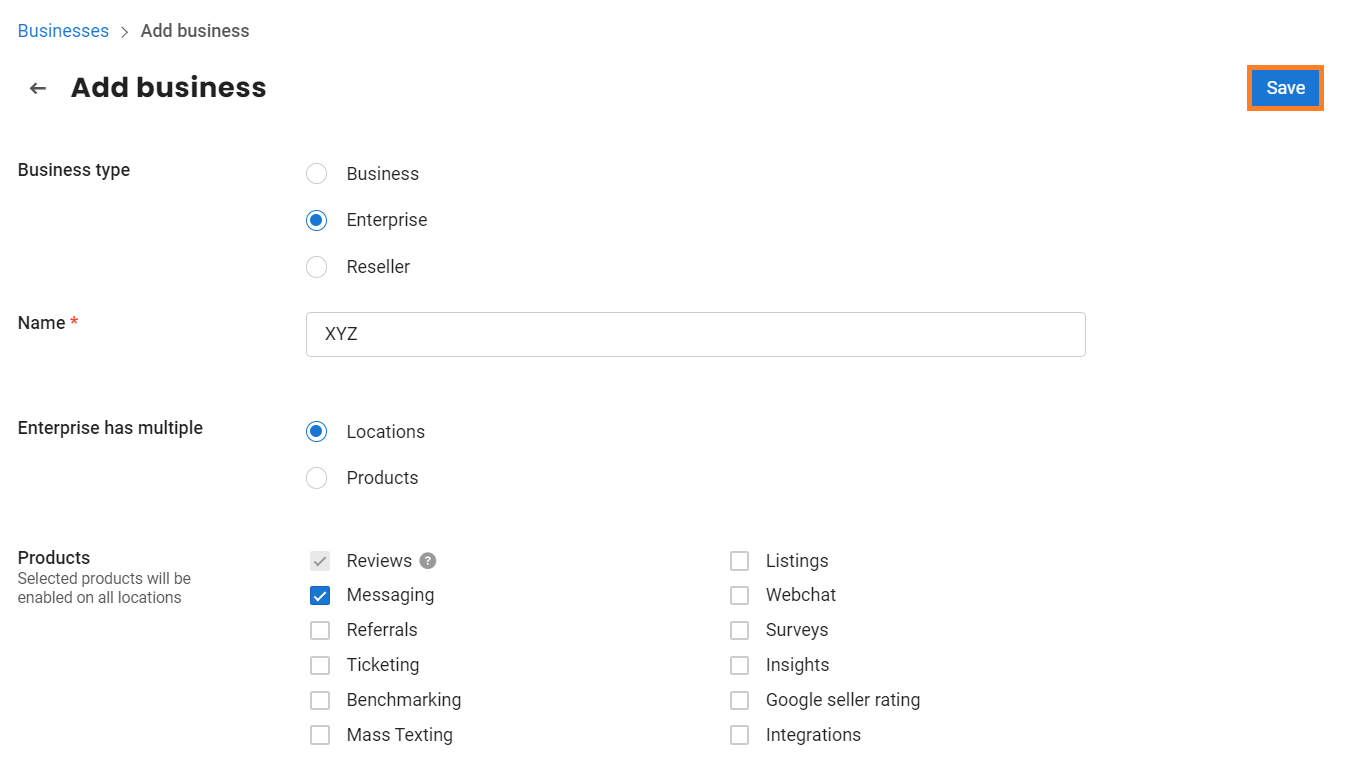
Step 2- Select ‘Enterprise‘ from the ‘Business type’ menu. Further, enter the name of the enterprise you want to create.
Step 3- Select whether the enterprise has multiple locations or products from the ‘Enterprise has multiple’ menu.
Step 4- Select the products you want to enable for the enterprise. All add-ons are supported for enterprise business. When an enterprise is added from the reseller dashboard, all the purchased add-ons will be shown in the products section.
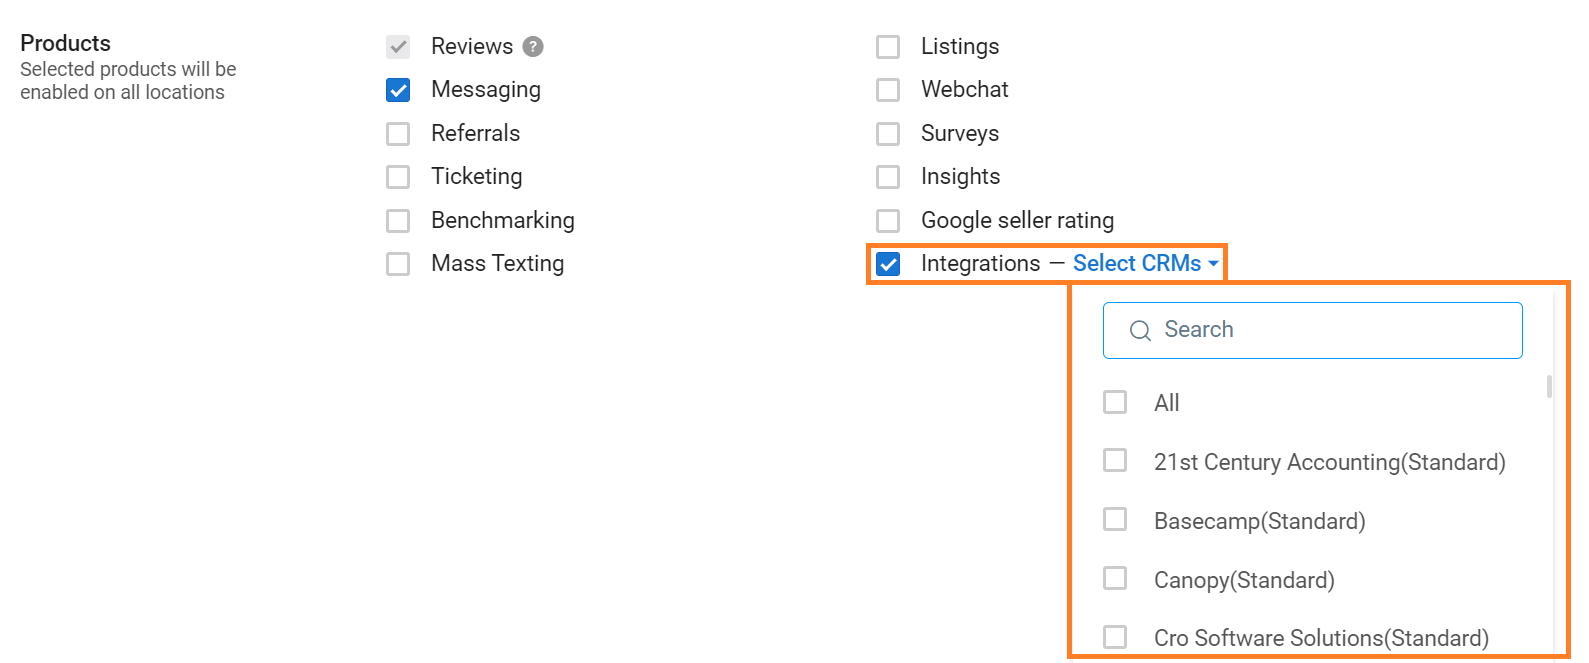
Step 5- Click on ‘Integrations’ in the ‘Products’ list to select the CRM of your choice. A drop-down will be shown next to CRM integrations. This dropdown will show the list of supported CRMs with the type mentioned next to it.
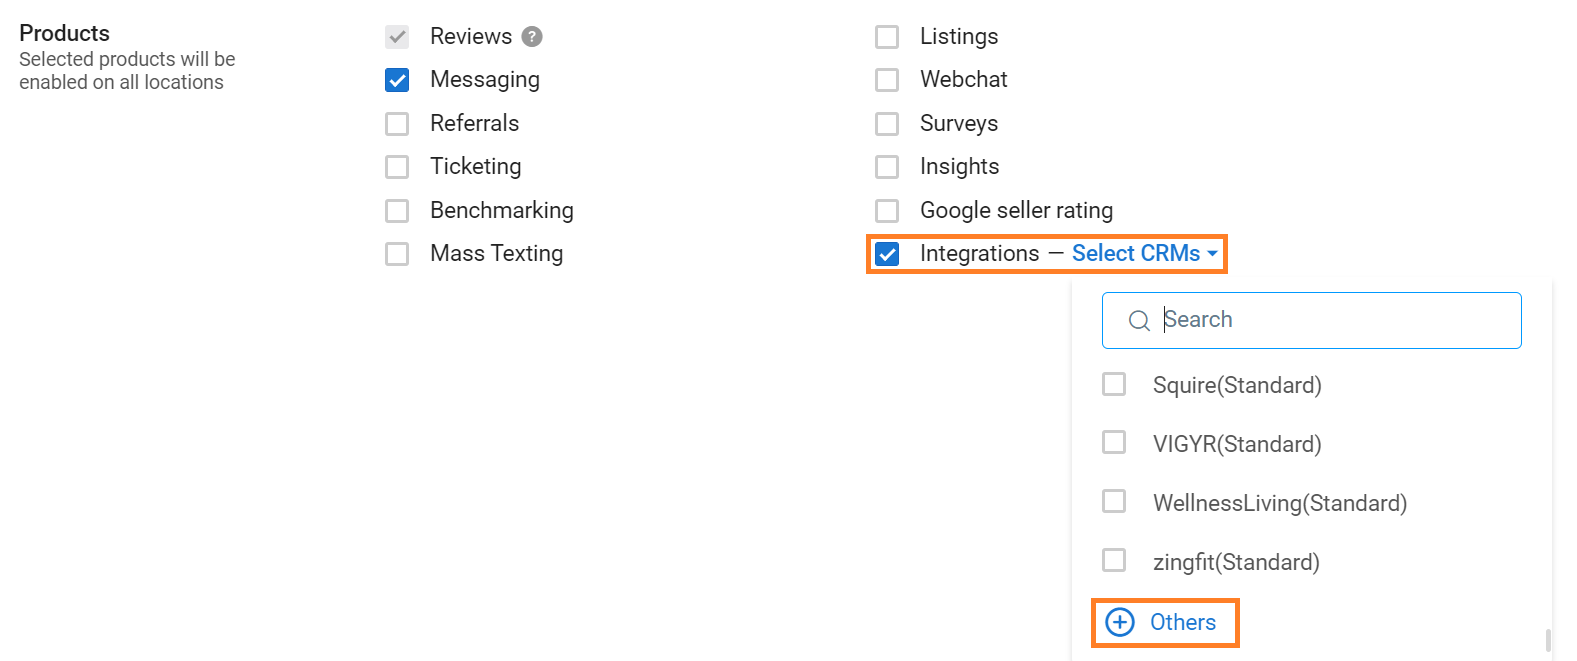
If your preferred CRM is not mentioned in the list, click on ‘Others’ and fill in the details to get the CRM enabled for your business.
Specify the CRM name in the dialog box and click on ‘Add’ to add the integration. Further click on ‘Save’ to save the changes.

Step 6- Click the ‘Save’ button on the top right of the screen. Further, Click on ‘Create’ in the confirmation box to create the enterprise.

To add a single or multiple SMB, Enterprise/multi-location, and Reseller accounts to your Birdeye account, refer to the help center article: How do I create an SMB, Enterprise, or Reseller account within my Birdeye reseller account?
CREATING SUB-RESELLERS FROM THE RESELLER DASHBOARD
Step 1- Login to your Birdeye reseller account and go to the 'Businesses' tab on the left navigation rail. On the 'Businesses' page, click on the 'Add Business' button on the top right.
Step 2- Select 'Reseller' from the ‘Business type’ menu. Further, enter the name of the enterprise you want to create.
Step 3- Click the ‘Save’ button on the top right of the screen to create a reseller.

MANAGING ADD-ONS AT THE RESELLER LEVEL
Resellers can track all the add-ons, how many they purchased, how many they have enabled/consumed, which businesses have which add-ons enabled, etc.
Product Usage
Step 1- Go to the 'Settings' tab on the left navigation rail of your Birdeye reseller account. In the 'Account' section, click on the 'Product Usage.'
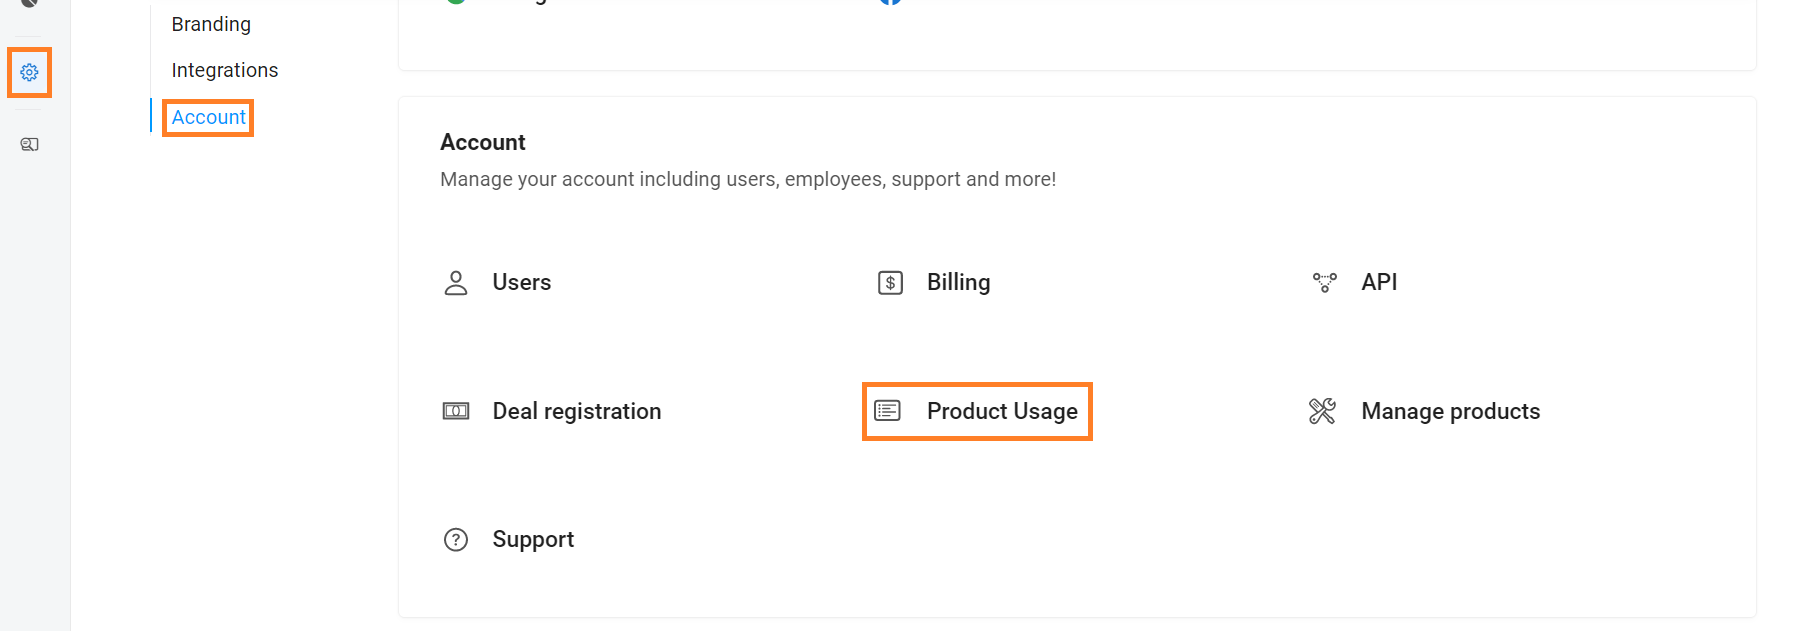
The ‘Product Usage’ page will show the product purchased vs. consumed quantity and also help the reseller to get the estimated cost for the next billing cycle.
This report will show the following data points
- Contracted → Minimum quantity as per the contract
- Enabled → No. of active products
- Charged → Quantity charged in the last invoice
- Available next month → Quantity to be charged next month
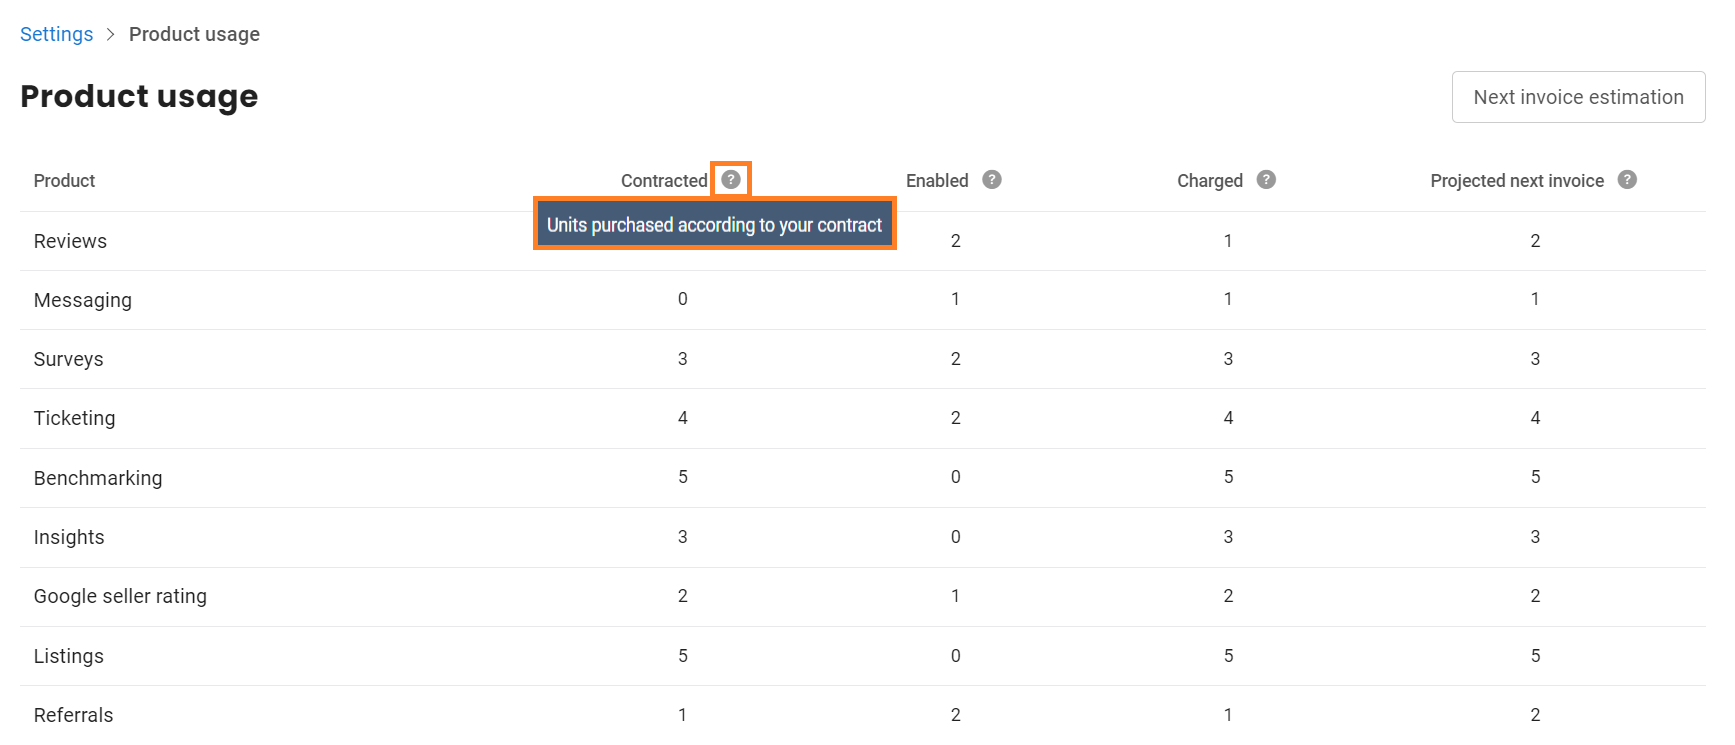
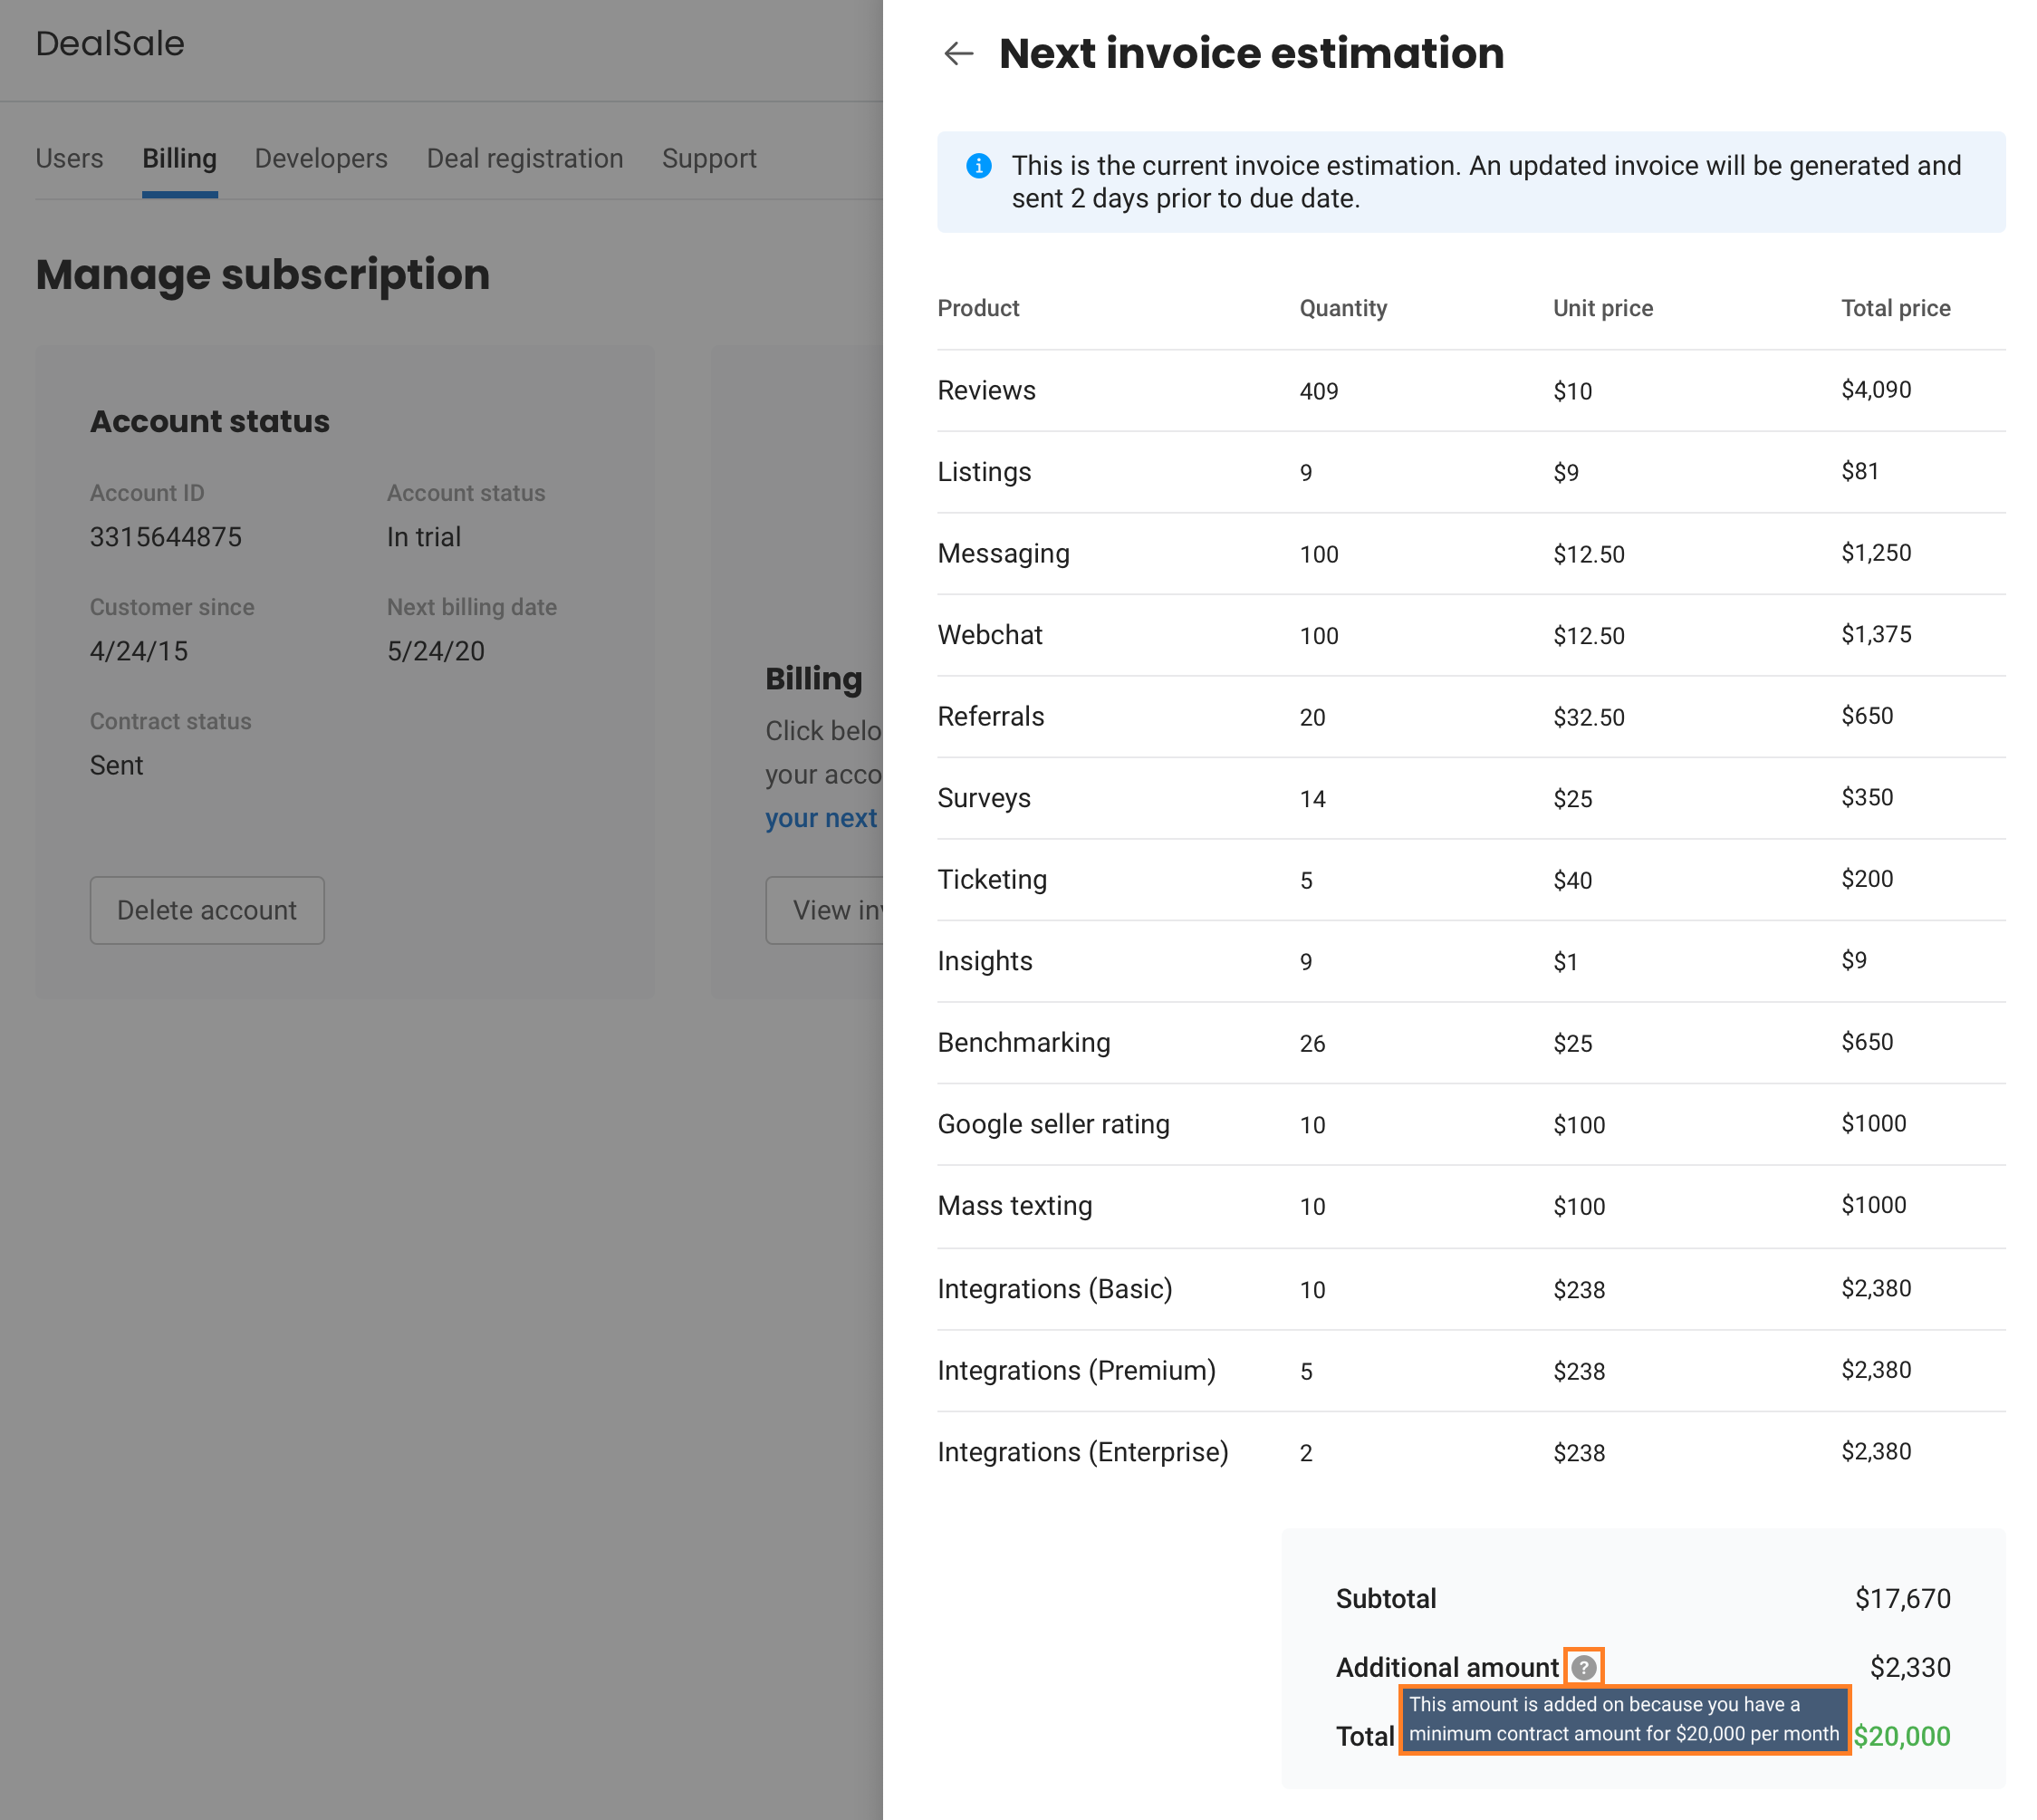
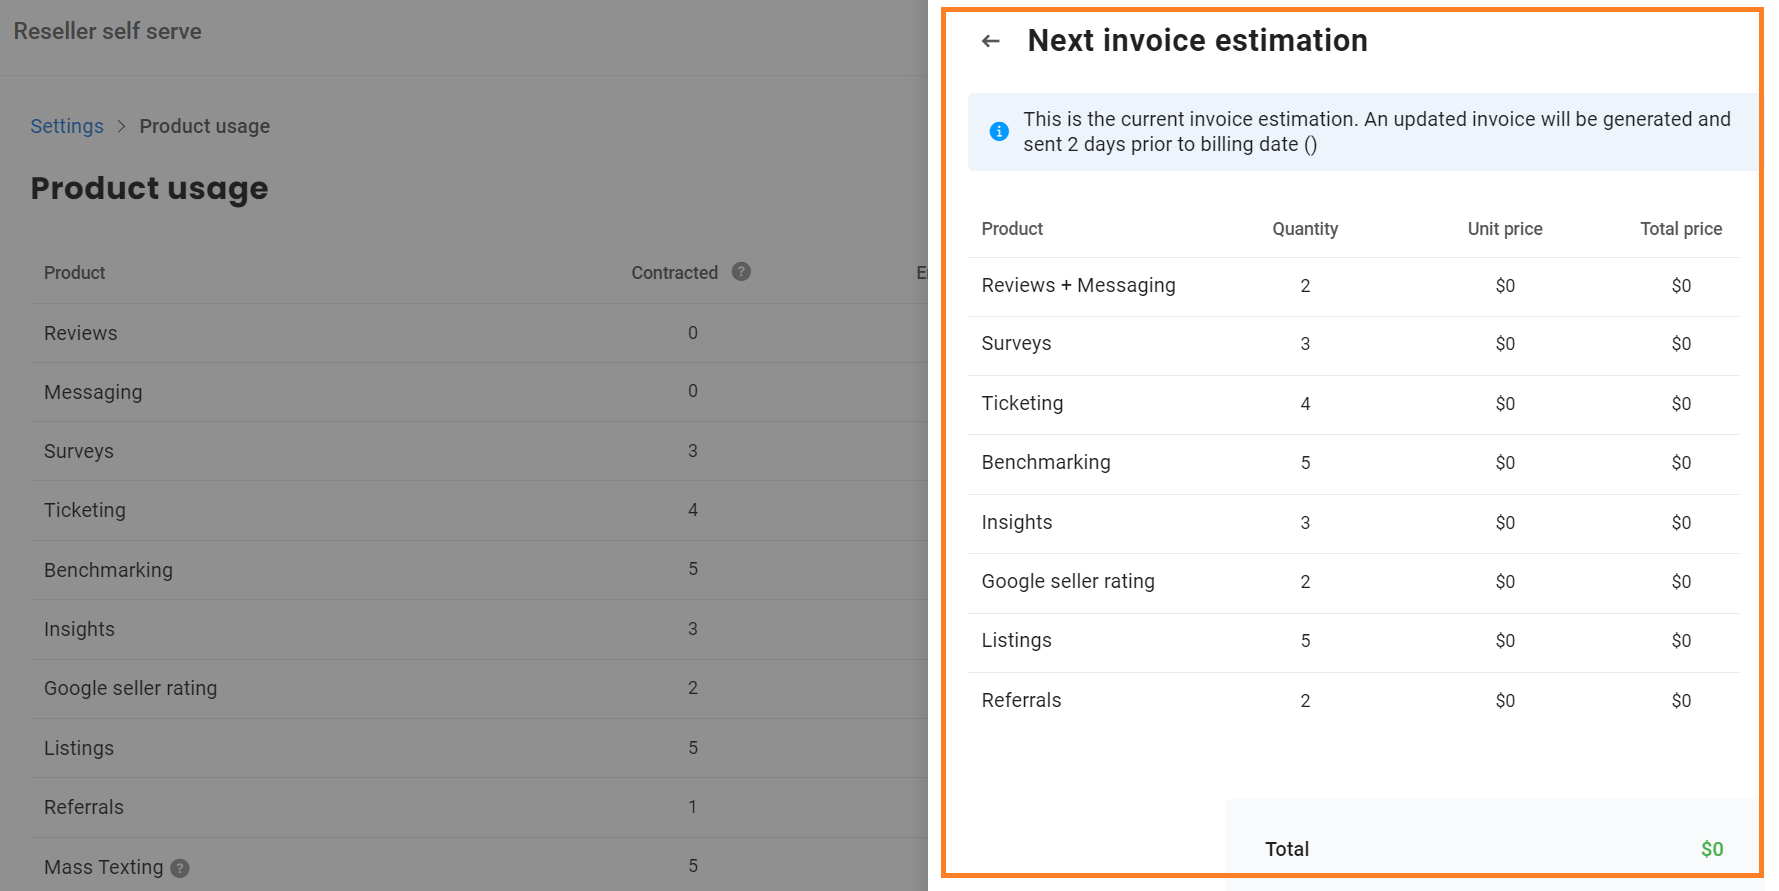
Step 2- To view the estimated billing amount for next month, click on ‘Next invoice estimation’ on the top right of the screen. The estimated billing amount is based on the highest quantity amongst the contracted quantity vs consumed quantity per product per unit.
Manage Products
Step 1- Go to the 'Settings' tab on the left navigation rail of your Birdeye reseller account. In the 'Account' section, click on 'Manage products.'
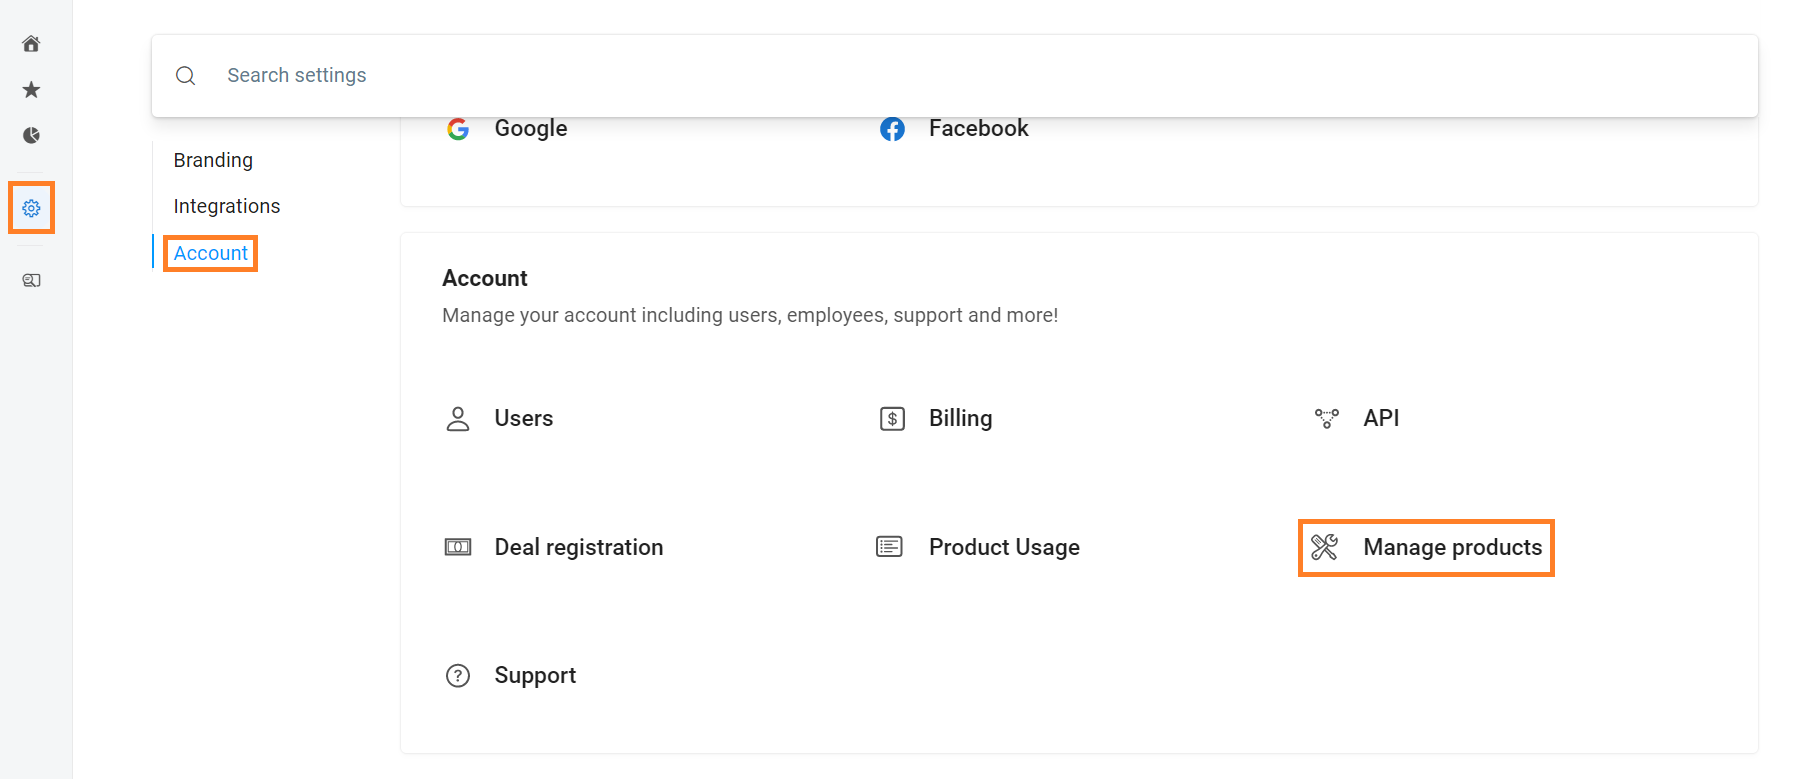
Step 2- The ‘Manage Products’ page will show the list of all businesses and the purchased products. The locations column will show the top-level direct businesses under that reseller (Sub-resellers or their businesses will not be shown).
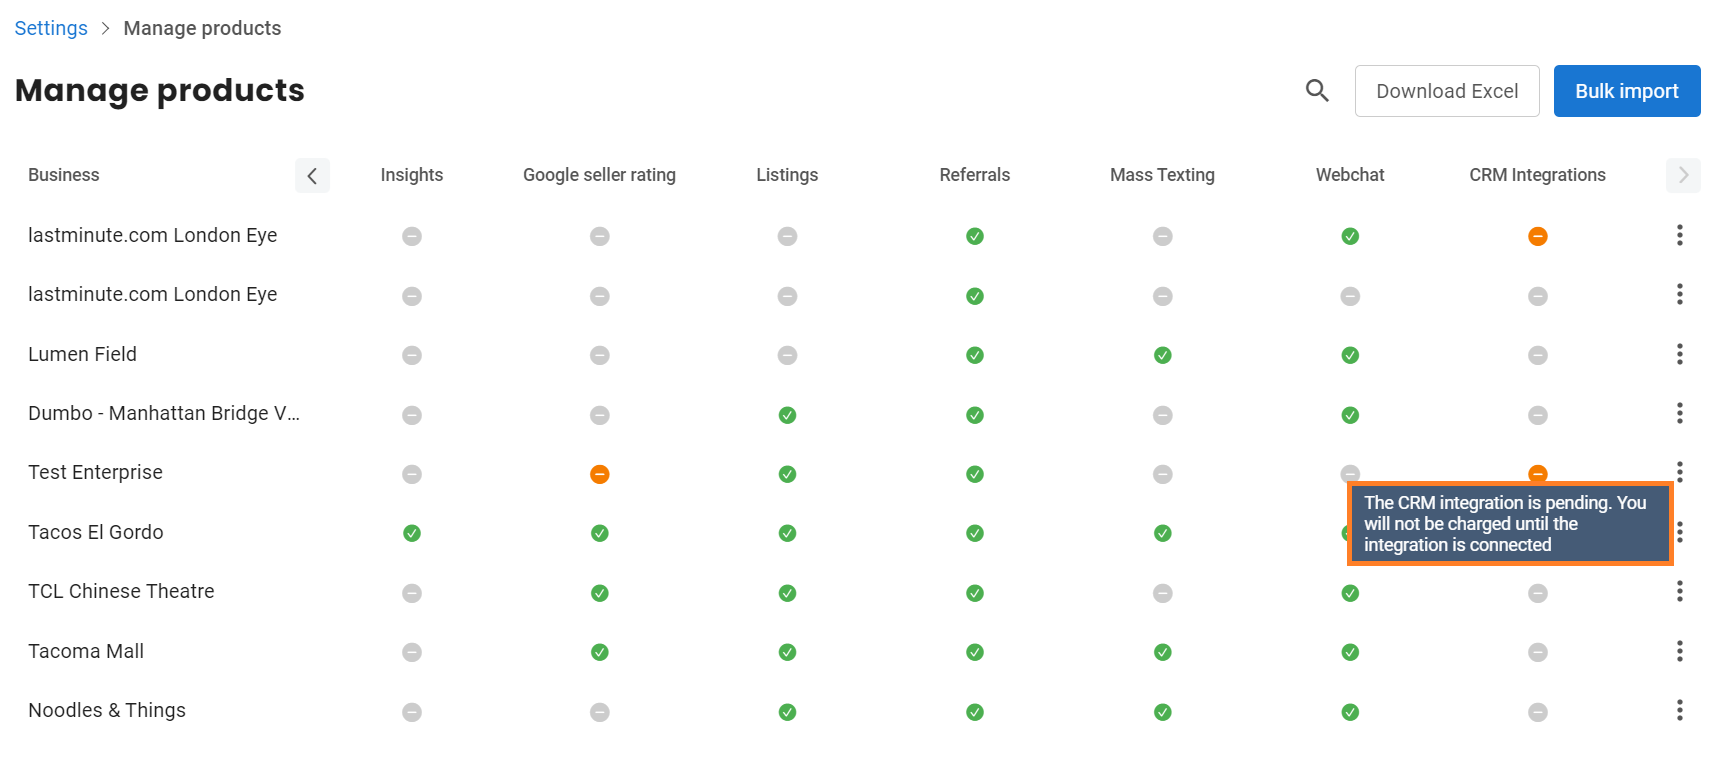
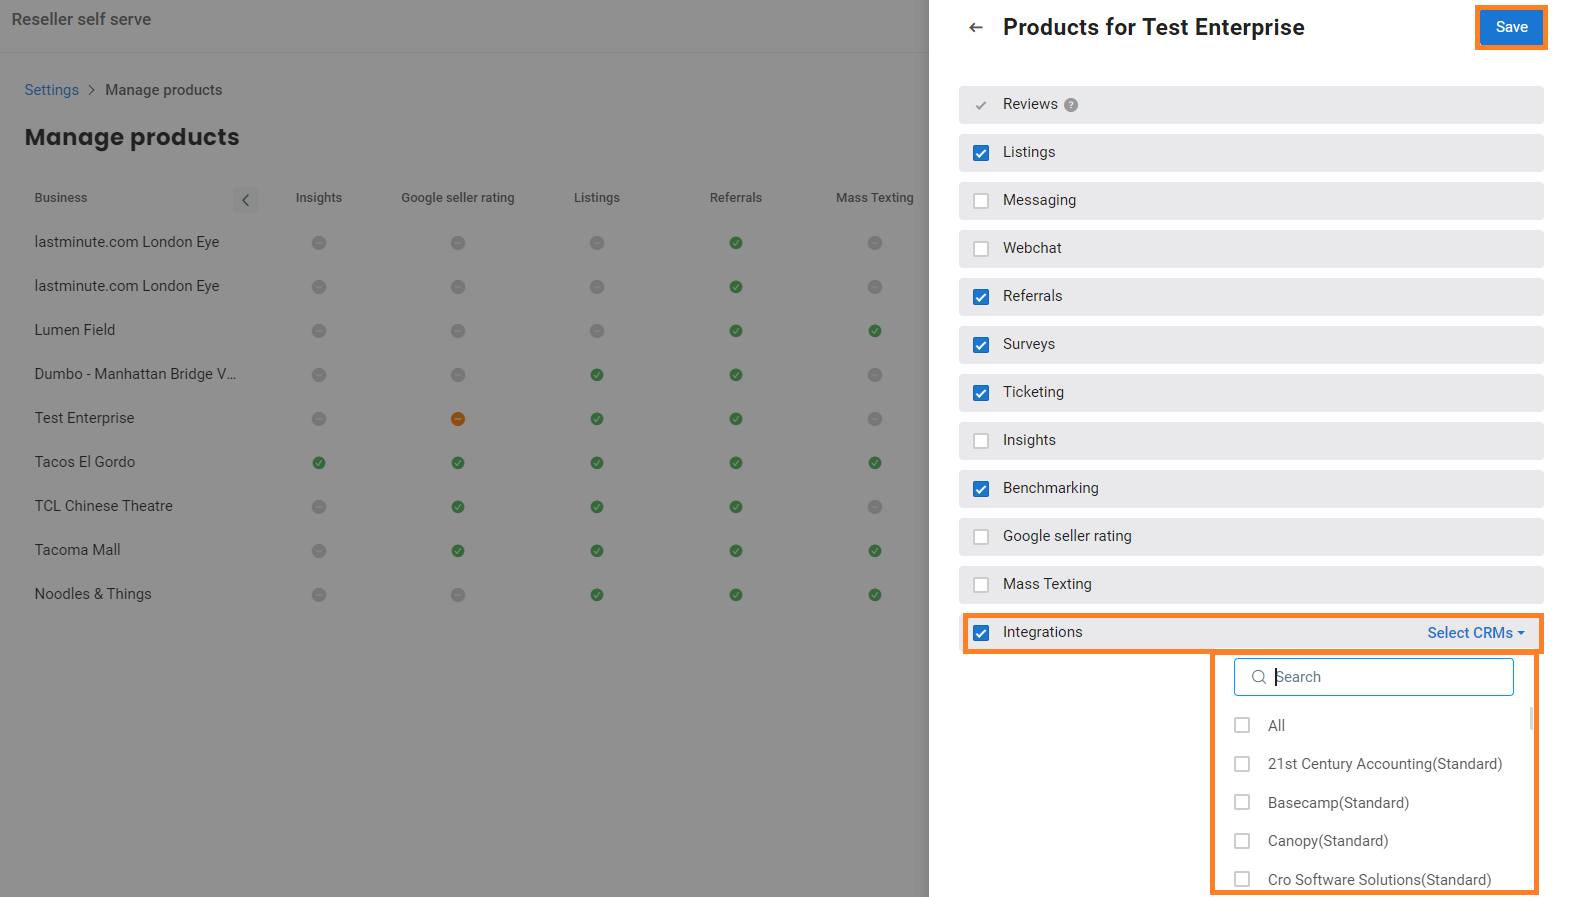
Step 3- Click the ‘Edit’ button to enable/disable any product for that particular row and update the product list.
When a reseller tries to enable a product, that will get enabled immediately. If the reseller attempts to disable a product, a case will be created for the CSM, and the reseller will be informed that the request to disable the product has been raised.
Step 4- Click the ‘Save’ button to save the changes.
In the case of Bulk Update,
Step 1- Click on the ‘Bulk import’ button on the right side of the ‘Manage products’ screen to update multiple businesses in one go.
Step 2- On the ‘Bulk import products’ page, click on ‘sample spreadsheet’ to download a sample spreadsheet to start your import quickly.
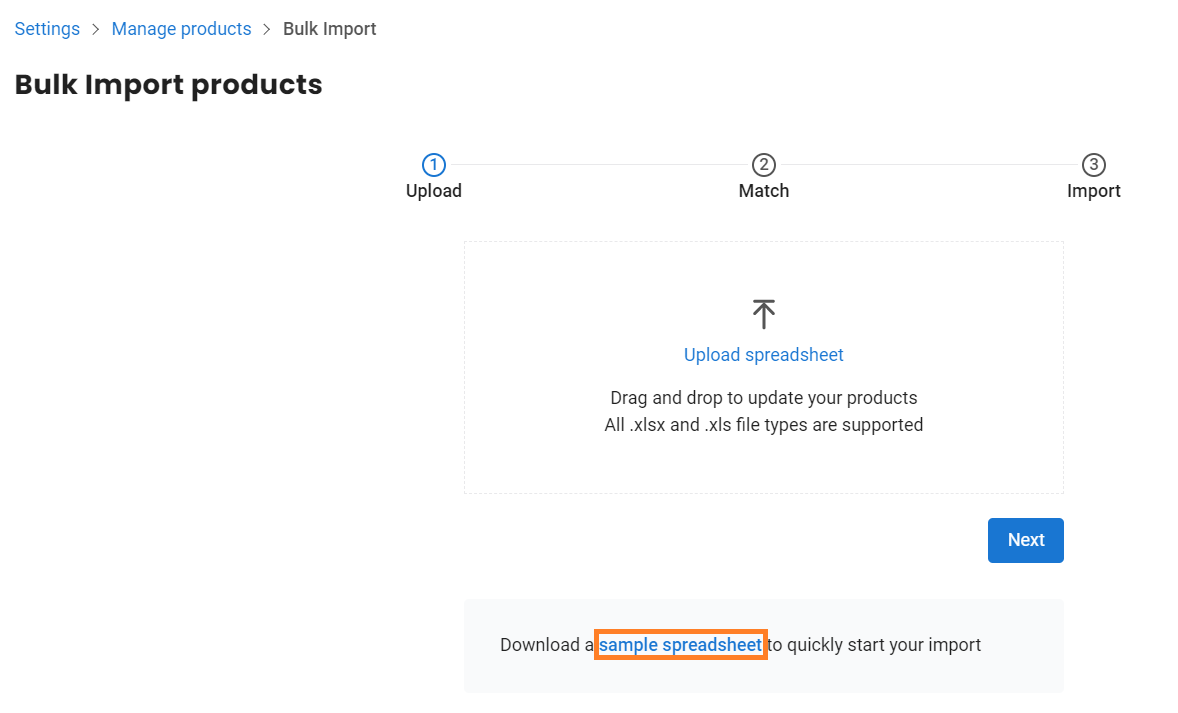
The download sheet will have all the fields available in the upload sheet + the business name.

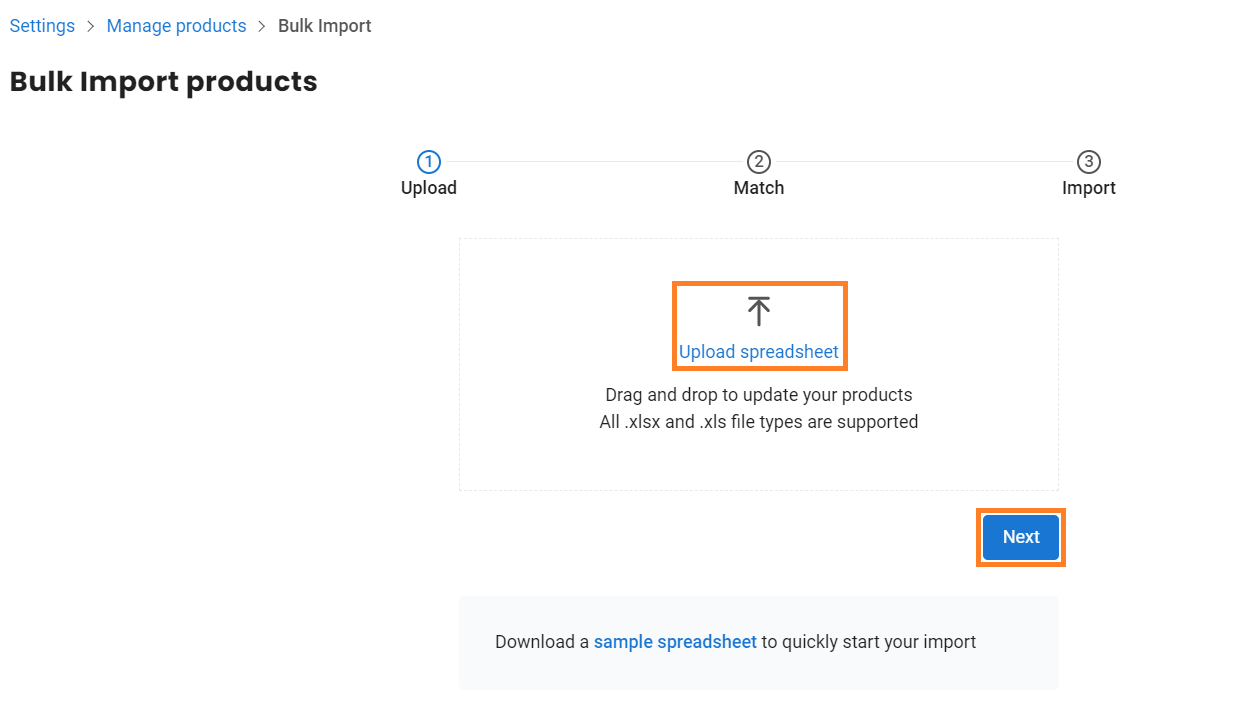
Once you have added information for all the fields, save and upload the Excel sheet by clicking the 'Upload spreadsheet' button on the 'Bulk imports products' page. Further, click on ‘Next’ to complete the import.
VIEW BILLING SCREEN
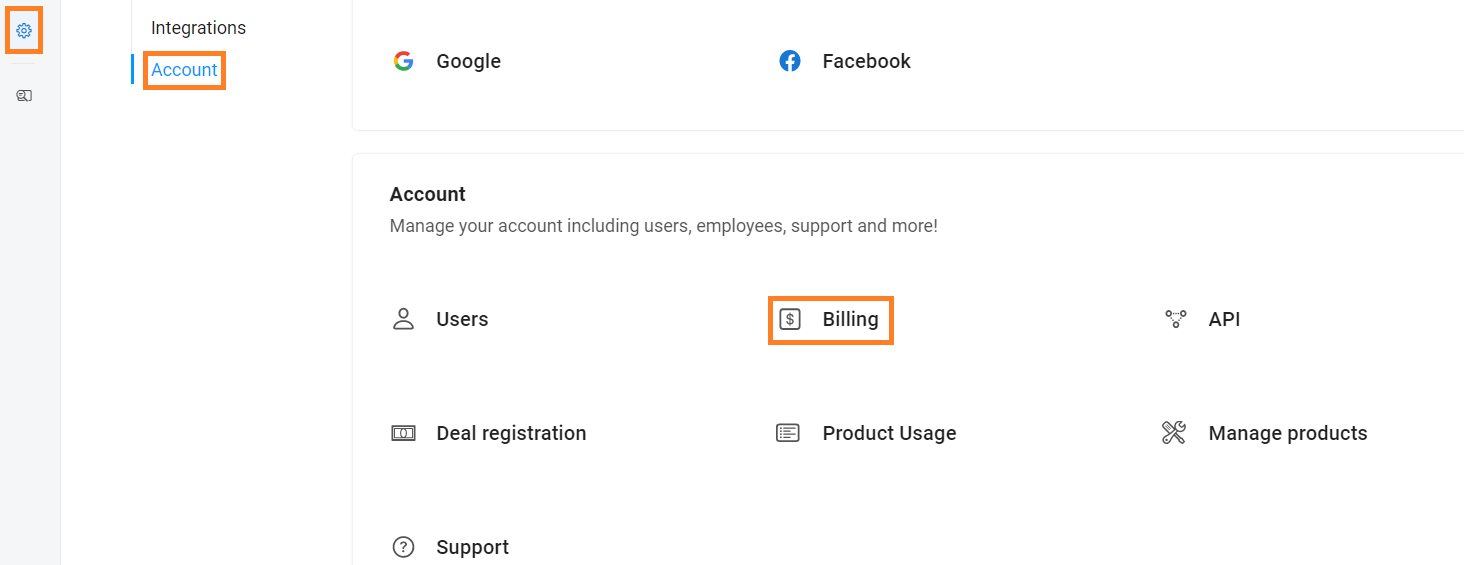
Step 1- Go to the 'Settings' tab on the left navigation rail of your Birdeye reseller account. In the 'Account' section, click on the 'Billing.'
Step 2- Click on ‘view the estimation of your next invoice’ to view the next estimated invoice. Likewise, click on the ‘View invoice history’ button to view the last month’s invoice.
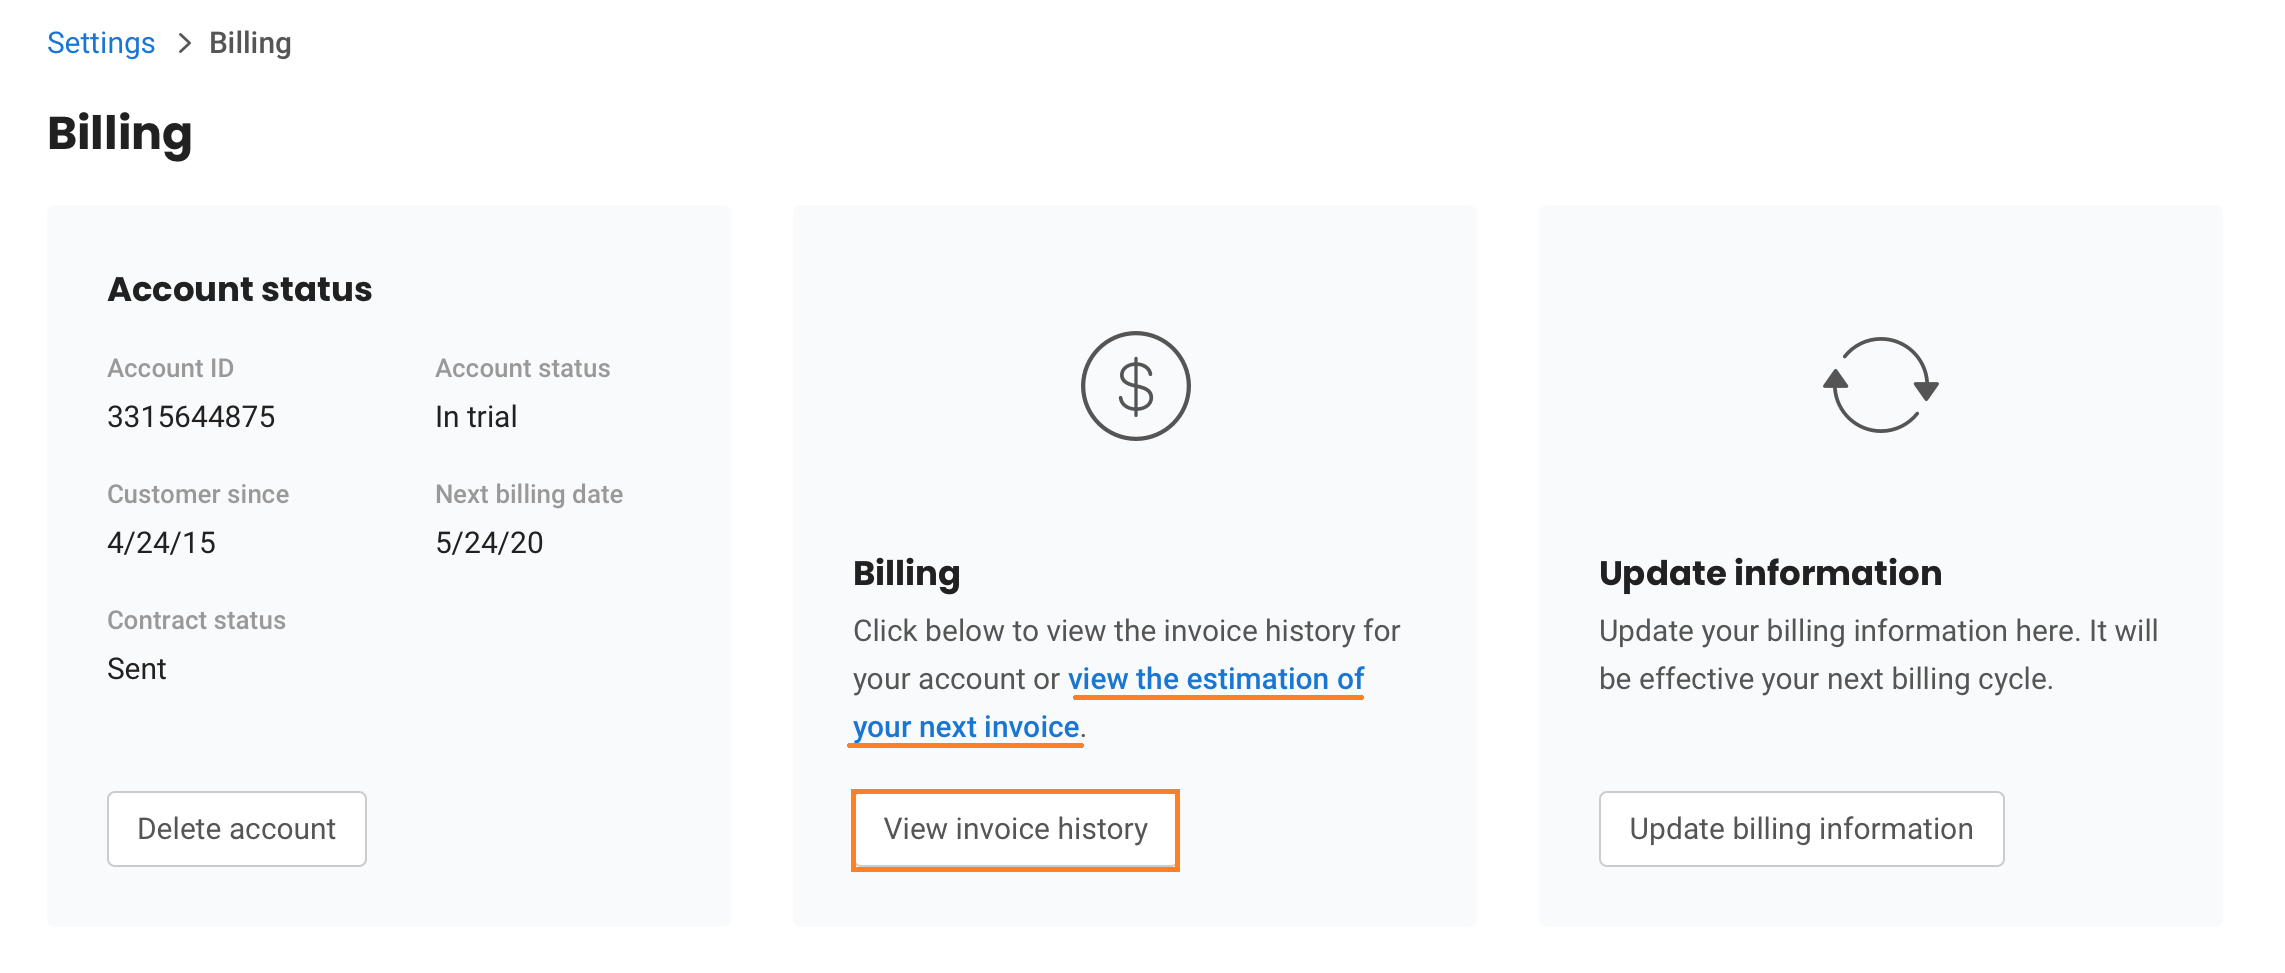
The ‘view the estimation of your next invoice’ will show the estimations in a drawer. Hovering over the question mark will show you the reason for the additional charge.
