How to set up and use location-specific custom field tokens?
Create, manage, or delete location-specific custom tokens per your business needs. Leverage custom tokens in social and campaign templates. Personalize your campaigns and social posts to ensure higher social engagement and improved campaign conversions.
Set up Custom Tokens
Under the ‘Settings’ tab, click ‘Business.’

Click the three vertical dots option and select ‘Manage custom fields.’

Click ‘Create custom field.’

Enter the ‘Custom field name’ (mandatory) in the first field. Enter the ‘Description’ in the second field (optional). Click the dropdown button and select the ‘Type’ from the dropdown options. It can be used as a ‘Number,’ ‘Text,’ ‘URL,’ ‘Dropdown - single select,’ and ‘Dropdown - multi select.’

Since the token being created focuses on the website link, select 'URL' as the token type. Enter the value under the ‘Default Value’ section where you want to redirect users. By default, ‘Use as a filter’ will be selected. It enables you to use the field as a filter for your entity data. Click ‘Create’ to save the custom field.

Once you create, you will view a notification at the top with the custom field details mentioned below.

Hover over the ‘Three vertical dots’ to ‘Edit or Delete’ the token.

Dropdown – Single Select vs Multi Select
When creating a custom field in Birdeye, you can choose from different field types. Two of the most powerful options are Dropdown – single select and Dropdown – multi select. These are especially useful when you want users to select from a list of predefined values, ensuring consistency in data collection, filtering, and integrations.

Single Select
Use Single Select when only one value should be chosen from the list. This is ideal for cases like:
- Choosing a preferred integration source, e.g., Salesforce, HubSpot, or None.
- Selecting a region or department where only one option is valid.
- Setting a status such as Active, Inactive, or Pending.
This ensures clean, mutually exclusive data that can be used reliably for reporting, filtering, or integrations.

Multi Select
Use Multi Select when multiple values need to be selected from the list. This is ideal for:
- Selecting multiple platforms a business uses, such as Instagram, LinkedIn, and TikTok.
- Assigning multiple service categories or locations to a listing.
- Capturing multiple tags or options relevant to the record.
This allows for greater flexibility and is useful in cases where more than one attribute can apply.

Once you create single and multi-select custom fields, you can view these in the ‘Business profile’ page under the ‘Custom fields’ section.

Single select example. You can select only one option.

Multi-select example. You can select ‘All’ or ‘Multiple options.’

Use Cases
A business integrating with Salesforce can use a single select custom field to define the data source, and another field (such as a unique identifier like Salesforce Contact ID) to map the record.
You may use multi-select fields to filter reviews or locations based on multiple associated attributes, such as ‘Preferred social sites’ or ‘Marketing campaigns’.
Custom fields configured this way streamline data organization, enable richer filters in reporting, and help maintain integration consistency.
NOTE:
Businesses can create up to 50 custom tokens.
Custom Fields Under Location
Customize values for each location.
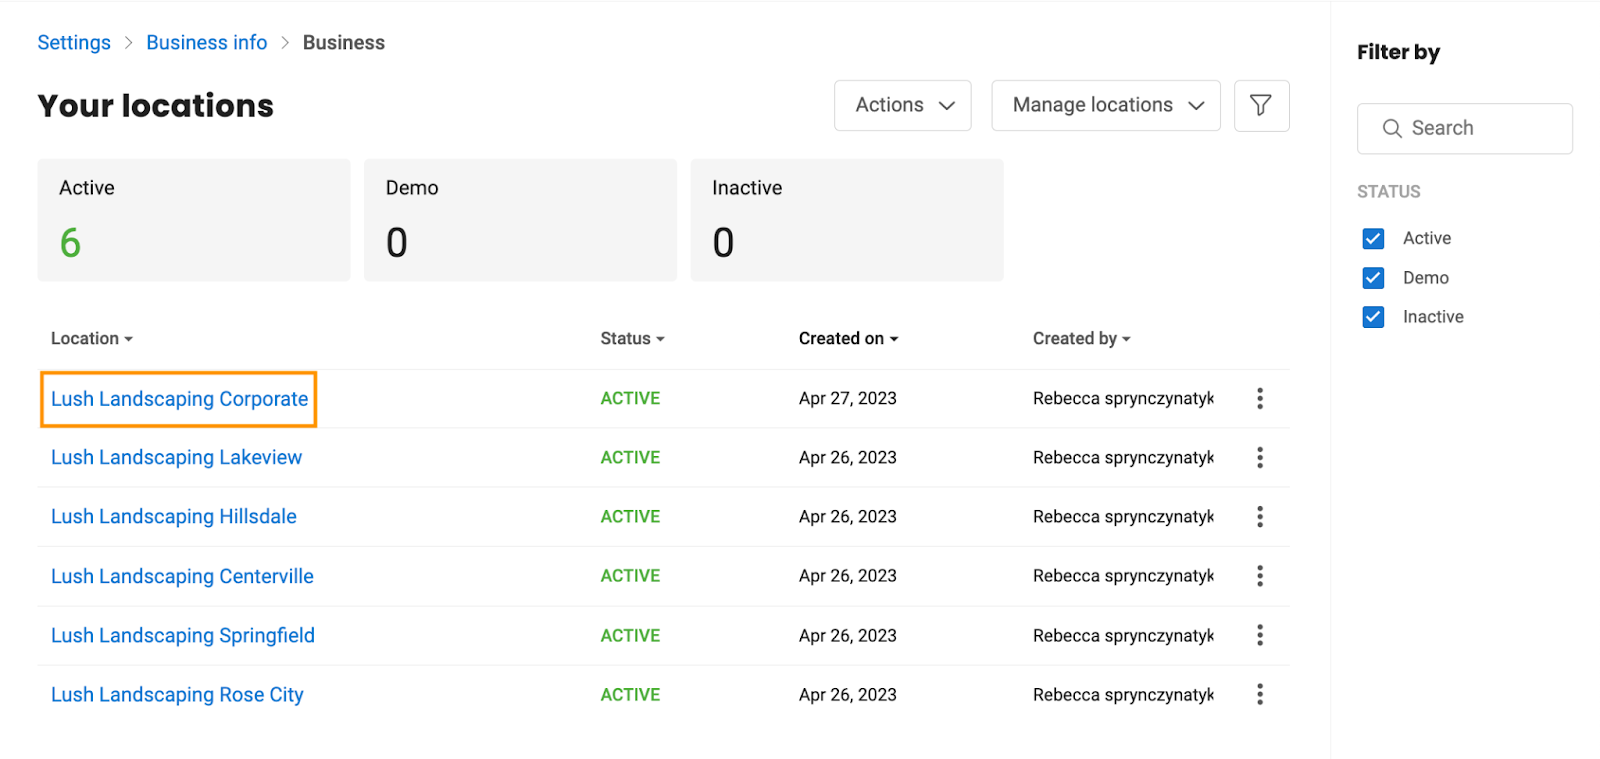
Go to the ‘Business’ page and select a ‘Location’ for which you want to customize values.
Scroll down to the end of the ‘Business profile’ page to view the ‘Custom fields’ section. Click the ‘Edit’ button, portrayed as a pencil icon, to customize the value for this particular location.

For instance, if you're creating a social media post for all locations and want to target every location with the same link except for one with its unique website landing page, you can tailor the content accordingly. Suppose you want to focus on customers from this location landing on the services page. You can customize the link for this location to direct specifically to the services page. When the post is published, the target audience for this particular location will receive the customized link, ensuring they land on the intended page, while the rest of your customers from other locations will receive a link used initially to create the custom token. Once done, click ‘Save.’

NOTE:
You can customize values for all or particular locations.
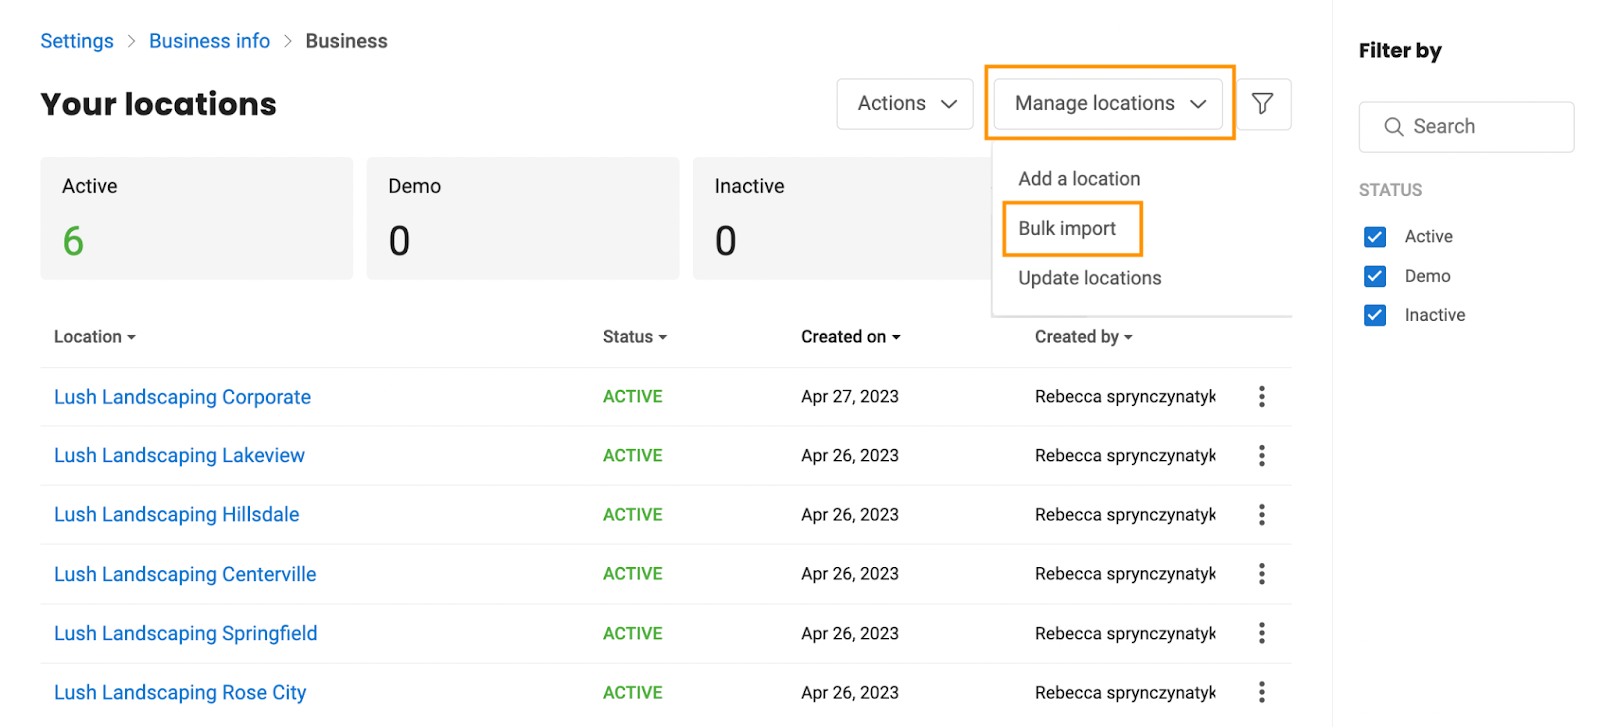
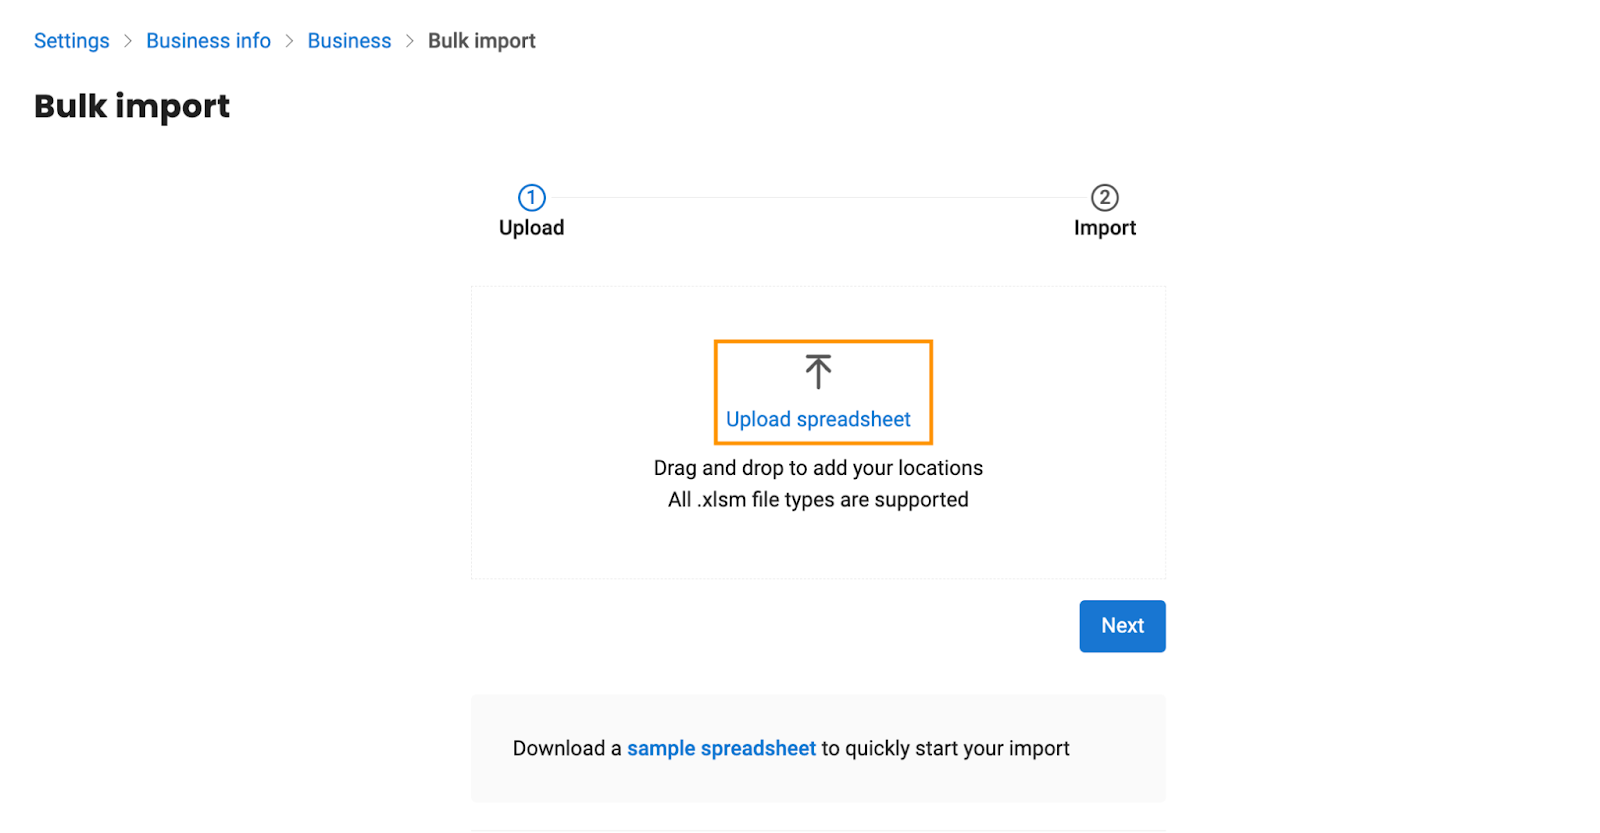
If you’re an enterprise user with bulk locations and want to customize values for a majority or every location, go to the ‘Business’ page, click ‘Manage locations,’ and select ‘Bulk import.’
Download a sample spreadsheet by clicking on ‘Sample spreadsheet.’
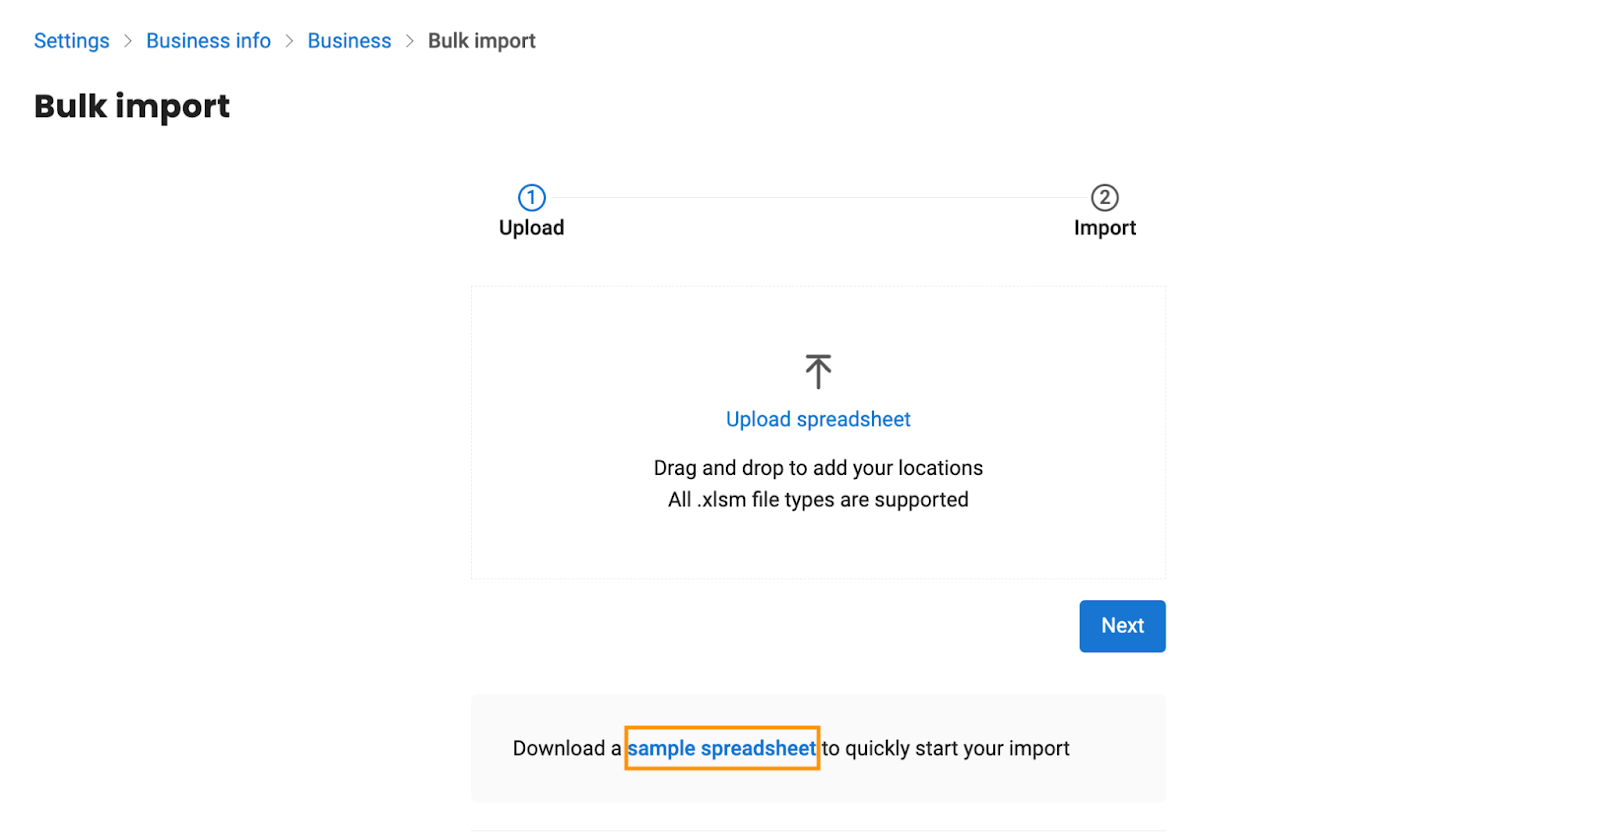
When you open the sheet, it appears as shown in the image below.
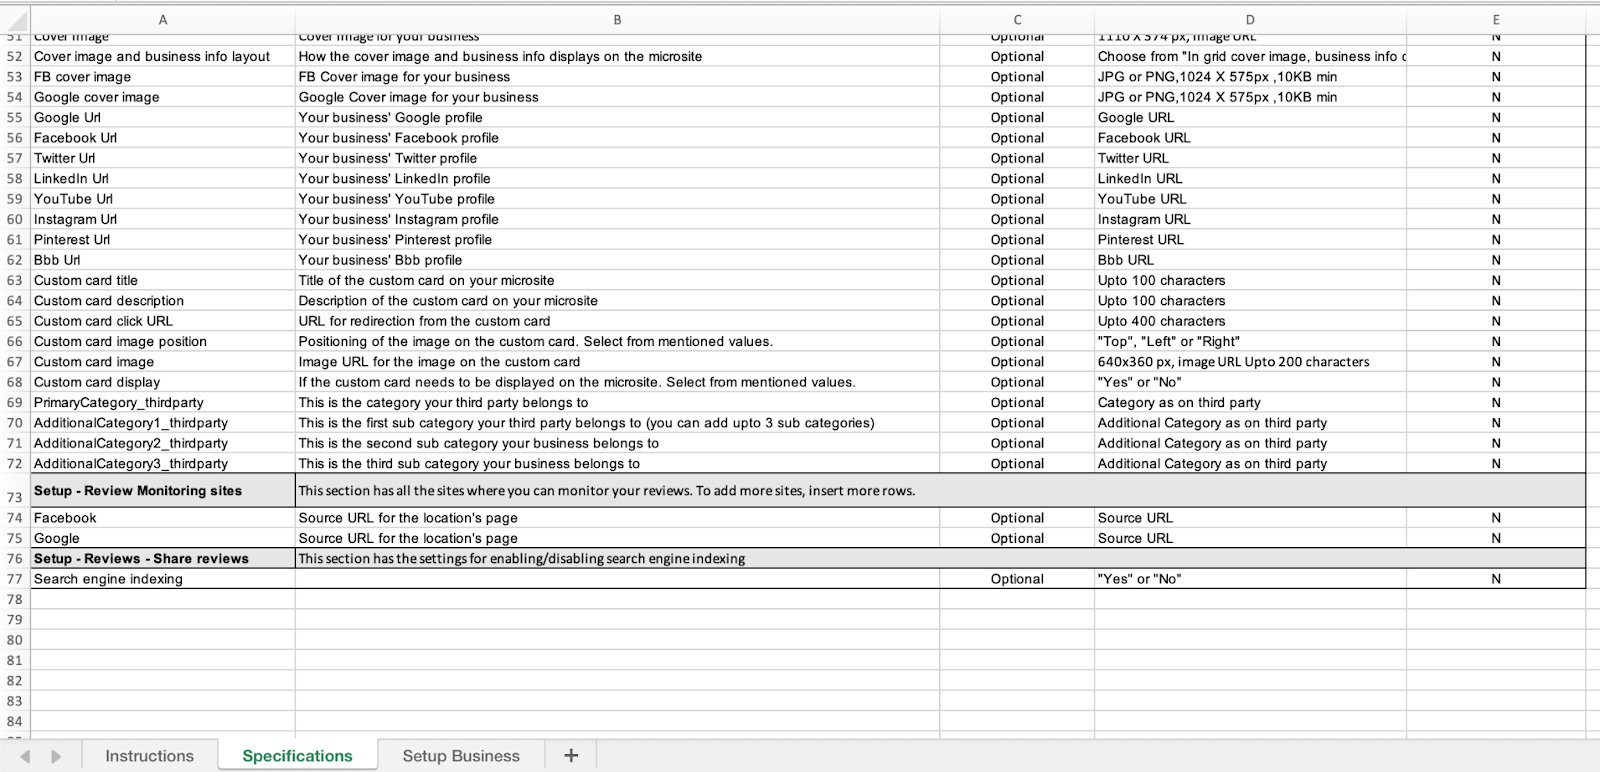
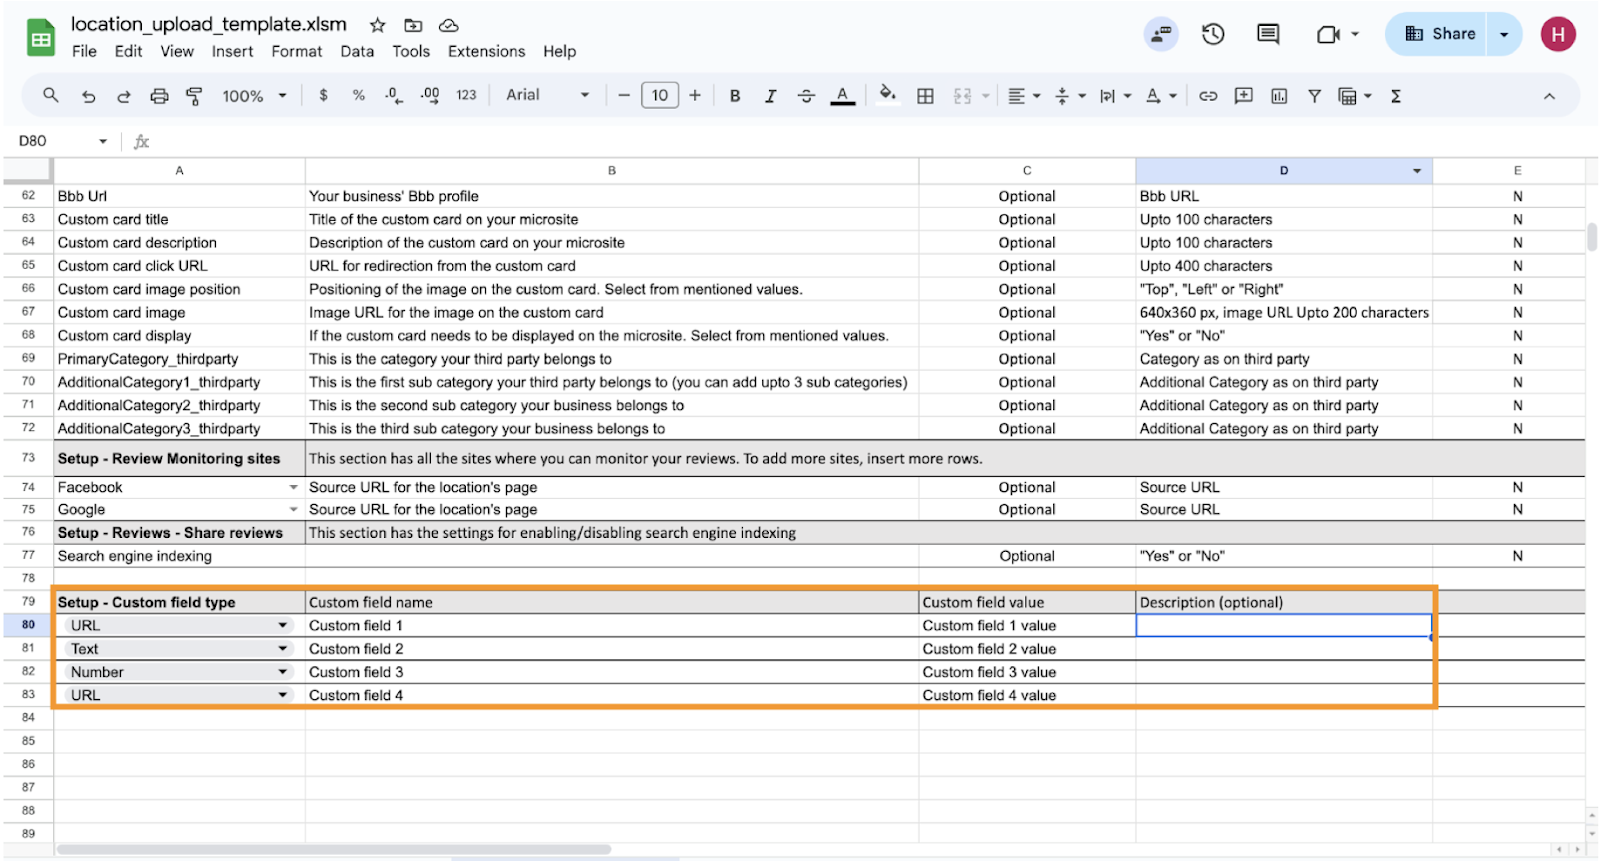
At the end of the sheet, enter the sections, such as setup - custom field type, name, and value, and fill out the sections as shown in the image below.
Click ‘Upload sheet’ to upload the sheet with the changes and import the file.
Use Custom Tokens
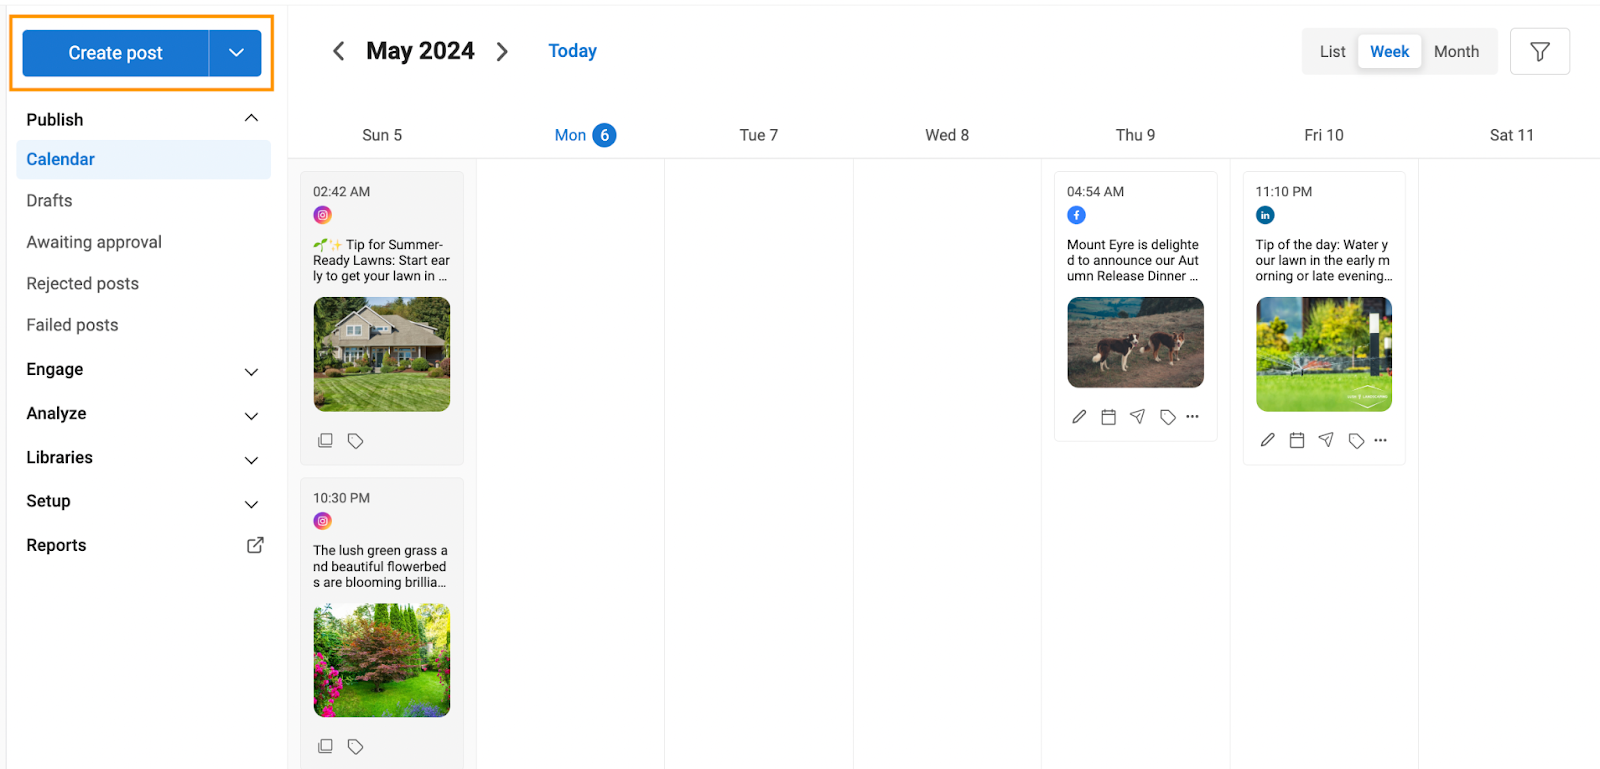
Use the custom tokens under the ‘Social’ and ‘Campaigns’ tab. Go to ‘Social’ and click ‘Create post.’
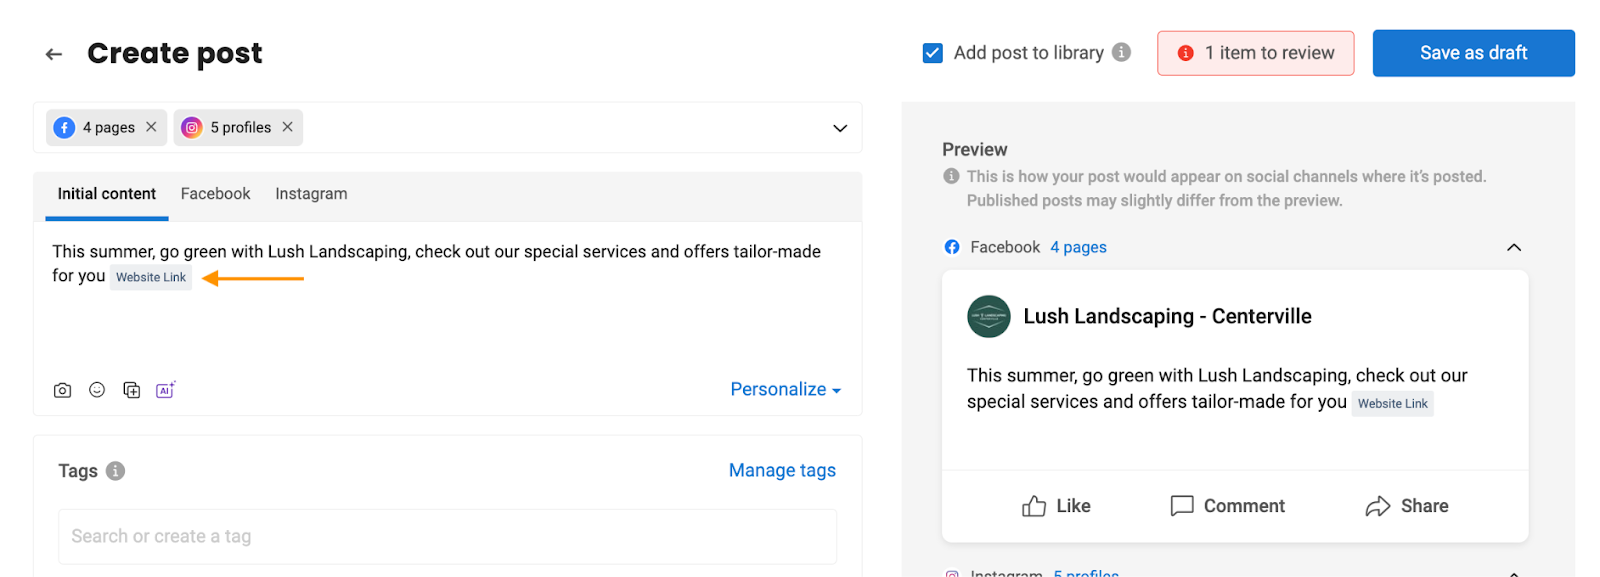
Enter the content, click ‘Personalize,’ and select the custom token you want to add. The custom token will appear by the name provided to the token and the value underneath it.
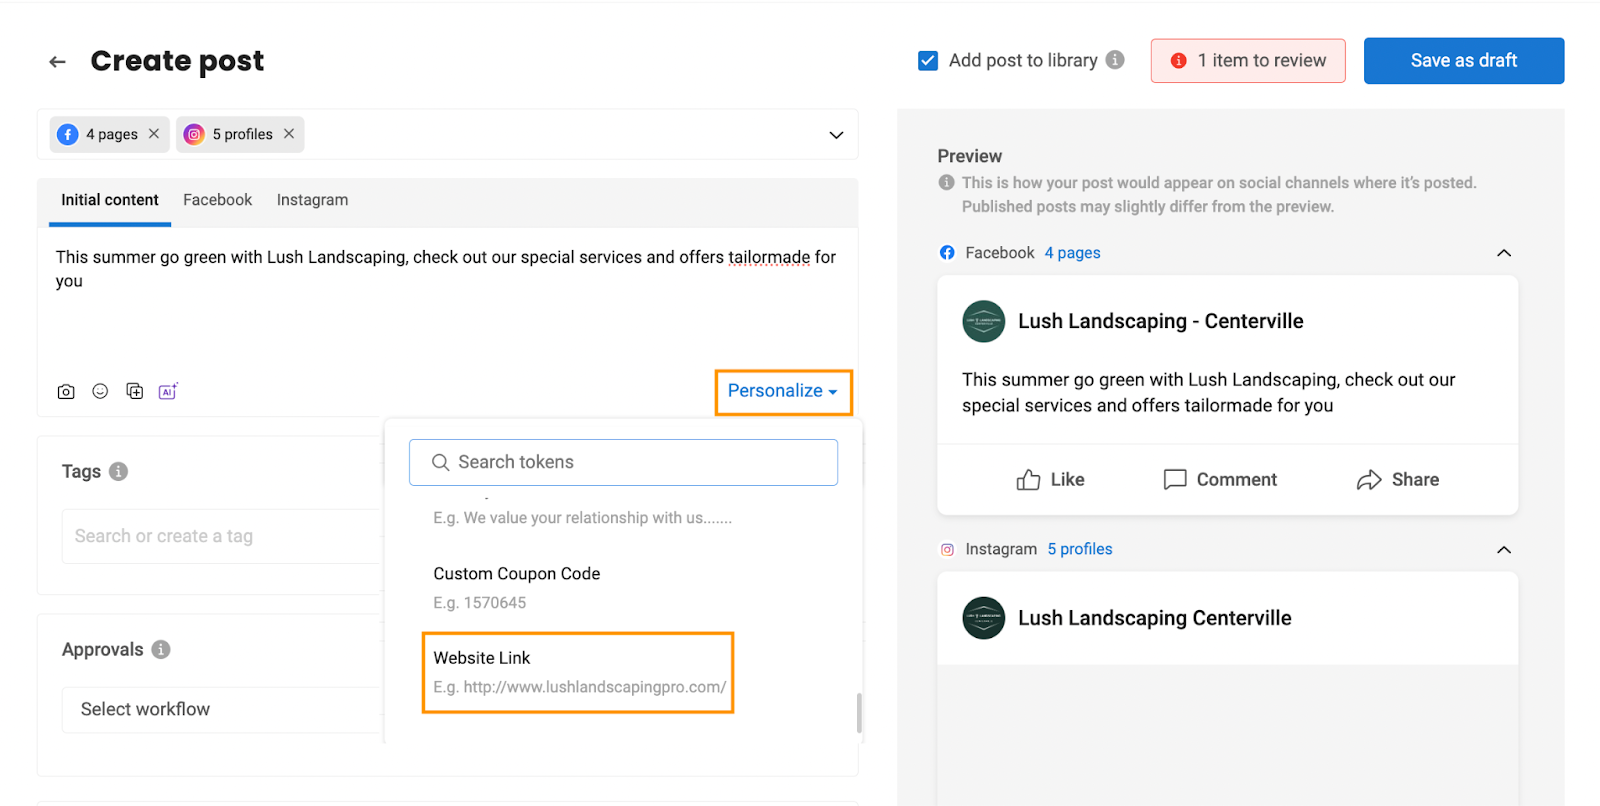
Here’s how it will appear depending on the token you select.
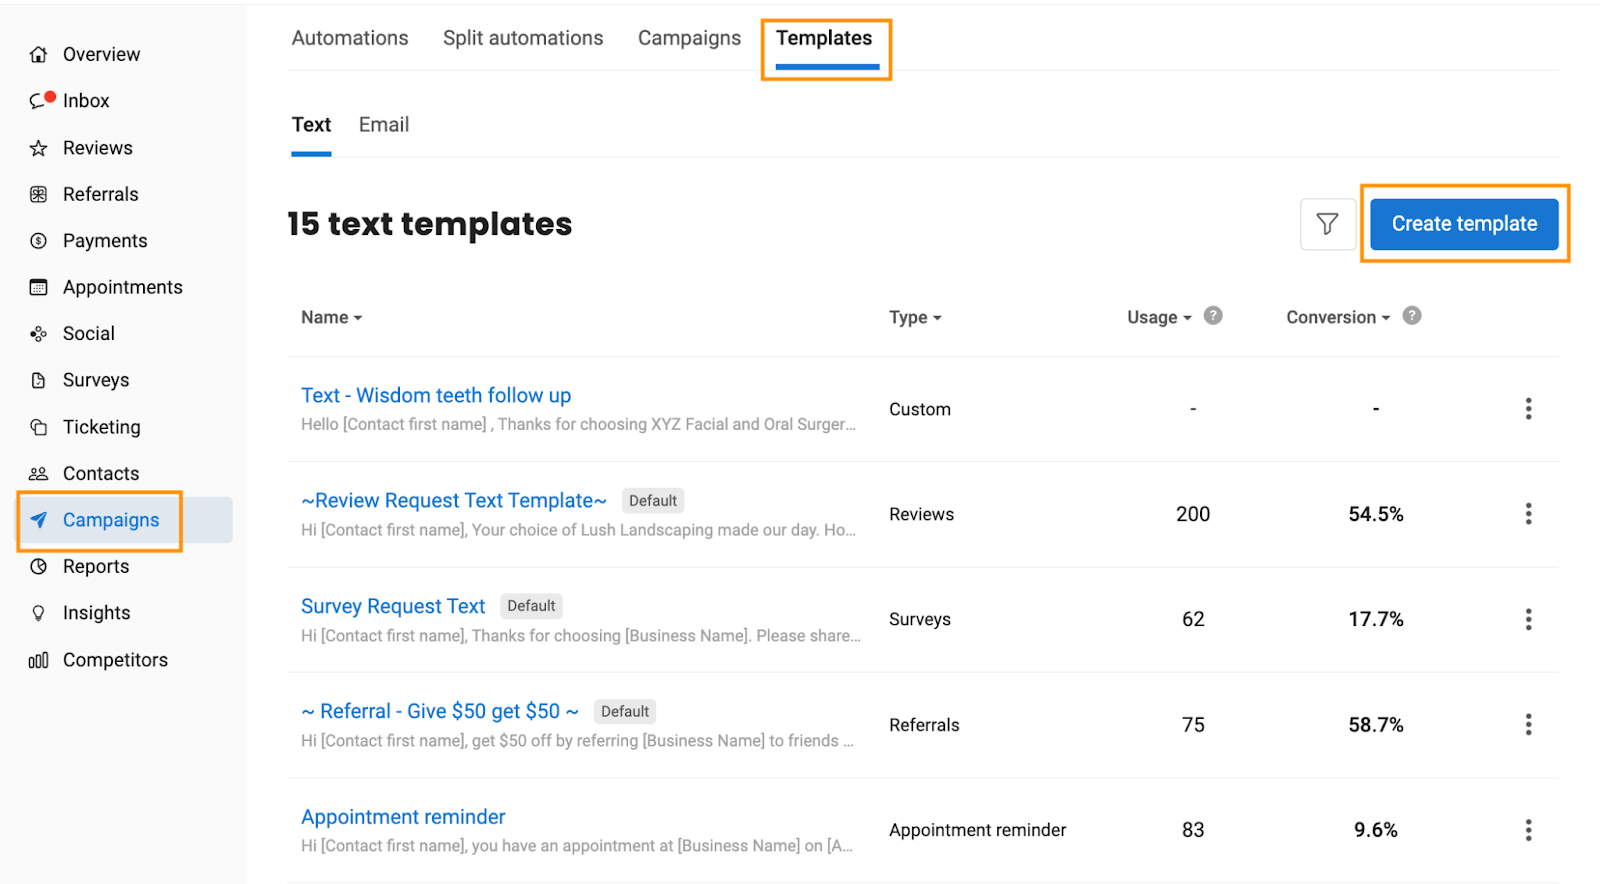
To use in campaigns, go to the ‘Campaigns’ tab, select 'Templates’ at the top of the page, and click ‘Create template.’
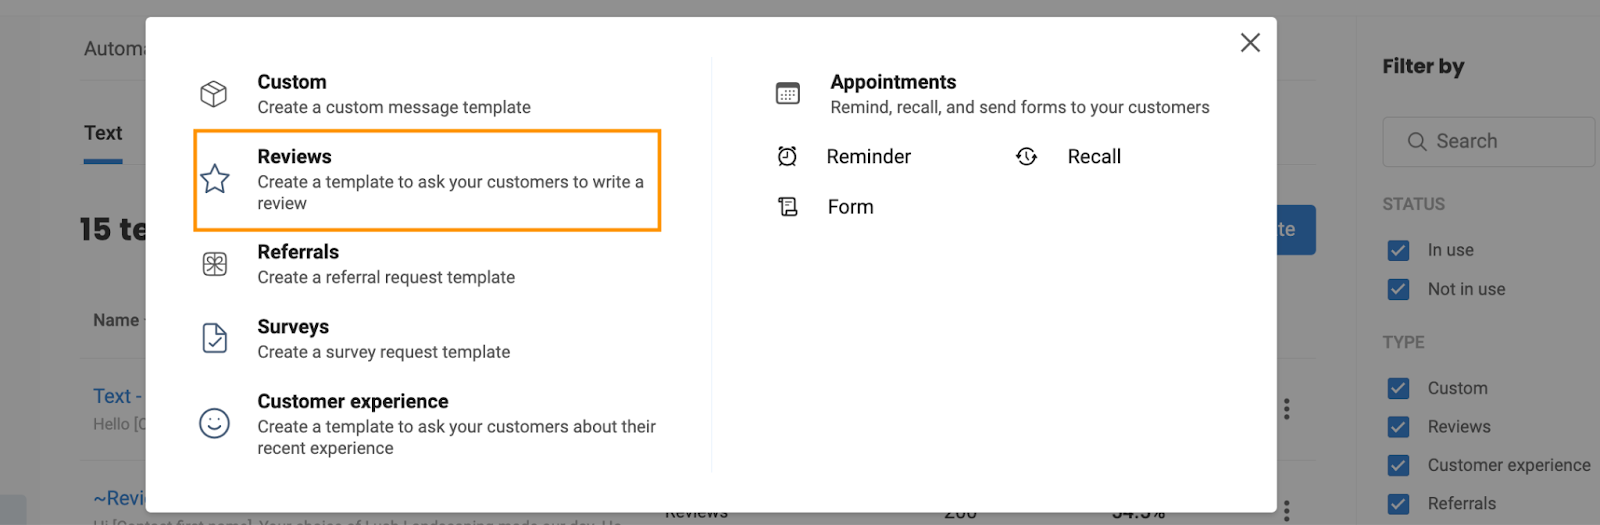
Select a template you want to create.
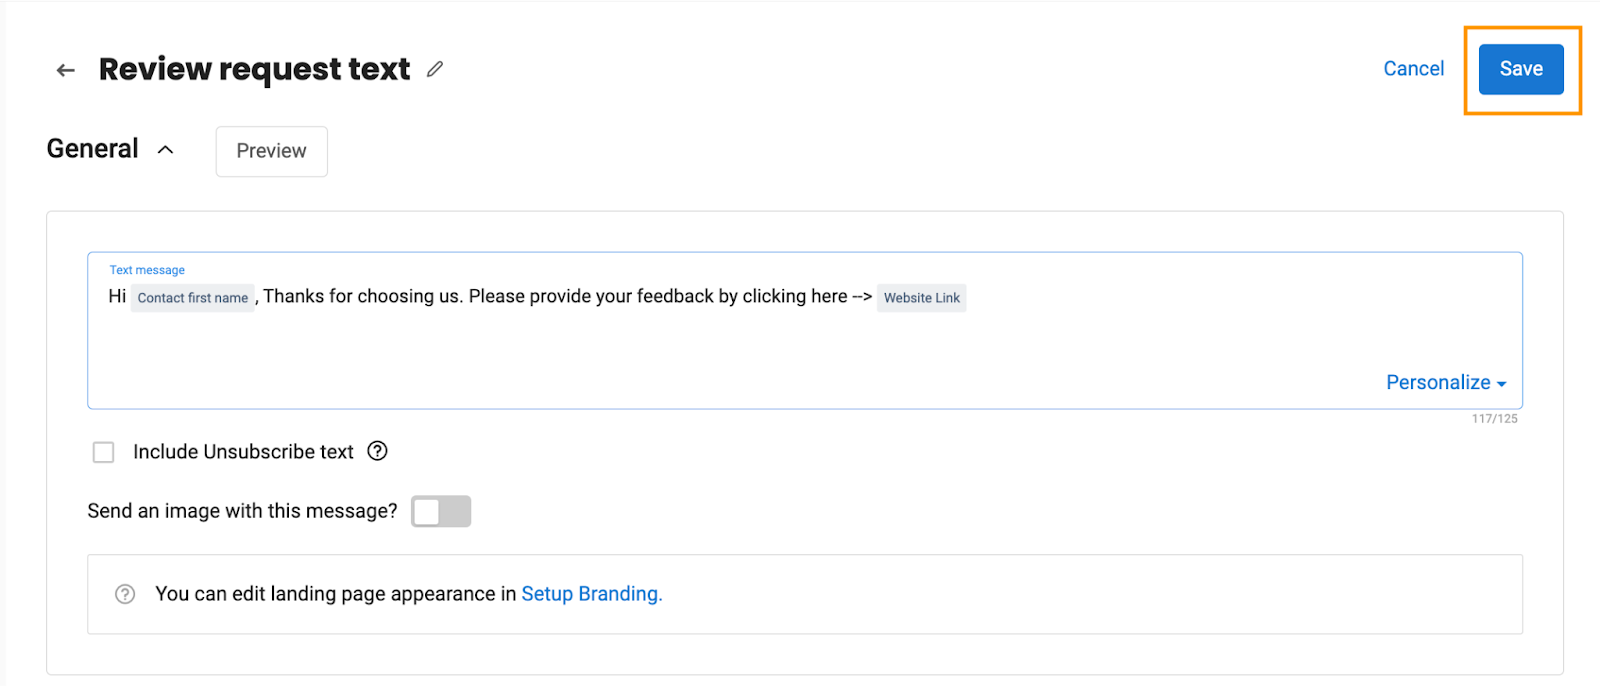
Click ‘Personalize,’ scroll down, and select the desired ‘Custom token.’
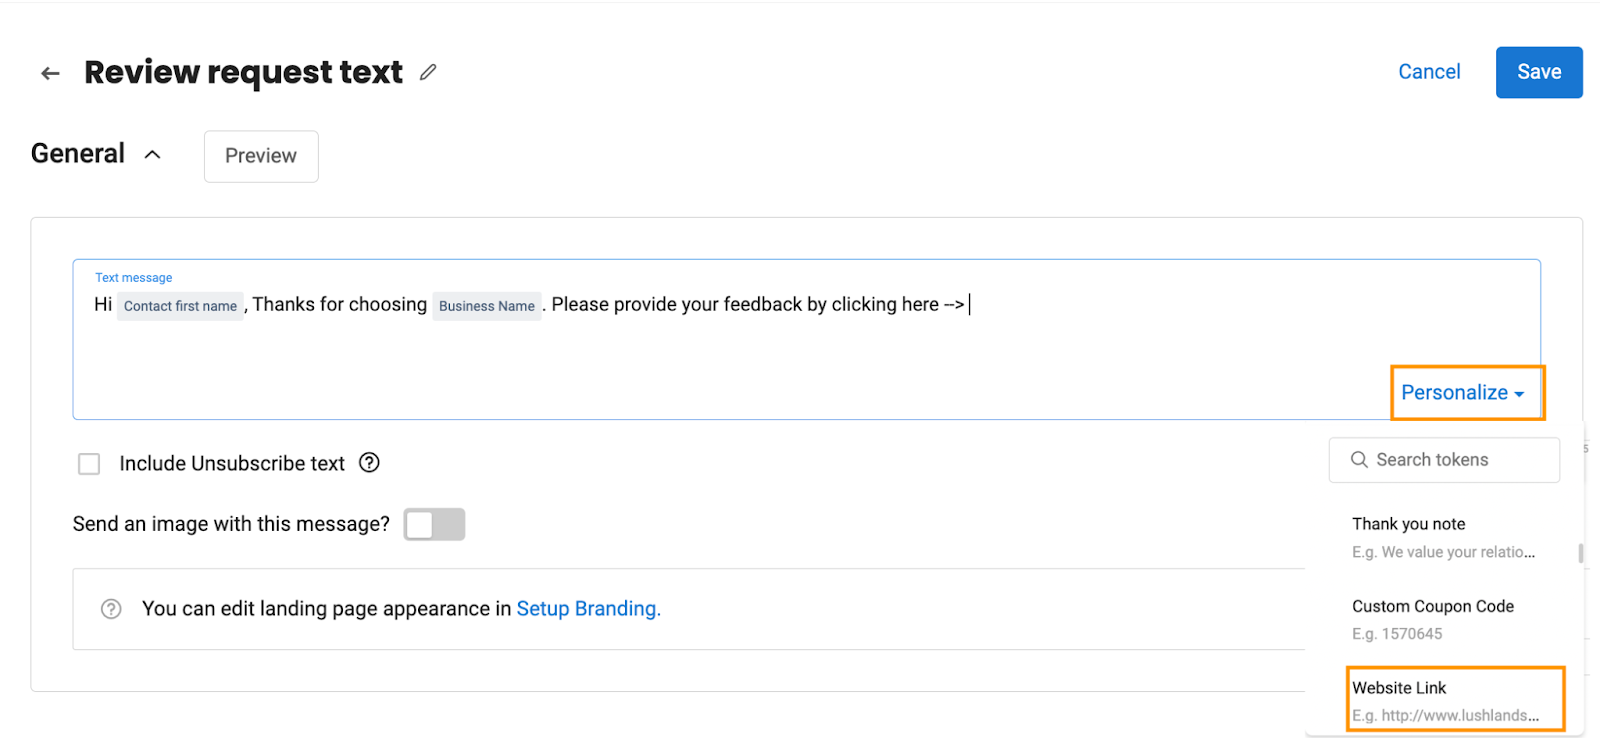
NOTE - You can add custom tokens to both ‘Text and Email’ templates.
Click ‘Save’ to save the template.