How do I setup a Customer Experience (CX) template?
Birdeye's Customer Experience (CX) templates help businesses get insight into what customers speak about them. These templates can be easily sent via email or text. Using CX Templates, businesses can gauge customer sentiment using three different scales - NPS (Net Promoter Score), 5-Star Rating or Sentiment buttons.
This article shows how to setup CX email templates. To learn how to create CX text templates, read the help center article: How do I setup text templates within Birdeye?
SETTING UP CX EMAIL TEMPLATE
To create/customize a CX email template, follow the steps detailed below:
Log in to your Birdeye account and click on the 'Campaigns' tab on left navigation rail of the dashboard. Now, click on the 'Templates' tab. Once you're on the new page, click the 'Create template' button under the 'Email' tab.
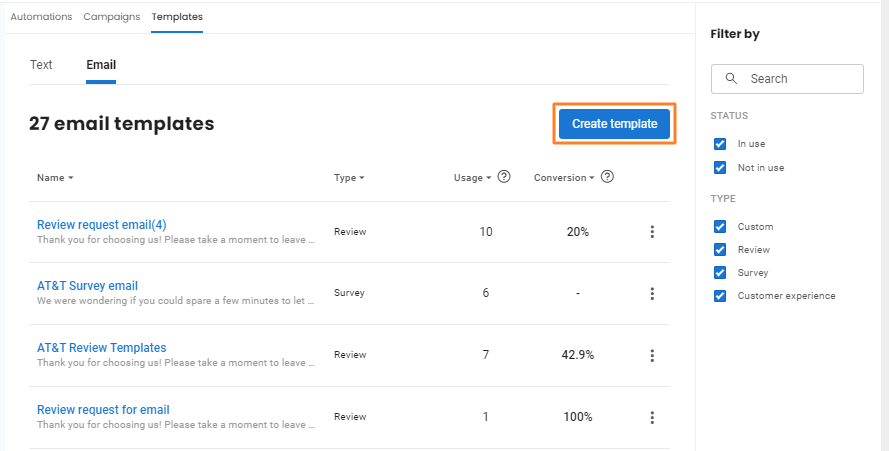
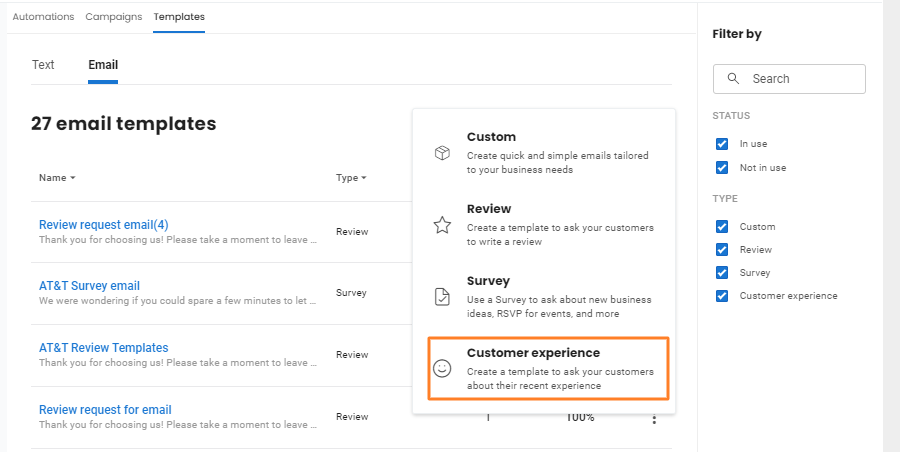
To create a new template, click on the 'Create template' button on the top right. When a window pops-up, select the 'Customer experience' option.
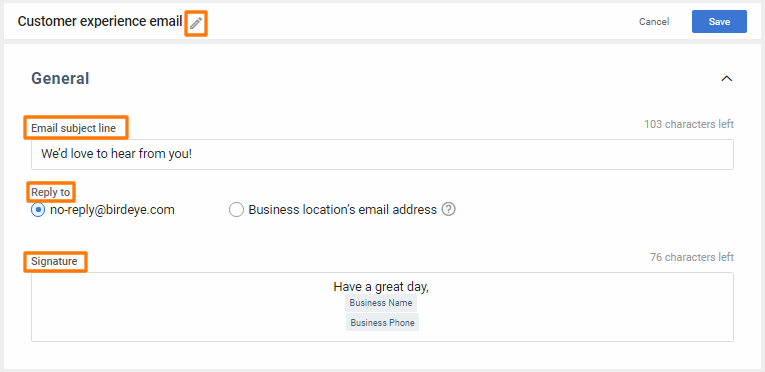
On the new page, you can rename your template by clicking the 'Pencil' icon. Here, you can configure six different sections of your CX templates - General, Header branding, Customer Experience Email, Review request page, Feedback Page, and Thank you page.
GENERAL
The 'General' section allows you to customize the subject line of your email, set a reply to the email, and set an email signature.
| Email Subject line | By default, the email subject line will be set as 'Follow Up', use the 'Email subject line' box to customize the subject line. |
| Reply To Email | If you want to enable customer response, select the 'Business location's email address' option. Now, all the responses from customers will be sent to the email address of the selected business location. NOTE: If you wish to change this email, visit the 'Profile' section under the 'Settings' tab. |
| Signature | You can also personalize your email/text templates by adding a 'Signature'. The tokens fetch the location's name, phone number, or other relevant details automatically and add those details to the email. |
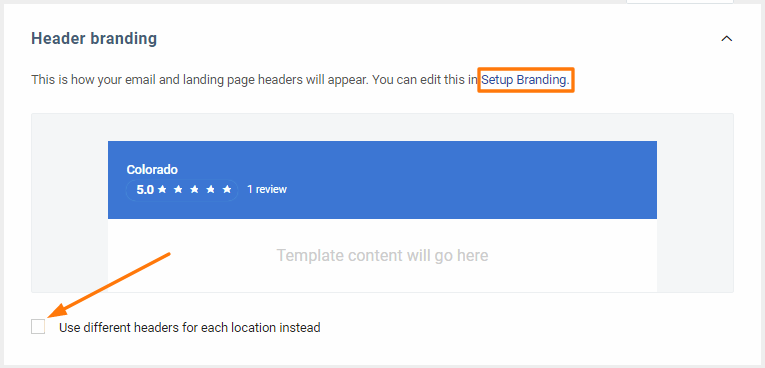
HEADER BRANDING
The next section allows you to customize the branding of your email campaign template.
CUSTOMER EXPERIENCE EMAIL
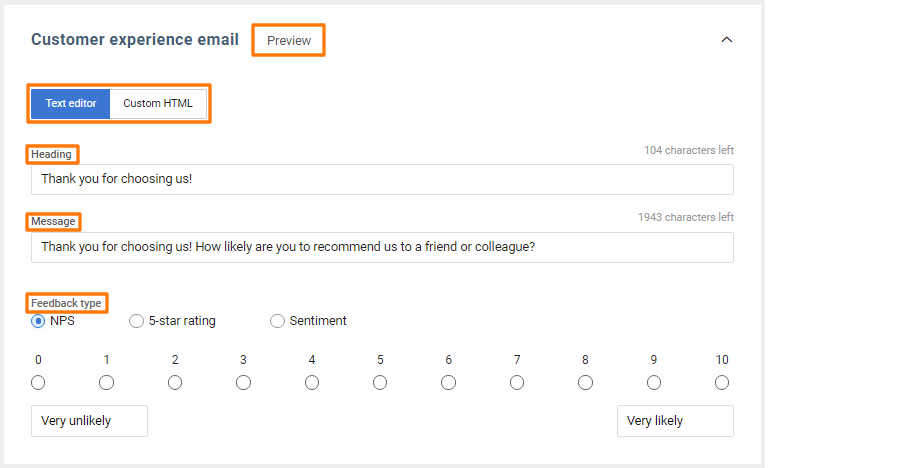
Using this section, you can customize the following fields:
| Heading | In this section, you can add a customized header to your email within 130 characters. |
| Message | In this section, you can add a customized message within 2030 characters. |
| Feedback type | As mentioned before, there are three ways to ask for feedback - 'NPS Question', '5-star rating' and 'Sentiment buttons'. To select one, click on the corresponding radio button. |
Here is how different feedback types work:
- NPS - NPS asks the customer to rate how likely they are to recommend you, on a scale of 0 to 10. 0 is not likely, 10 is extremely likely.
- 5-star rating - The 5-star rating asks the customer to rate their experience on a scale of 1 to 5 stars.
- Sentiment buttons - The Sentiment buttons allow the customers to rate their experience as Positive, Neutral or Negative. You can enhance the appearance of the options by enabling the emoticons. To do this, check the 'Show emoticons' box. You can also deactivate the 'Neutral' button by checking the 'Exclude neutral option' box.
REVIEW REQUEST EMAIL
This section allows you to customize the messaging, review sites and the contact us sub-sections of the review request page.
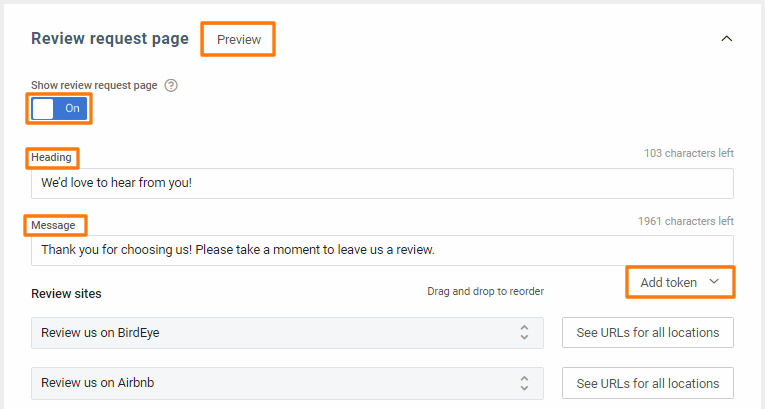
| Show Review request page | You can enable or disable the 'Review request page' for the customers using the toggle button. |
| Heading | Allows you to add a customized header to your email within 130 characters. To personalize the heading, add tokens to the message by clicking on 'Add token' drop-down menu. |
| Message | In this section, you can add a customized message within 2030 characters. To personalize the message, add tokens to the message by clicking on 'Add token' drop-down menu. |
| Add token | Enables you to personalize the email header and email body by adding the contact's name, address or any other detail. Tokens automatically fetch the contact information from your account and add it to the email template. |
| Preview button | Allows you to preview your email at any point. |
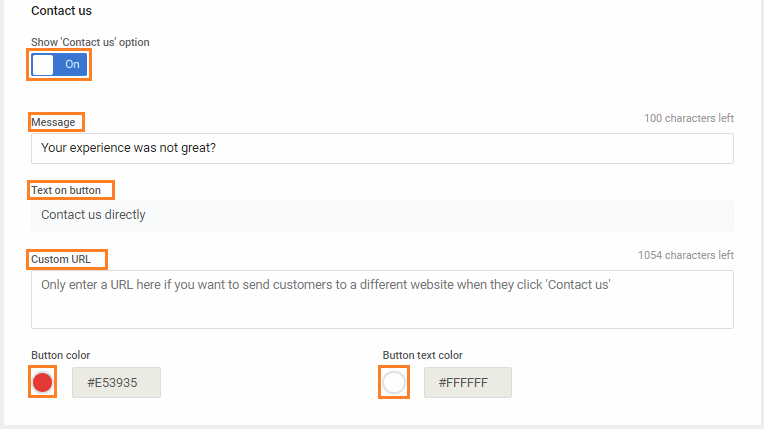
In the 'Contact us' sub-section, under 'Review request email', you can configure communication for customers who may not be completely satisfied with their experience and want to write to you privately on Birdeye. You can customize the following fields in this section:
| Show 'Contact us' option | You have the option to keep this section enabled or disabled in your review request email - for this, use the toggle button. |
| Message | You can also customize the feedback request message. Add tokens to personalize your message further. |
| Text on button | This text will be visible on the button. |
| Custom URL | In case you want to redirect the customer to a different site other than the default 'Feedback page' upon clicking the 'Contact us directly' button, add the URL of the destination page in the field labeled as 'Custom URL'. |
| Button color | Use this icon to customize the color of the 'Contact us directly' button. |
| Button text color | Use this icon to customize the color of the text on the 'Contact us directly' button. |
FEEDBACK PAGE
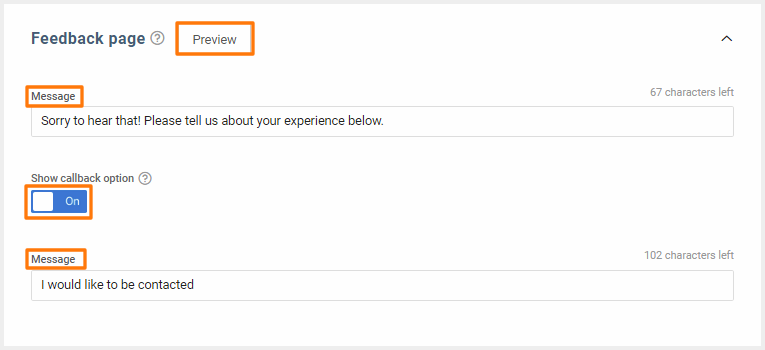
After customizing the 'Contact us' button, you can customize the 'Message' that shows up when the customer clicks on the 'Contact us' button. This is done on the 'Feedback Page' section.
| Message | You can customize the feedback request message in this section and add tokens to personalize the message. |
| Show callback option | If you wish to allow the customer to request a callback, enable the 'Show callback option' button. If enabled, the customer will see a message and choose whether or not they want to get a callback. |
| Message | This message is visible to the customer and shows the callback request. |
| Preview button | Click on this button if you wish to preview the page at any point. |
THANK YOU PAGE
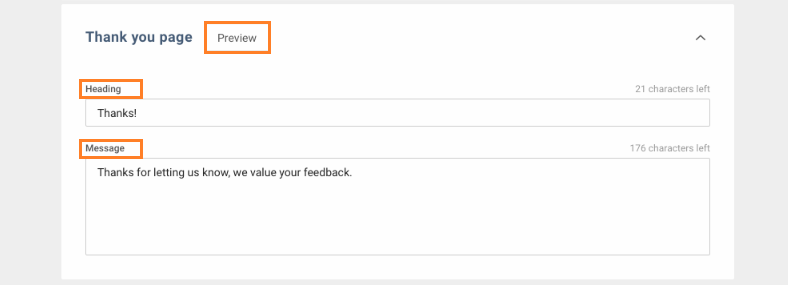
In this section, you can customize the message that will appear on the 'Thank you page', after a customer submits their feedback. You can customize three different fields detailed under:
| Heading | Allows you to add a customized heading to your 'Thank you page'. |
| Message | Allows you to add a customized 'Thank you' message. |
| Preview button | Click on this button if you wish to preview the page at any point. |
