How can I send out manual review requests from my Salesforce instance?
Birdeye provides you with the option of sending out review requests to your customers using Salesforce. Please follow these steps to embed a 'Get Feedback' button within your Salesforce Org to help you send out review requests from Salesforce manually.
PREPARATION
- Before you start, please make sure you have a Salesforce Sales/ Service cloud instance up and running.
- Please ensure that you have a valid Birdeye account subscription
INSTALL MANAGE PACKAGE LINK
Installation Link -https://login.salesforce.com/packaging/installPackage.apexp?p0=04t0K000000qrVc
The above link will take you to the installation confirmation page. Review the instructions and enter your Salesforce credentials for the location where you’d like to install the app.
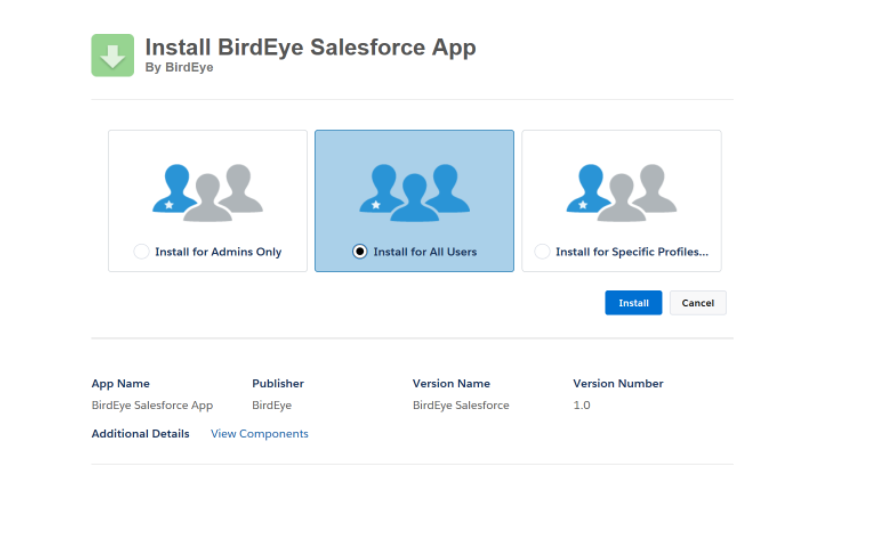
Select option “Install for All Users” to ensure all the users have access to BirdEye App. Review the terms and conditions, and click Install. You will be taken to the Package Installation Details.
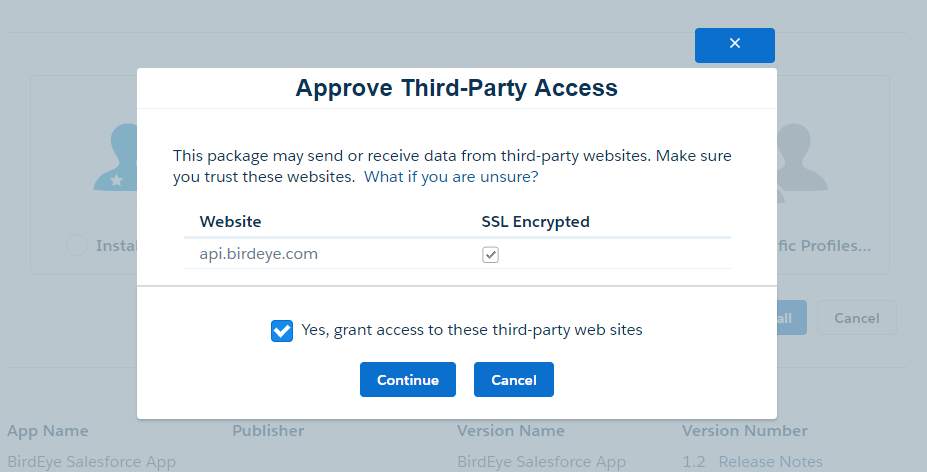
 Approve Third-Party Access by clicking on the 'Continue' button
 The package is now ready to be installed. Click Install to continue.
Once the package is installed follow these steps to complete the process of embedding the 'Get Feedback' button.
SALESFORCE CUSTOMER CHECK-IN
Step 1: Populate Custom Settings
- Configure Birdeye custom fields mapping through Custom Setting - Go to Setup > Develop >Custom Settings >Birdeye Customer Checkin >Manage >New
Field Label Value Name Customer Checkin
Birdeye Business IDGet this from your Birdeye account. Account > Developers > Business ID Birdeye API Key Get this from your Birdeye account. Account > Developers > API Key Birdeye CheckIn URL https://common-services.birdeye.com/webhook/salesforce/checkin Reference ID If Multi Location is true then populate the Account object field API name used to lookup location in Birdeye Custom Email Specify Contact object field API name to pass on Email from Salesforce to Birdeye. If Blank, then native Email field from customer object is used. Custom Phone Specify Contact object field API name to pass on Phone from Salesforce to Birdeye. If Blank, then native Mobile field from customer object is used. Custom First Name Specify Contact object field API name to pass on First Name from Salesforce to Birdeye. If Blank, then native First Name field from customer object is used. Custom Last Name Specify Contact object field API name to pass on Last Name from Salesforce to Birdeye. If Blank, then native Last Name field from customer object is used.
.jfif)
Step 2: Add Custom Button to Contact Page layout
- From Setup, enter Contact in the Quick Find box, then select Contacts.
- Click Contacts.
- In the Page Layouts related list, click Edit next to the page layout you want to edit first.
- Drag and Drop 'Get Feedback' Button to page layout
- You will now see the 'Get Feedback' button on the 'Contact details' page.
.jfif)
SENDING OUT REVIEW REQUESTS
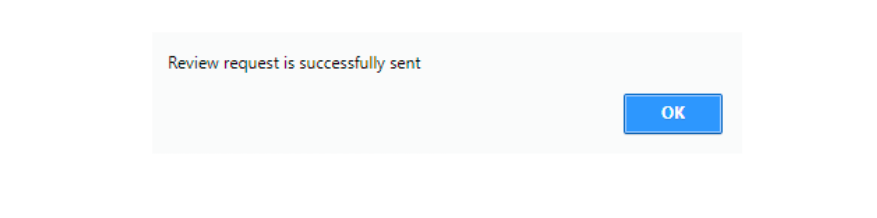
To add contact details within the account, go to 'Contacts' on the top navigation rail of your Salesforce account. Once on this page, fill in the contact details of the customer you want to send out the review request email to. It's important to fill in the email address of the customer to send out review requests. Once you have successfully added the customer’s contact details, you can easily send out a review request to the customer, right from the 'Contact details' page. To send out a review request, just navigate to the contact details of the customer you want to send the review request to. Next, click on the button labeled ‘Get Feedback’ and your review request email will be sent.You will get an alert indicating that the review request has been successfully sent.To learn about how to automate review requests, read the help article: How can I automate review requests from my Salesforce instance?
.jfif)
Once you have successfully added the customer’s contact details, you can easily send out a review request to the customer, right from the 'Contact details' page.
To send out a review request, just navigate to the contact details of the customer you want to send the review request to. Next, click on the button labeled ‘Get Feedback’ and your review request email will be sent.
.jfif)
You will get an alert indicating that the review request has been successfully sent.
To learn about how to automate review requests, read the help article: How can I automate review requests from my Salesforce instance?