Understanding 'Review Request Automation via SFTP' and How It Works
Secure File Transfer Protocol (SFTP) is a popular protocol designed to transfer files between two remote computers safely. SFTP is the secure version of the File Transfer Protocol (FTP) which allows data access and data transfer over a Secure Shell (SSH) data stream.
Birdeye uses the SFTP technology to securely transfer the customer data from the client's computer to Birdeye. Once Birdeye receives the customer data from the client, it automatically sends out review requests according to the preferences set by the client. For Birdeye server to upload the data correctly, the customer data has to be sent in a specified format by the client's internal SFTP tool.
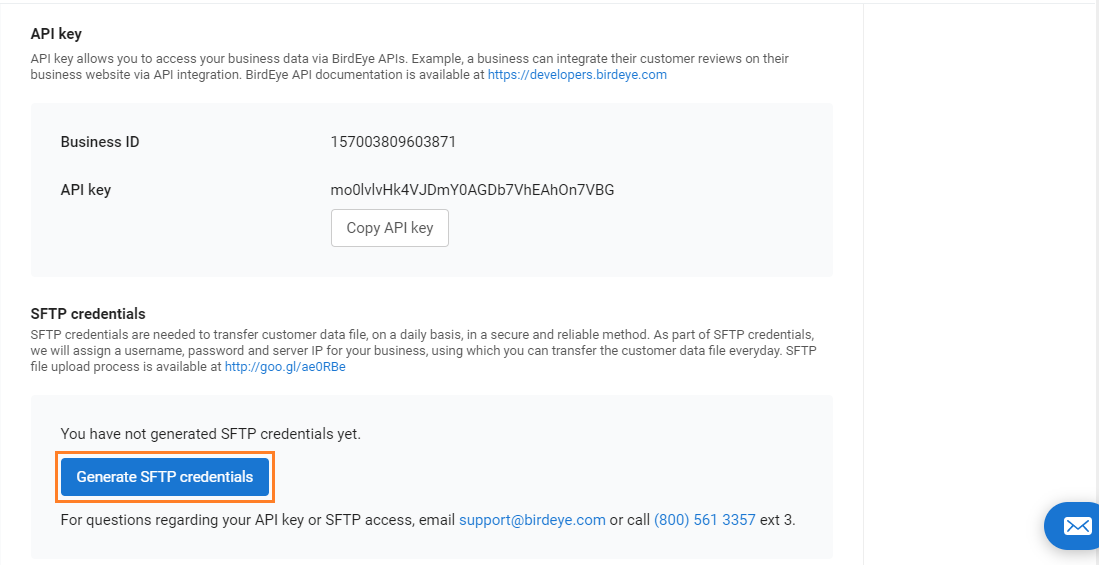
To understand the upload process and the correct format, you can read the SFTP guidelines by clicking on the 'Settings' tab on the left navigation rail, then navigate to the 'Integrations' tab and select the 'API' option.
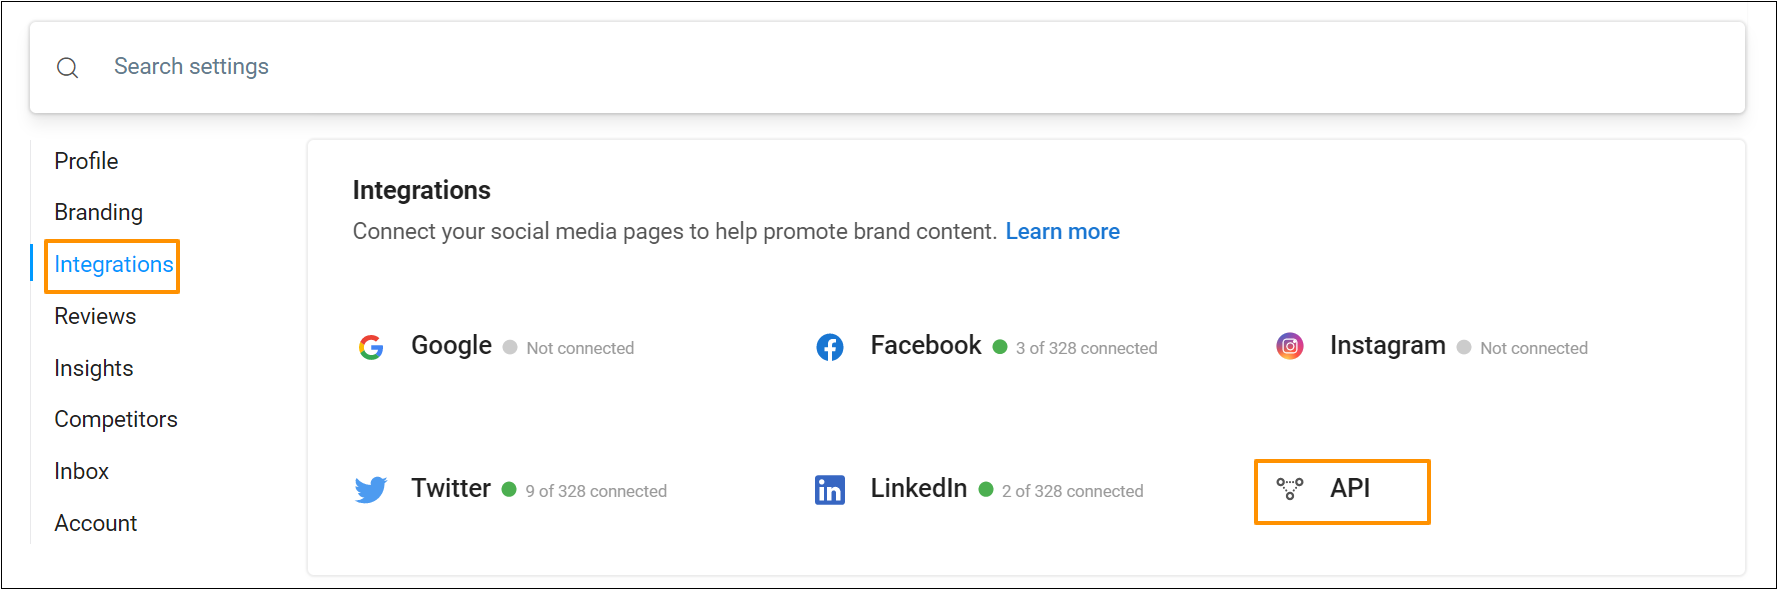
On the new page, find the shortened Google link with the instructions.
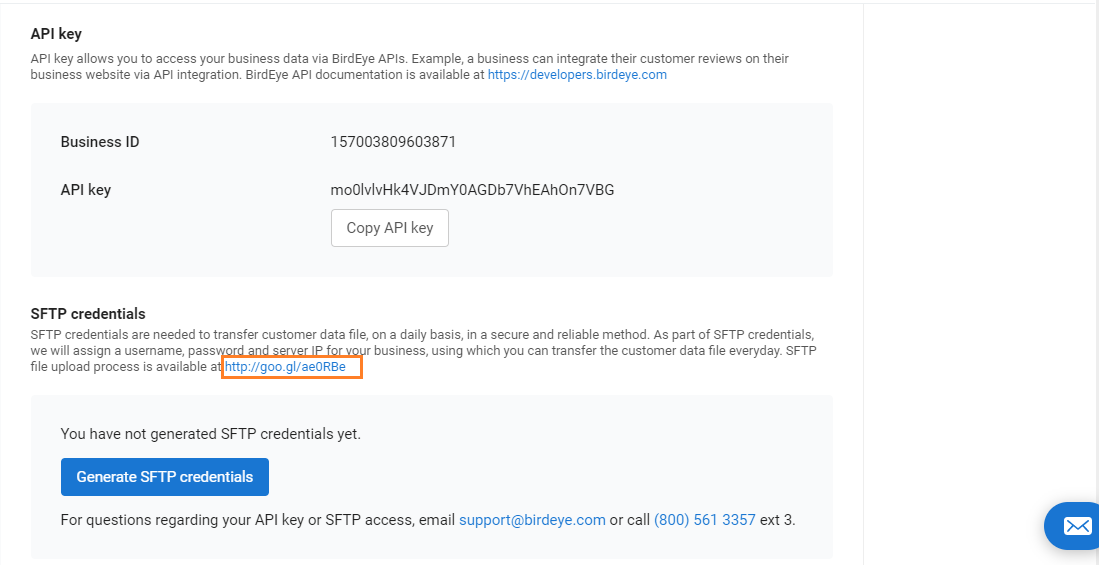
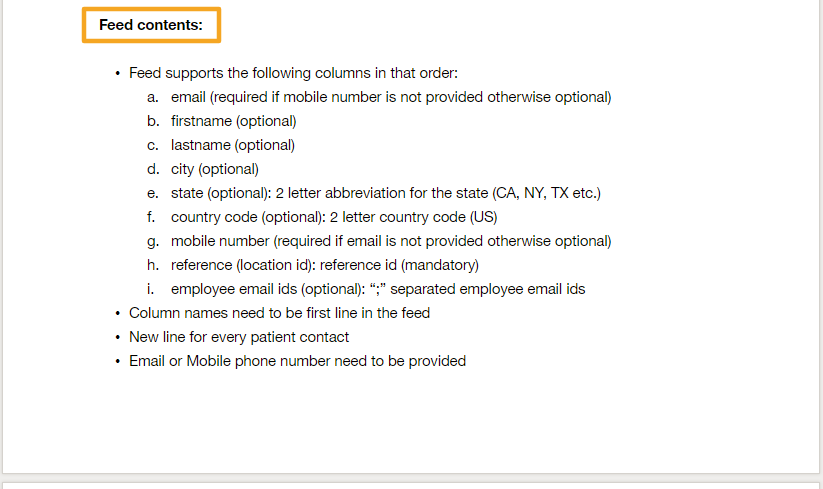
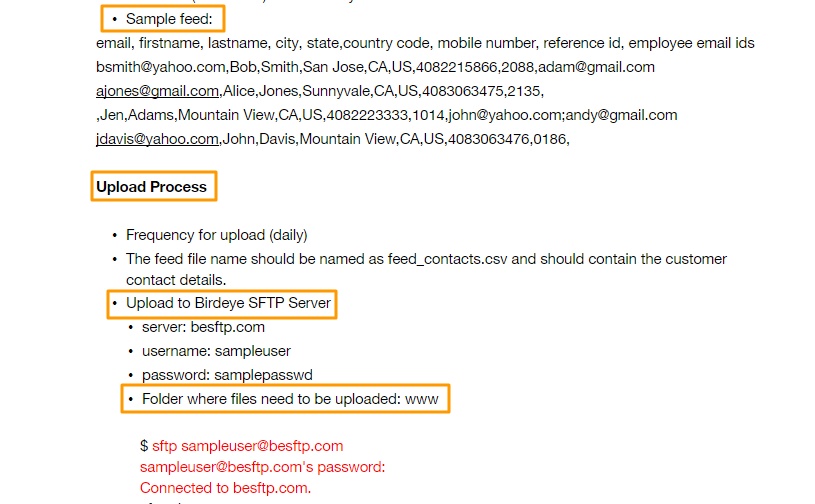
After you click on the shortened Google link, you will be directed to a Google document, which will have instructions on the feed upload process. The primary requirement is that the data needs to be uploaded in a CSV/HL7 file format and the name of the file should have ‘Feed contacts’ as its prefix. The document also specifies some sample feed names which are acceptable to use for the SFTP data transfer. You can also download the document with the instructions by clicking on this link - https://goo.gl/5VGyc8.
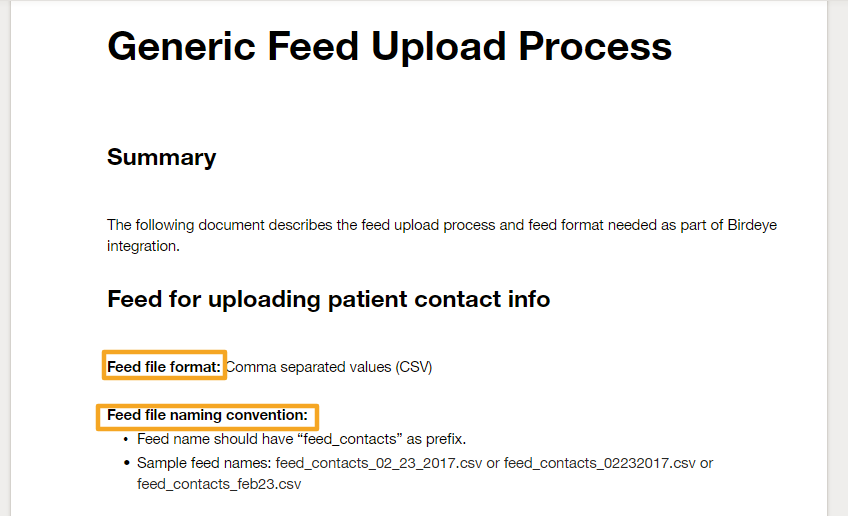
The columns in the CSV feed should be in the same order (A-I) as specified in the document. For Birdeye to process the information correctly, no columns should be deleted, even if there is no information for the particular column. Between columns 'A' and 'H', at least one is required to be filled in. The column 'H' is mandatory, which will require you to enter the Business ID associated with your Birdeye account. NOTE: The data upload will fail if the feed is not in the right format or if the Business ID mentioned is incorrect.
You can refer to this help center article to find your Birdeye account's unique business ID. Where can I find my account's unique business ID?
Open your SFTP tool, enter the Host Name besftp.com, add the username and password, and upload the data to the 'www' folder.
To get your unique 'Username' and 'Password', click on the 'Generate SFTP credentials' button on the bottom of the 'Developers' page.
To facilitate the upload process, you can use the unique 'Username' and 'Password' provided here. To reveal the password, click on the 'Eye' icon. To send alerts, enter the users' email IDs.
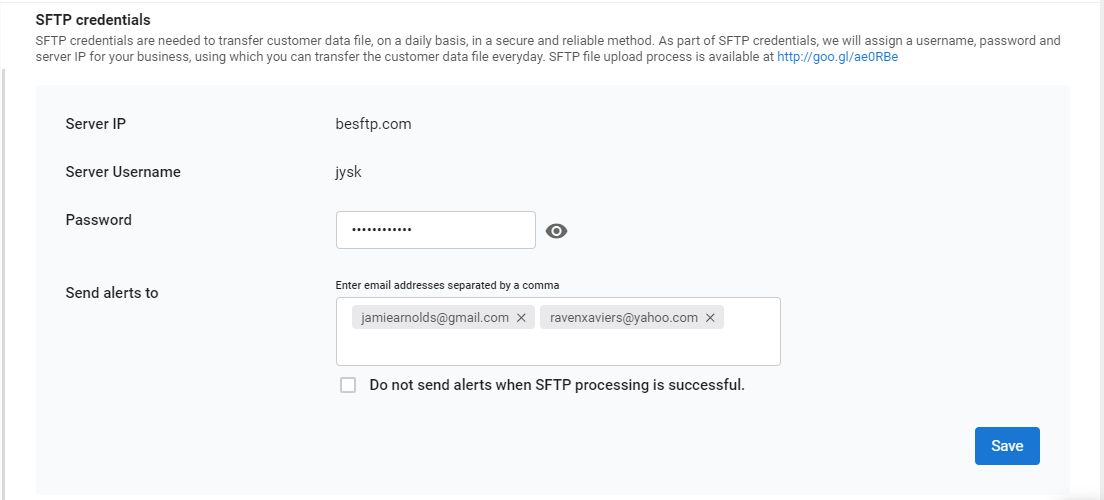
If you wish to be notified whenever there is a problem with the feed file, please add your email id in the highlighted field and check the box labeled 'Do not send alerts when SFTP processing is successful.'
Capability to Set up External Reference Identifier within the Dashboard (Single Location)
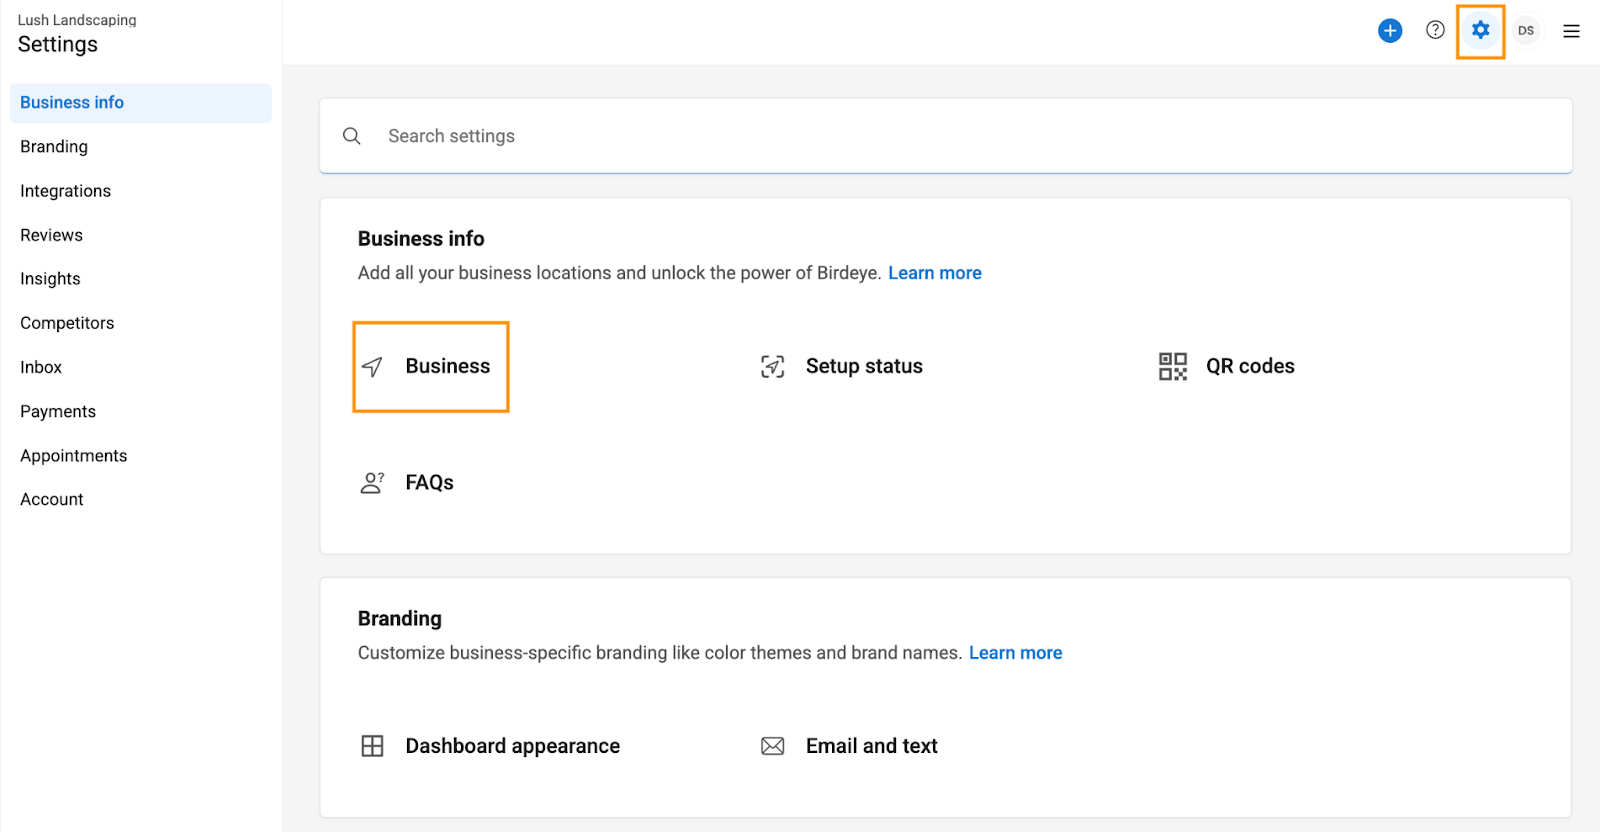
Setting up an external reference identifier can also be self-served for all locations. To do so, click ‘Settings’ and select ‘Business.’
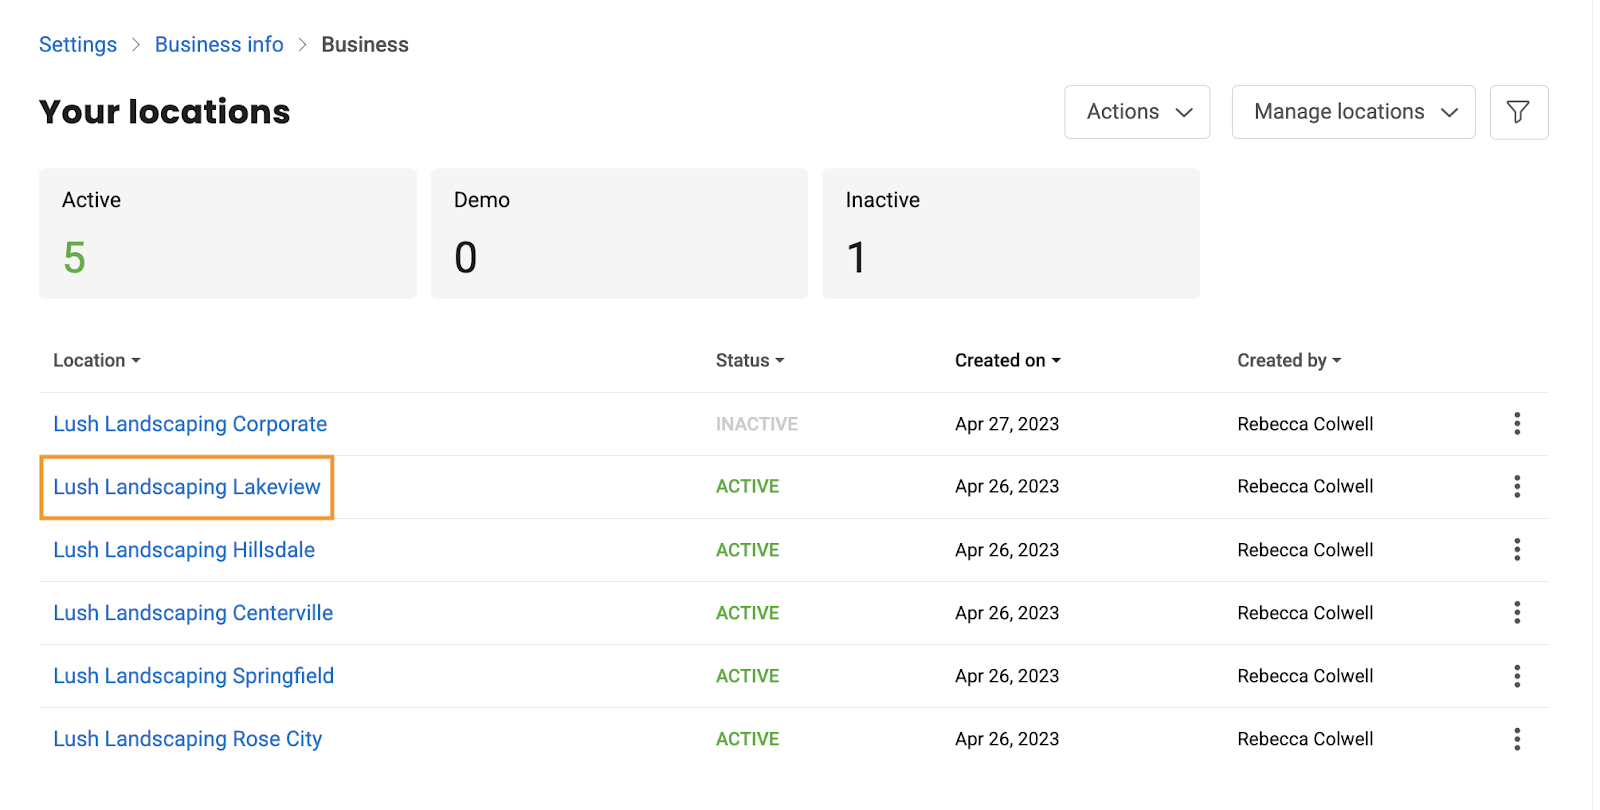
Select the desired location.
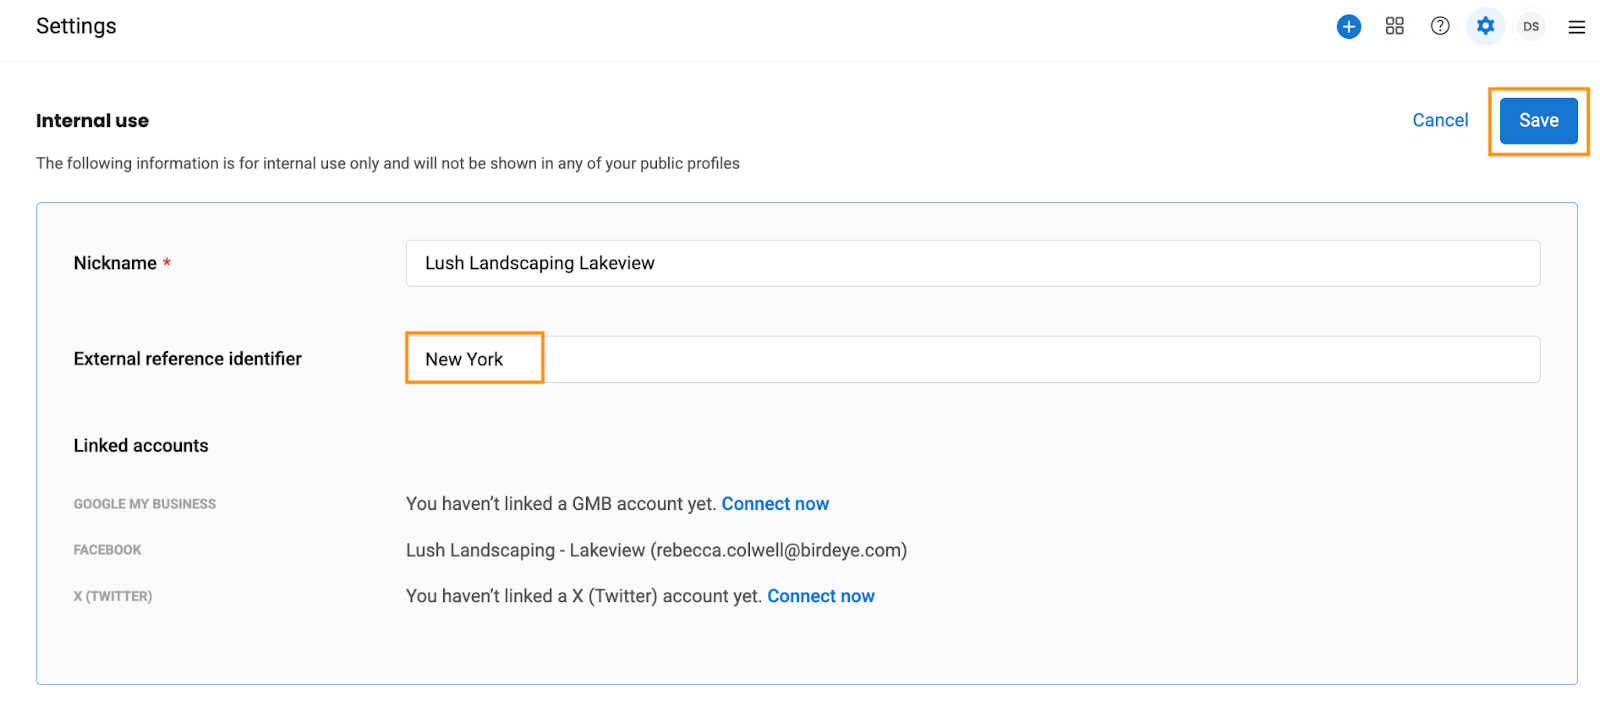
Scroll down to the bottom of the page and click the ‘Edit’ icon corresponding to the ‘Internal use’ section.
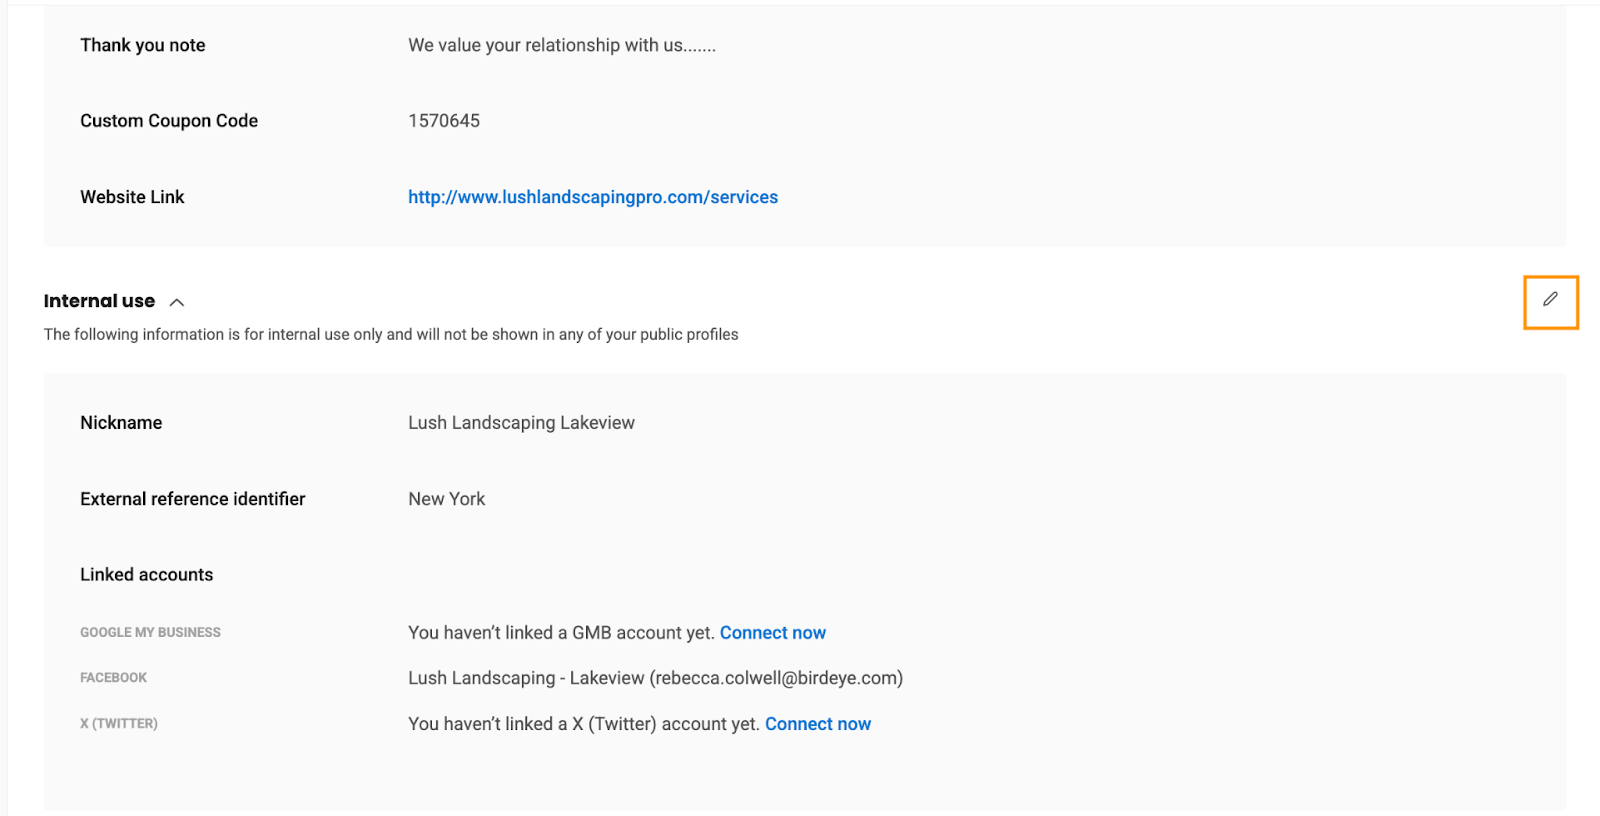
Users can enter the reference name in the ‘External reference identifier’ field. This is the identifier of your business location used externally within your CRM/PMS. For example, if a user submits a request to add a new contact via SFTP, they can specify the location name used in CRM/PMS (e.g., "New York") in the ‘External reference identifier’ field. Birdeye will automatically map the identifier to the corresponding location, Lush Landscaping Lakeview, and seamlessly add the contact to this location.
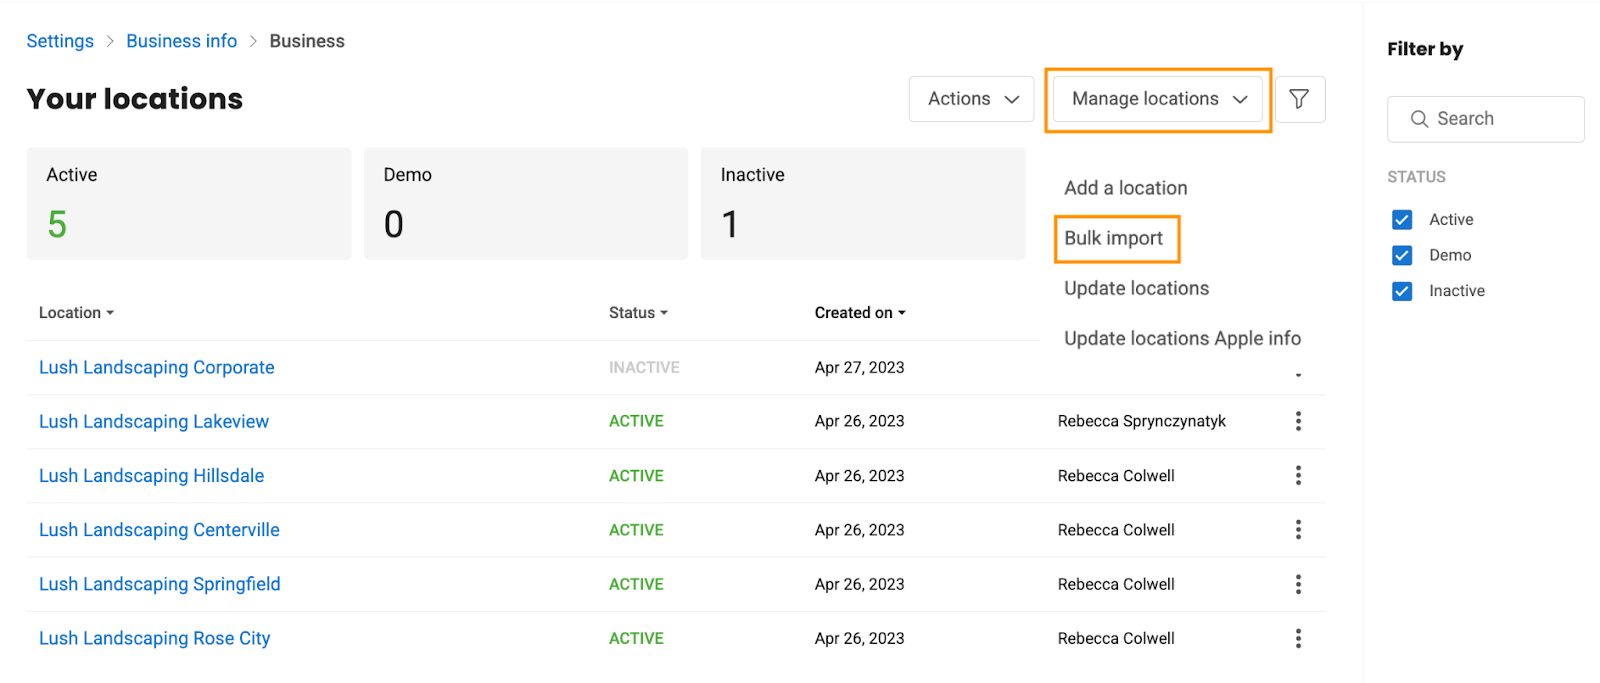
Bulk Upload External Reference Identifier (Multiple locations)
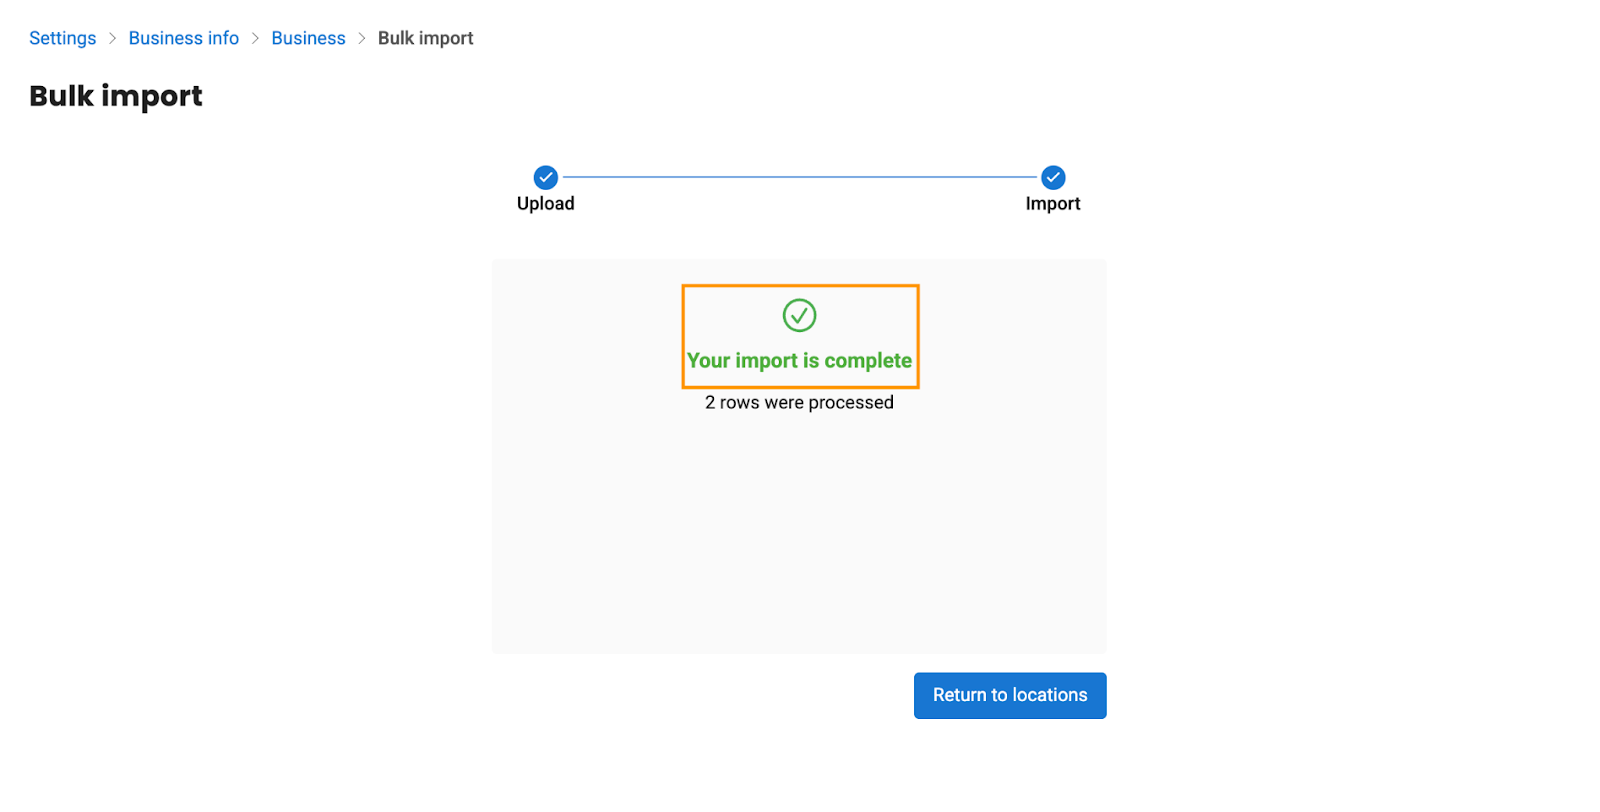
Click ‘Manage locations’ and select ‘Bulk import.’
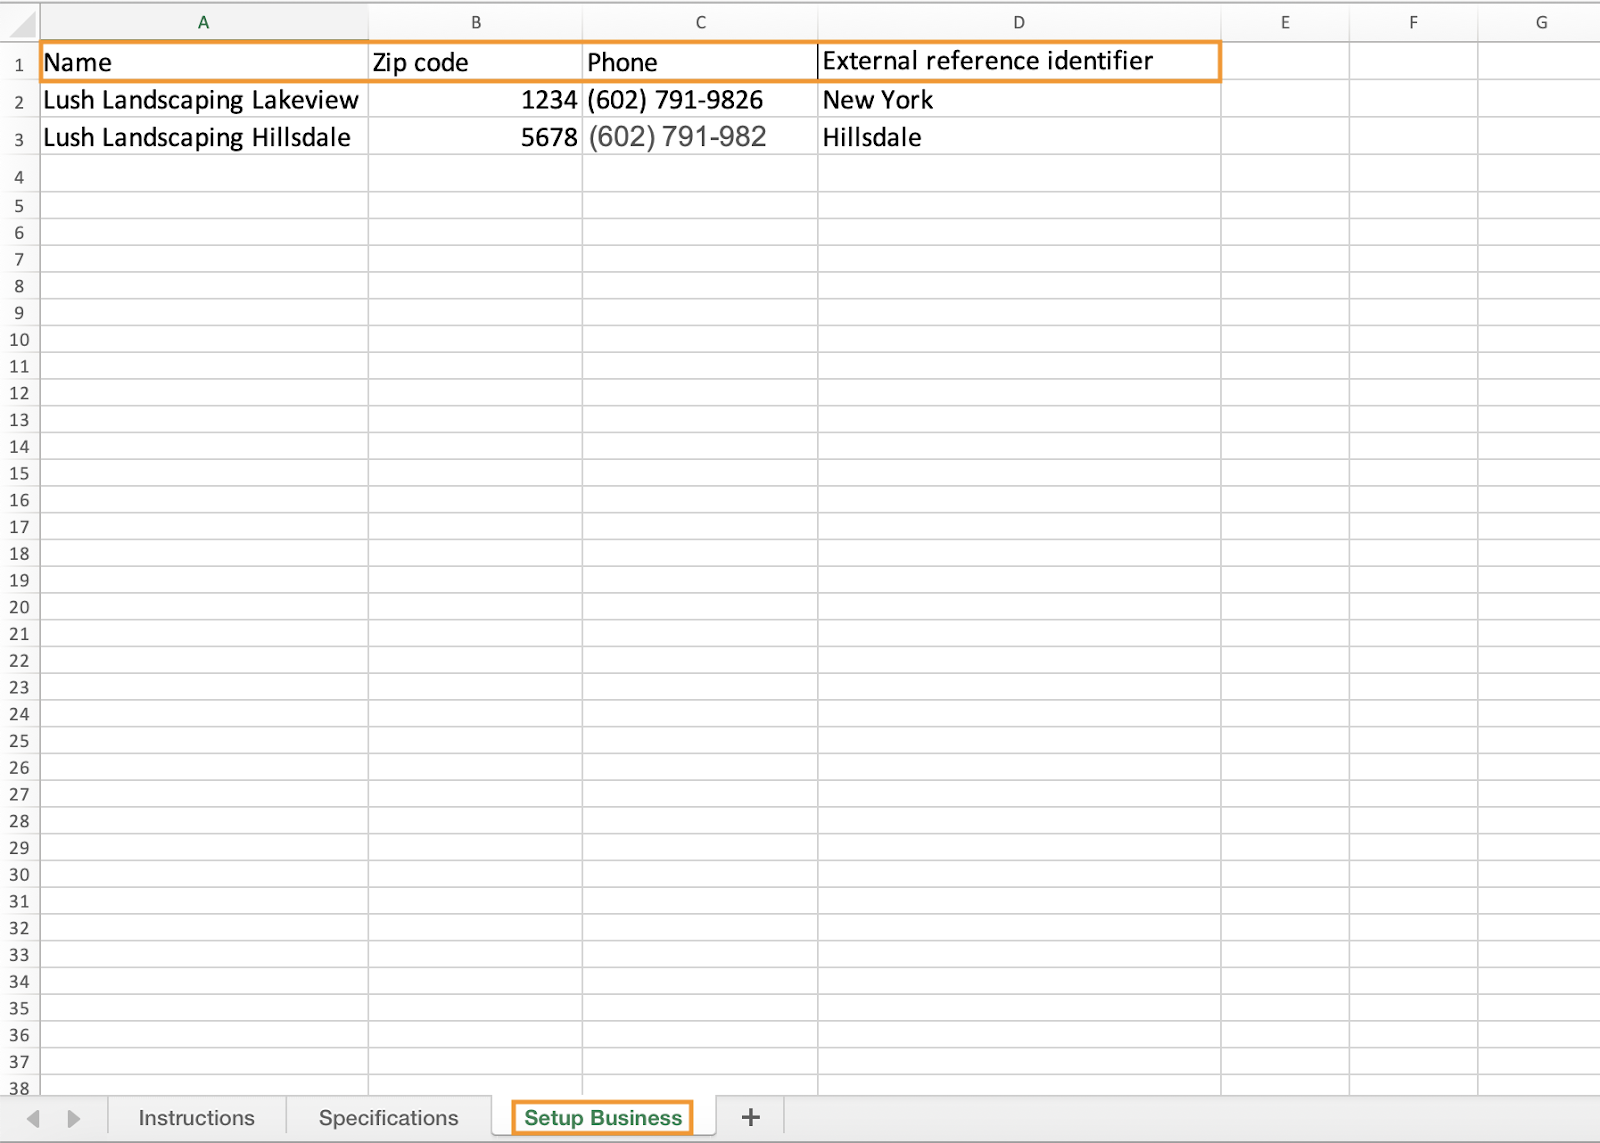
Click ‘sample spreadsheet’ to download a spreadsheet.

Open the spreadsheet, go to the ‘Setup business’ tab, and add an ‘External reference identifier’ attribute next to the field ‘Phone.’ Add business names under the field ‘Name,’ enter zip code, phone number, and external reference identifier under their respective fields, and save the spreadsheet.
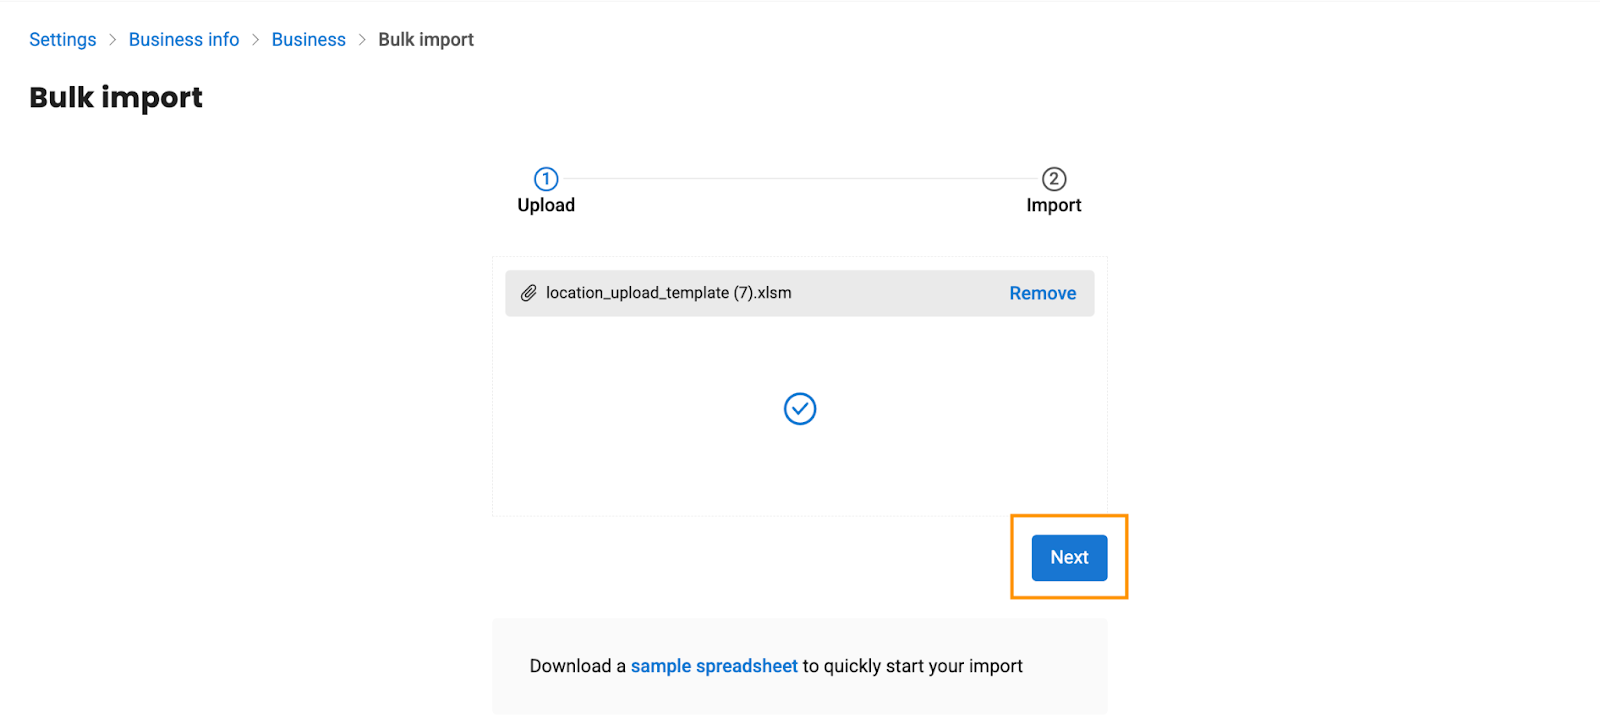
Return to the Birdeye account and upload the spreadsheet.
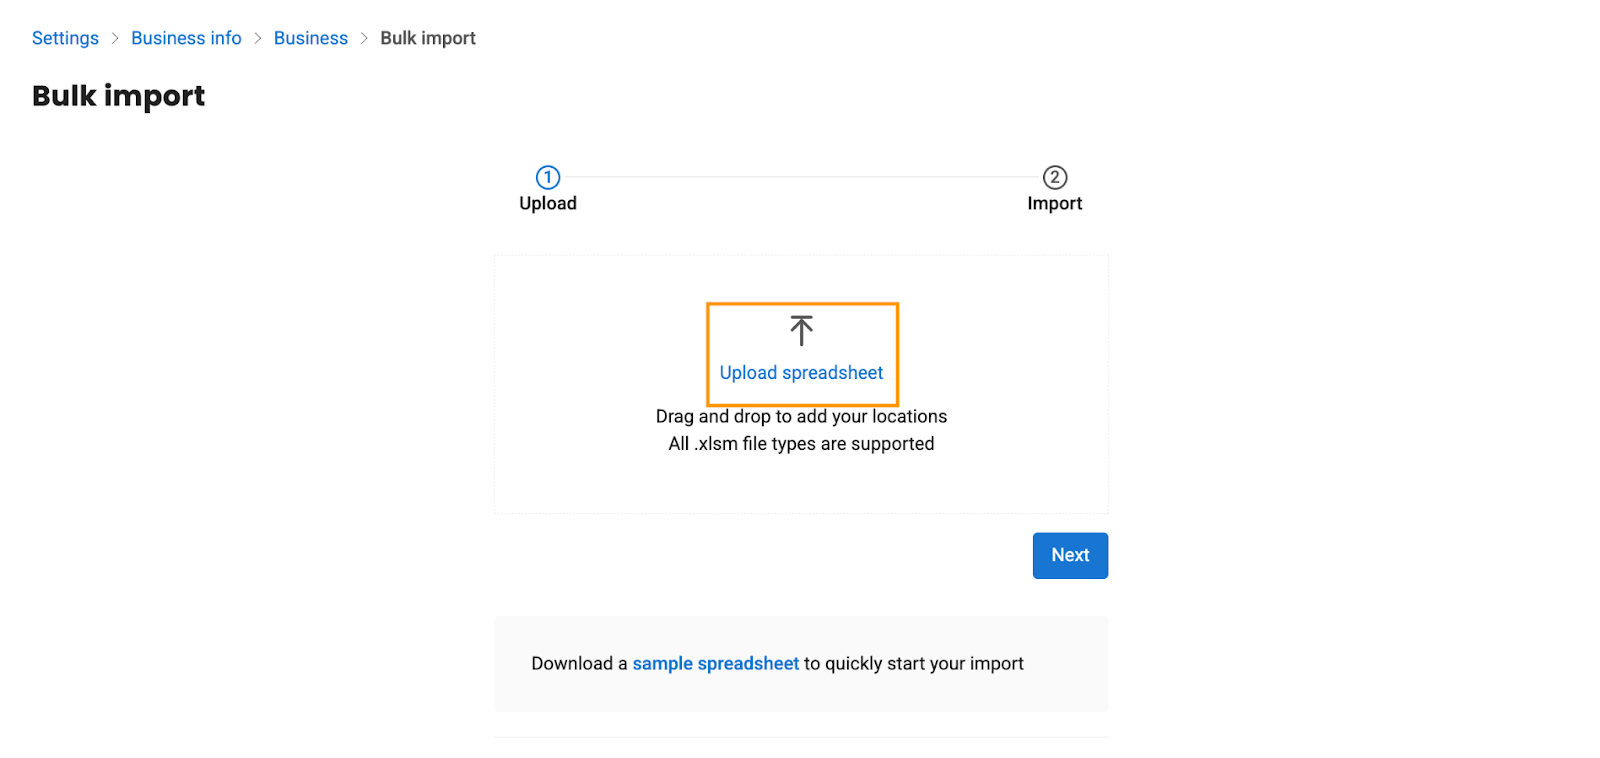
Click ‘Next.’
Click ‘Start import.’
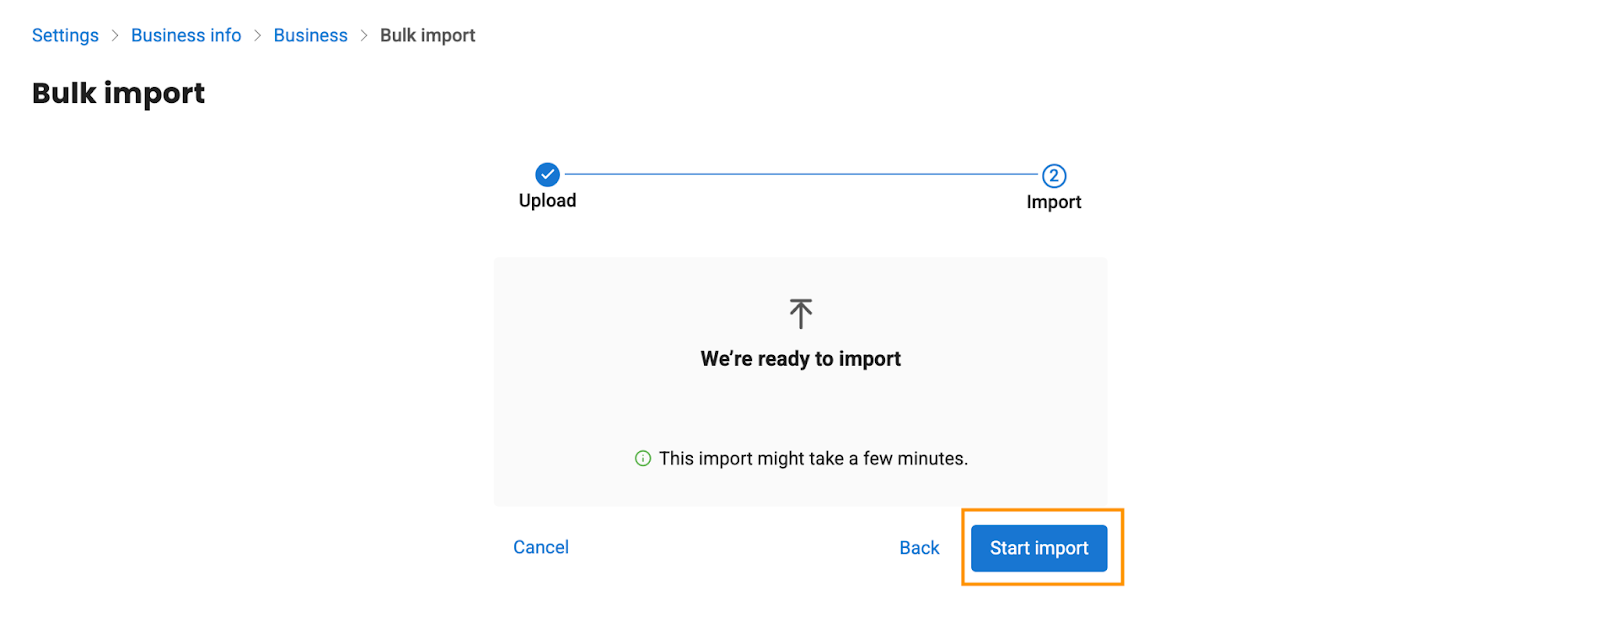
Importing takes a few minutes to complete. Once completed, you will view a notification indicating, ‘Your import is complete.’